
Ubuntu: Authenticate passwordless using a Yubikey
How-To: Linux Yubikey Authentication

Monday 3rd November 2025
Updated 23rd November 2025
Tired of writing the long and complex password all the time? Me to. One solution could be to have a password that’s one character long, but that will violate any corporate security policy.
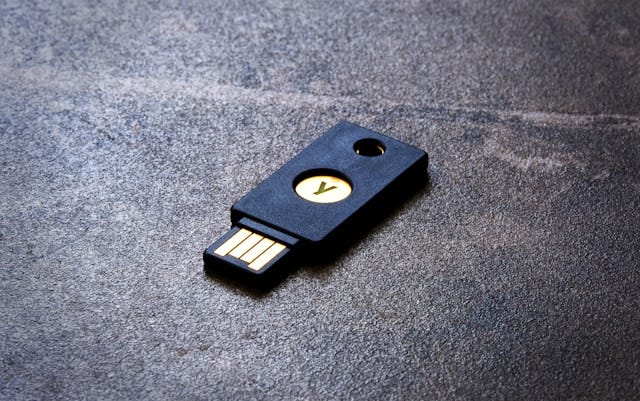
A more secure way is to use a Yubikey. Then you only need to enter a short PIN code to authenticate, or not even that if you are really lazy.
Attribution
All credit goes Jonas Markström as I’m more or less copying what he has written on his blog: https://swjm.blog/fido2-security-key-sign-in-on-linux-3f9f9fd629d7
Configuration
Install the required packages
Step 1: add the repository
Add the requisite PPA repository to the system’s package manager:
sudo add-apt-repository ppa:yubico/stableStep 2: Install pam-u2f
sudo apt-get install libpam-u2fConfirm pam-u2f version
You can verify the installation with following command. It should be version 1.4 or higher:
~$ pamu2fcfg --version
pamu2fcfg 1.4.0
Create credentials
With pam-u2f installed, let’s configure it for passwordless sign-in:
Make a directory:
sudo mkdir -p /etc/yubicoCreate a public key file:
sudo touch /etc/yubico/credentialsRegister a device-bound passkey (for a user called “wl”):
pamu2fcfg -uwl -N | sudo tee -a /etc/yubico/credentialsWhen prompted: insert a Yubikey, provide PIN and then touch it.
Note: No it’s not a typo. You really write “-uwl”.
Update: I have removed the “-r” flag from the pamu2fcfg command because that caused the second key to be required to be tapped twice. AFAIK nothing else needs to be changed and login works as before, but without having to tap twice.
Note: For more information on how to, for example, set a PIN to your Yubikey:
https://opensourceisfun.substack.com/p/installing-and-managing-the-yubikey
Verify credential creation
To confirm that a public key has been generated:sudo cat /etc/yubico/credentials
Register a backup authenticator
It is always recommended to have a spare yubikey in case you loose one. To add a second security key for a user named ‘wl’, run:pamu2fcfg -uwl -N -n | sudo tee -a /etc/yubico/credentials
Edit PAM to approve passwordless authentication
Open the PAM configuration:
sudo nano /etc/pam.d/common-authImplement support for pam-u2f with the following line:
auth sufficient pam_u2f.so authfile=/etc/yubico/credentials cue
~$ sudo nano /etc/pam.d/common-auth

...
# As of pam 1.0.1-6, this file is managed by pam-auth-update by default.
# To take advantage of this, it is recommended that you configure any
# local modules either before or after the default block, and use
# pam-auth-update to manage selection of other modules.  See
# pam-auth-update(8) for details.

auth sufficient pam_u2f.so authfile=/etc/yubico/credentials cue

# here are the per-package modules (the "Primary" block)
...
Note: You may have to run a sudo pam-auth-update for the changes to take effect.
Verification
Now you should be prompted when you try to do any sudo related tasks:
~$ sudo whatever
Please enter the PIN:
Please touch the FIDO authenticator.
You should also be able to login with PIN code and then touch the key
More configuration available
There are even more instructions on Jonas Markströms blog but I only cover the essentials here. For example, you can also :
Configure multiple users
Disable password fallback (This is good security wise but can be dangerous if you don’t have a spare key. However, it’s mostly an inconvenience if you forget your key at home).
Consolidate U2F authentication with your SSH keys.