
Proxmox VE Setup Part 3: Physical Storage
How-To: Proxmox VE Part 3

Monday 3rd March 2025
In part 2 I setup the underlying network for the VM and storage traffic. Now I need to configure the storage before I can start installing Virtual Machines.
Storage Setup
This is a recap from Part 1:
Ideally, I would build a 3-node Ceph Cluster (or more) with alot of high-speed nvme disks. Then I would create separate partitions for:
Boot partition and root directory
Containers and VM Storage
ISO storage
But I don’t have that. What I do have is a custom built gaming computer and a NAS. My storage design is therefore:
x2 SATA SSDs with 500GB each*, configured as RAID 1 (mirrored). These drives are used for the boot partition and the root directory (configured in initial setup)
x2 NVME SSDs with 1TB each, configured as RAID 1 (mirrored). These drives will contain the primary disks of the VMs.
An iSCSI link to my NAS. This is used for secondary VM disks to store alot of data in certain directories (will be covered in the upcoming post).
One 2TB HDD for storage of ISO images and other non-critical data. It’s not entirely necessary, but it was there, so I might as well use it for something.
500GB for the linux operating system might seem excessive. The reason for that much space is that I read somewhere that the Proxmox VE does alot of logging. Until I have setup a remote logging server, I don’t want to risk running out of space.
Proxmox VE Storage Configuration
Creating a ZFS RAID for the NVME disks
This is going to be used by Primary VM disks
Go to node_name > Disks > ZFS > Create: ZFS
Settings:
Name: VM-Disks
RAID Level: Mirror (RAID1)
Check “Add Storage”
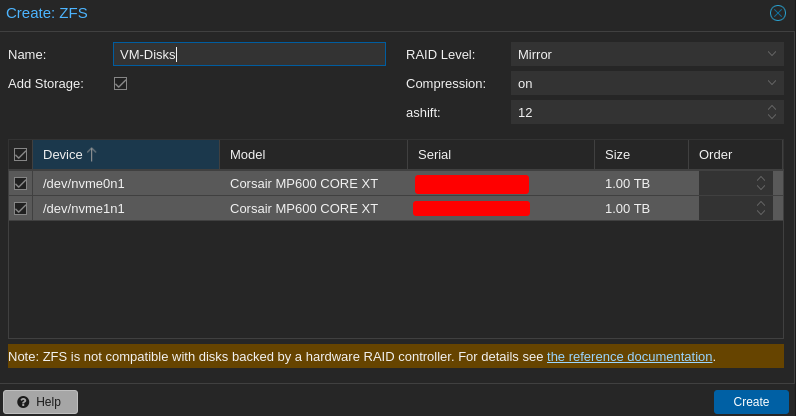
That’s it. Suspiciously easy.
Creating an LVM for the HDD drive and create a mount point
The HDD is going to be used to store ISO images locally.
Creating an LVM is usually a best practice if you plan to add more drives later. Then you can add those new drives to the existing LVM.
To create an LVM, there are 7 steps involved:
Create physical volume with pvcreate
Create volume group with vgcreate
create a logical volume with lvcreate
format the logical volume with a filesystem
mount the logical volume to a mount point
Create a directory where you can store your ISO images on - in proxmox GUI
Upload images to the directory - in proxmox GUI
The best way to do these tasks is through the CLI, unless something else is mentioned.
Step 0: Wipe the disk
In the case the disk already contains partitions.
In proxmox VE GUI, navigate to your_node > disks and wipe the disks you are going to need for your logical volume.

Step 1: Create a Physical Volume
pvcreate /dev/sda
Step 2: Create a Volume Group
vgcreate VG-HDD /dev/sda
Step 3: Create a Logical Volume
lvcreate -L 1.8T -n LV-HDD VG-HDD
Note: 1.8T is the total size of the disk. You can find out exactly how big your disk is with lsblk
Now you can verify that the logical volume and volume group are created with lvs:
root@lbs-pve01:~# lvs
LV  VG  Attr  LSize Pool Origin Data%  Meta%  Move Log Cpy%Sync Convert
LV-HDD VG-HDD -wi-ao---- 1.80t
In proxmox under LVM, you can see that about 99% of the disk is assigned to the logical volume just created:

Step 4: Format the volume with a filesystem
mkfs.ext4 /dev/VG-HDD/LV-HDD
Step 5: Mount the volume to a mount point
First create the mountpoint:
mkdir -p /mnt/ISO
Then mount:
mount /dev/VG-HDD/LV-HDD /mnt/ISO
You can verify with lsblk:
root@lbs-pve01:~# lsblk
NAME              MAJ:MIN RM   SIZE RO TYPE MOUNTPOINTS
sda                 8:0    0   1.8T  0 disk
└─VG--HDD-LV--HDD 252:0    0   1.8T  0 lvm  /mnt/ISO
...
To make it persistent through reboot, add the new mountpoint to /etc/fstab:
nano /etc/fstab
# <file system> <mount point> <type> <options> <dump> <pass>
proc /proc proc defaults 0 0
/dev/VG-HDD/LV-HDD /mnt/ISO ext4 defaults 0 2
After that, update grub and reboot
update-grub
reboot
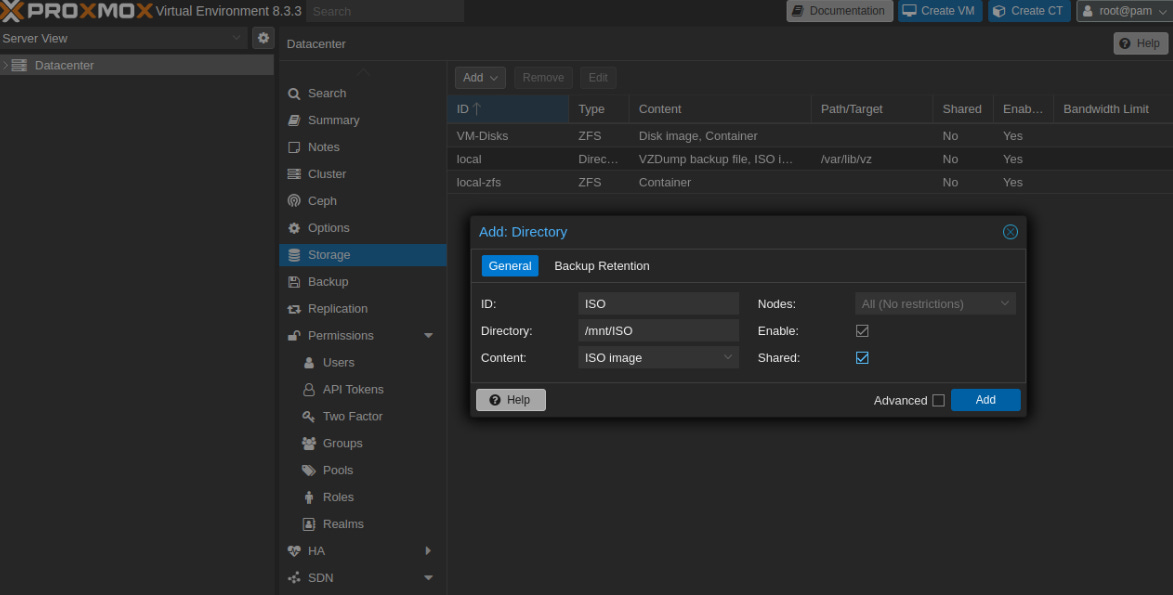
Step 6: Create a directory to store your ISO images on (GUI)
Navigate to Datacenter > Storage > Add > Directory
Settings:
ID: ISO
Directory: /mnt/ISO
Content: ISO image
Enable: yes
Shared: yes
Step 7: upload your iso image
Under the newly created Directory, Click on ISO Images > Upload
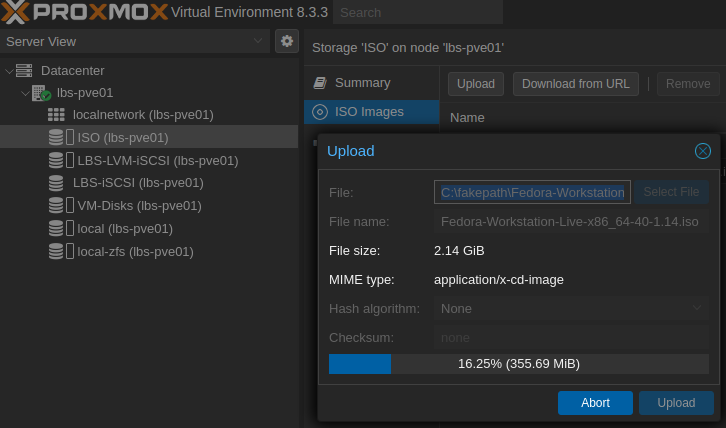
That concludes the physical drive setup. The next part will demonstrate how to add a network attached iSCSI storage.