
pfSense: Reverse Proxy part 2 - Configure Nextcloud to use RP
How-To: pfSense / HAProxy


28th December 2023
Updated 29th January 2024
As explained in part 1 why you would end up needing a RP, this is the design I intend to setup:

Note: see part 1 for more details
Components used for this solution:
The RP / Load Balancer in this case actually runs on the same pfSense appliance that handles incoming traffic from external networks.
pfSense is using the HAProxy packet for the RP features.
For SSL Offloading, the ACME = Automated Certificate Management Environment for let’s encrypt packet is being used.
Pre-Requisites
Underlying features
It is assumed that following features are in place:
pfSense firewall appliance or VM is used and configured with some zones.
Nextcloud server has been installed as a snap.
A standalone HPB server has been installed.
Public DNS records for both IPv4 and IPv6 are available and points towards the pfSense WAN interface.
Internal DNS records for at least Nextcloud is required.
Configuration changes
Forwarding exceptions for your domain has been made, if applicable.
Any previous NAT entries related to Nextcloud and HPB has to be removed.
Nextcloud and HPB can not have a certificate assigned from certbot anymore, but either internal PKI or self-signed certificates.
Depending on how you have set up your pfSense, you may have to change the management interface port from 443 to something else (With that being said, it still works for me without changing it).
You have to create firewall rules that permits TCP 443 and TCP/UDP 5349 towards the appliance itself.
Make sure that pfSense can resolve your internal DNS records.
Installation and Configuration of RP
This will be a lengthy article. I recommend Lawrence Systems for video tutorial on how to set this up for generic webservices. The configuration I present here however, are specific for Nextcloud.
Prepare the pfSense for HAProxy setup
Download necessary packets
In your pfSense GUI, navigate to System > Package Manager and download and install these two packets:
haproxy
acme
Create required firewall rules
This one is critical. Otherwise it will not work and you will get stuck for hours and pull your hair in frustration (trust me, I’ve been there).
Go to Firewall > Rules and under the WAN interface, create rules to permit incoming IPv4+v6 traffic for TCP 443 and TCP 5349 towards the firewall itself:
Note: I created an alias for TCP 5349 called STUN_LISTEN. It also includes TCP 3478 that is used without TLS.
Make sure pfSense is able to resolve internal DNS records
You can verify DNS operation by navigating to Diagnostics > DNS Lookup.
If it isn’t working properly, check settings under Settings > General Setup and verify that DNS servers and forwarding settings are configured correctly.
Also check under Services > DNS Forwarder and DNS Resolver that those settings are either working as intended or turned off.
Optional: Change management port number
This one is only applicable if for some reason you have problems with getting HAProxy to work.
Go to System > Advanced > Admin Access and then change the TCP port option.
DNS Provider (EasyDNS) Configuration
This is only applicable if you have EasyDNS as your provider.
Get the API token credentials
For the ACME tool to work optimally, you should activate the EasyDNS API tool, if not done previously.
Here you can manage the Easy DNS API tool for your domain: https://cp.easydns.com/manage/security/api/production_info.php
Note: You can also find it in your customer portal under User > Security > easyDNS REST API > Production and click info
Create an API token (It doesn't seem to be any way to autogenerate the token id so you just have to make up your own).
Then click Regenerate and copy the key that is displayed. Note both token ID and Key ID down.
Configure ACME
Task 1: Configure an account key
Navigate to Services > Acme Certificates, and go to the tab Account Keys
The Account key will be the base algorithm for generating certificate requests towards Let’s Encrypt.
Click +Add and enter the following (example):


Task 2: Issue certificates
After Account key has been created, go the the Certificates tab. Click +Add and enter following:


Click Save and then the Issue/Renew button. Repeat these steps for all applicable services you need a certificate for.
Note: If you don’t use EasyDNS as your provider, there are plenty of other options. On this link it is described how to use the manual method:
https://agix.com.au/configure-haproxy-on-pfsense-with-letsencrypt-ssl-https-termination/

Configure HAProxy
Task 1: Configure Global Settings
Go to Services > HAProxy and click on the Settings tab. Edit following:
Under Tuning, set the value of Max SSL Diffie-Hellman Size to 2048.
Under Stats tab, 'internal' stats port, set a port number for the internal stats port (not necessary but nice to have).
Click Save in the bottom
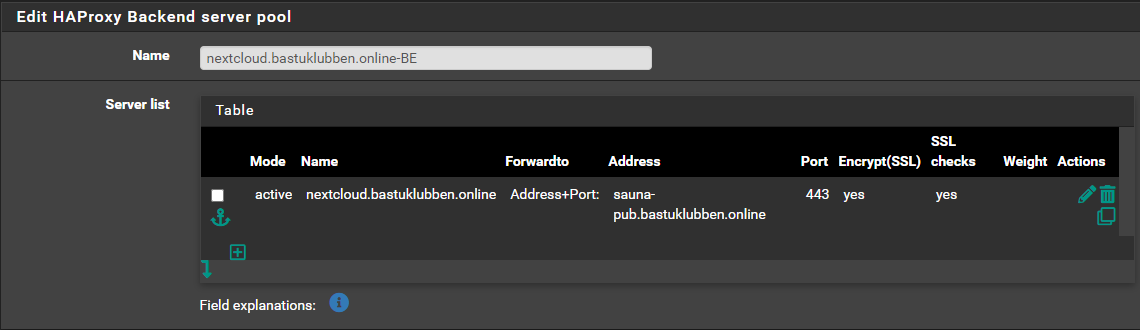
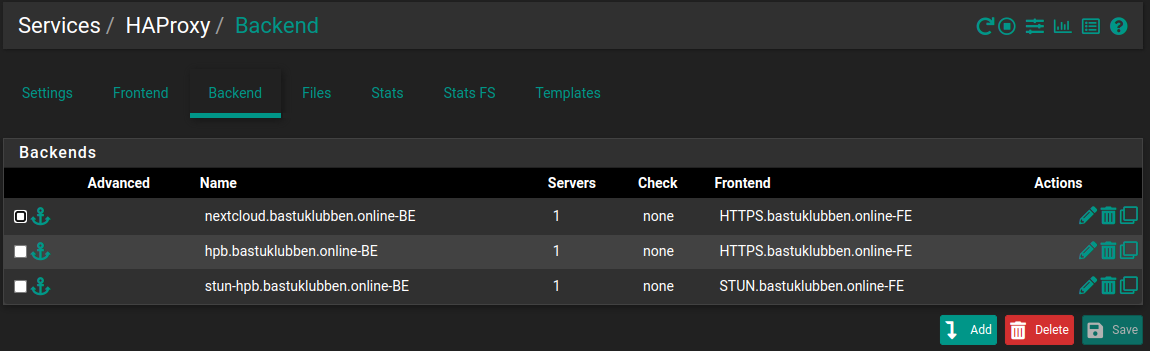
Task 2: Configure Backend Servers
Go to the Backend tab. We need at least 3 backends configured:
HTTPS traffic for the nextcloud server
HTTPS traffic for the HPB
STUN traffic for the HPB
To create a backend, click Add and enter following:

Notes:
The address for the Nextcloud server must point to an internal DNS record. IP addresses won’t work, because the Nextcloud server will complain that the “request is not coming from a permitted domain”, even if you have entered the IP addresses under allowed domains. Apparently only DNS names work.
Encryption has to be enabled for all Nextcloud features to work properly. SSL check is recommended but not necessary, and should probably be turned off if you use self-signed certificates.
You don’t need to add any information about certificates here. That will be handled by the frontend.
Load balancing options are not covered in this guide.
Even if the incoming connection is IPv4, HAProxy can forward to an IPv6-only backend (only true for HTTPS traffic. STUN traffic seems to only work on IPv4).
The same is true vice versa. (Incoming IPv6 to and IPv4-only server).
Repeat these steps for the HTTPS-HPB backend and the STUN-HPB backend:
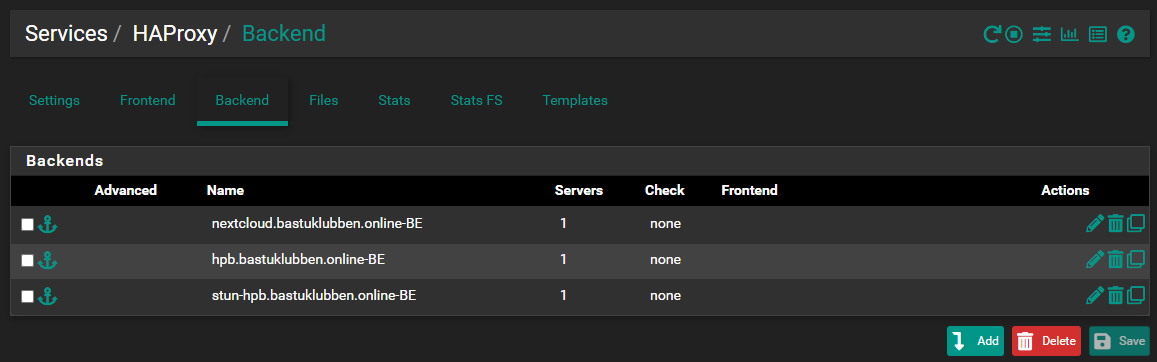
Note: the stun-hpb backend is configured with Port 5349, not 443.
Update: the stun-hbp backend must be configured with an IPv4 address (or a DNS name resolvable to an IPv4 address). This is because the STUN server only supports IPv4, as of today.
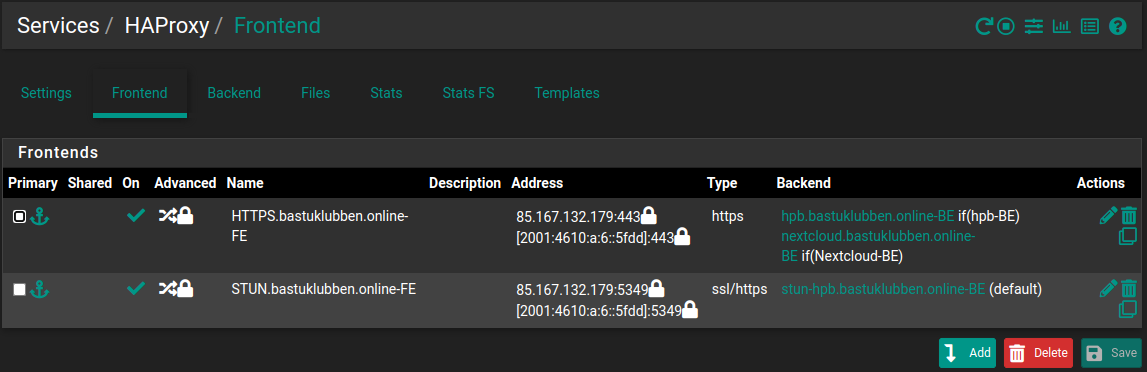
Task 3: Configure Frontend Servers
Go to the Frontend tab. We need to add 2 frontends:
One for HTTPS traffic;
and one for STUN traffic.
HTTPS Frontend Configuration
To start configuring the frontend handling HTTPS traffic, click Add.
Under the Edit HA Proxy Frontend settings:


Under Default backend, access control lists and actions:
ACL Configuration:


Note: the caldav and carddav entries are required for CalDav and CardDAV redirects to work properly, according to Nextcloud Documentation.
Actions:


Note: No Default Backend Needed.
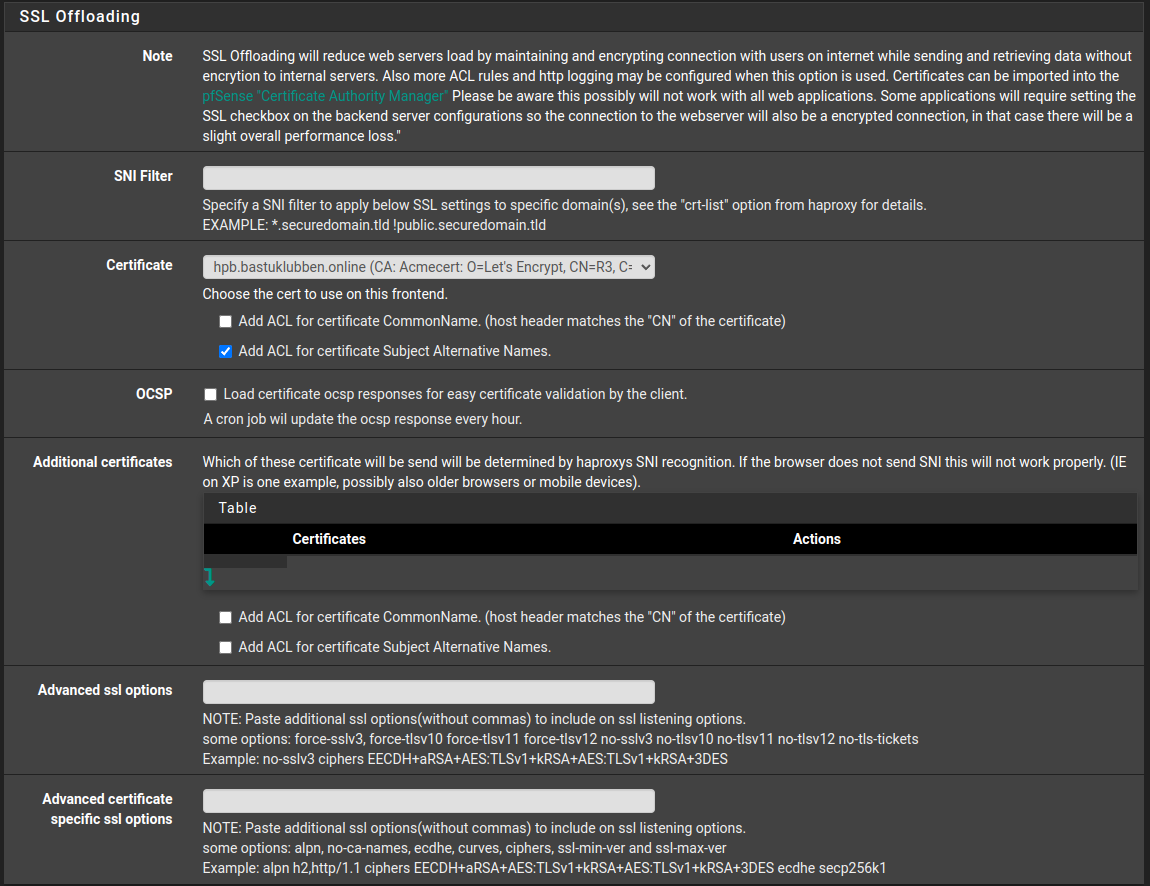
Under SSL Offloading, add a certificate and check Add ACL for certificate Subject Alternative Names.
You can choose any certificate, because under Additional certificates you will include the certificates for nextcloud and HPB. Again, check Add ACL for certificate Subject Alternative Names. HAProxy will present correct certificate to the client based on the information inside the SNI=Server Name Indication.

Click Save. Now it is time to configure the STUN frontend…
STUN Frontend Configuration
Under the Edit HA Proxy Frontend settings:
The settings are about the same, except different port number and method is set to TCP mode.

Under the Edit HA Proxy Frontend settings:
Since I don’t have multiple STUN services, I only need to choose a default backend and certificate.

Summary
When finished, the result should be similar to this:
Appendix
Nextcloud variables
There are some additional variables one can set on the Nextcloud server that are specific for Reverse Proxy, but I believe most of them are only valid if it’s a NGINX proxy being used.
$ nextcloud.occ config:system:set overwritehost --value="mydomain.com"
$ nextcloud.occ config:system:set overwriteprotocol --value="https"
$ nextcloud.occ config:system:set overwritewebroot --value="/mycustompath"
$ nextcloud.occ config:system:set overwrite.cli.url --value="https://mydomain.com/mycustompath"
Special Mention
I want to thank Lawrence Systems for two great video tutorials on pfSense HAProxy and SSL Offloading setup.
I also want to thank “zeigerpuppy”, one of the contributors in a Nextcloud forum, for translating the CalDAV/CardDAV HAProxy CLI configuration into pfSense GUI settings.