Installing Nextcloud AiO = All-in-One
How-To: Nextcloud

15th September 2025
It has been a while since I wrote the article on how to install Nextcloud using Snap. That is a very easy way for people to setup their own Filesync application but it has some limitations; Other features like Nextcloud Talk and Collabora are not included in the Snap version (however, they can be installed separately).
Now, finally, the stars are aligned and it’s time to write about the Nextcloud All-In-One installation. It may be slightly more complex, but when you consider all the features and functions that are included, it’s an alright tradeoff.
Note: This installation happen to take place on a Raspberry Pi 5 with Open Media Vault installed. It doesn’t make a huge difference what the underlying platform is though.
Nextcloud AiO Features
The AiO way is actually the official way of installing Nextcloud now. Features includes, but not limited to:
High performance backend for Nextcloud Files
Nextcloud Office
High performance backend for Nextcloud Talk and TURN-server
Nextcloud Talk Recording-server
Backup solution based on BorgBackup
Imaginary - for previews of heic, heif, illustrator, pdf, svg, tiff and webp files
ClamAV - Antivirus backend for Nextcloud
Fulltextsearch
Whiteboard
Nextcould AiO Installation
Prepare the Docker Compose file
Source: https://wiki.omv-extras.org/doku.php?id=omv7:docker_in_omv
In the case of OMV 7, navigate to Services > Compose > Files and create following file:
# https://github.com/nextcloud/all-in-one
# For custom configuration consult -> https://github.com/nextcloud/all-in-one/blob/main/compose.yaml
services:
  nextcloud-aio-mastercontainer:
    image: nextcloud/all-in-one:latest
    init: true
    restart: always
    container_name: nextcloud-aio-mastercontainer
    volumes:
      - nextcloud_aio_mastercontainer:/mnt/docker-aio-config
      - /var/run/docker.sock:/var/run/docker.sock:ro
    ports:
      - 8080:8080
    environment:
      - APACHE_PORT=20443
      - NEXTCLOUD_DATADIR=${PATH_TO_APPDATA}/nextcloud_data
      - NEXTCLOUD_TRUSTED_CACERTS_DIR=${PATH_TO_CA_CERT}
volumes:
  nextcloud_aio_mastercontainer:
    name: nextcloud_aio_mastercontainer
Explanation:
This creates the master container, which will spawn all the other containers.
the environment
APACHE_PORTsets the HTTPS port for the nextcloud container. This is used in reverse-proxy setup.PATH_TO_APPDATAis a global environment variable and was set in the last article.NEXTCLOUD_TRUSTED_CACERTS_DIRis only necessary if you are planning to integrate LDAPS for external user database.
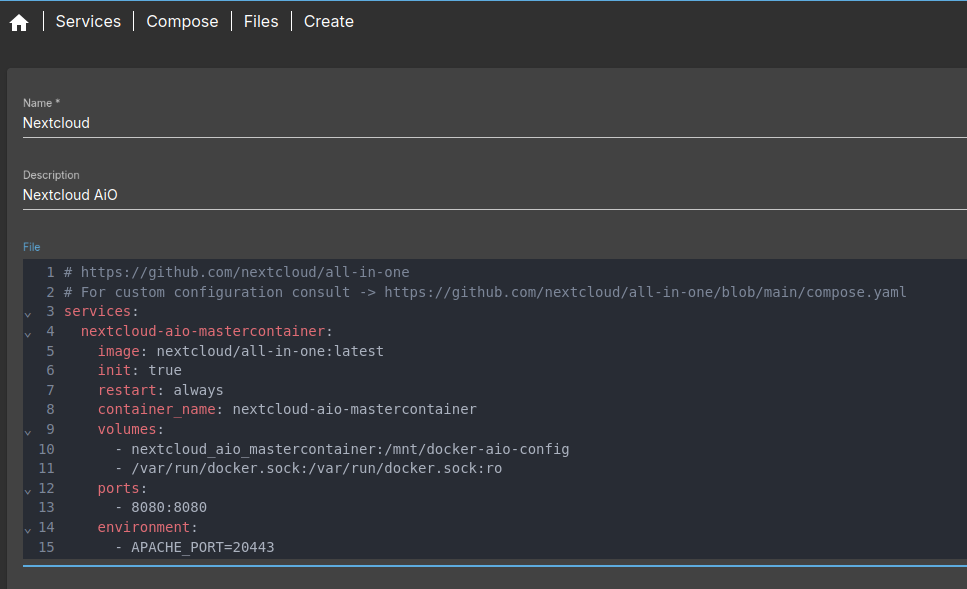
After that click Save
Create network for the child containers
The master container spawns a bunch of child containers that creates the Nextcloud application stack. It also creates a network called “nextcloud-aio” but this doesn’t have IPv6 turned on by default. Therefore, create the network from CLI in advance:
docker network create \
--ipv6 \
--subnet 100.103.4.0/24 \
--subnet 2001:db8:1234:3018:4::/80 \
--gateway 2001:db8:1234:3018:4::1 \
nextcloud-aio
Note: Custom subnets are optional.
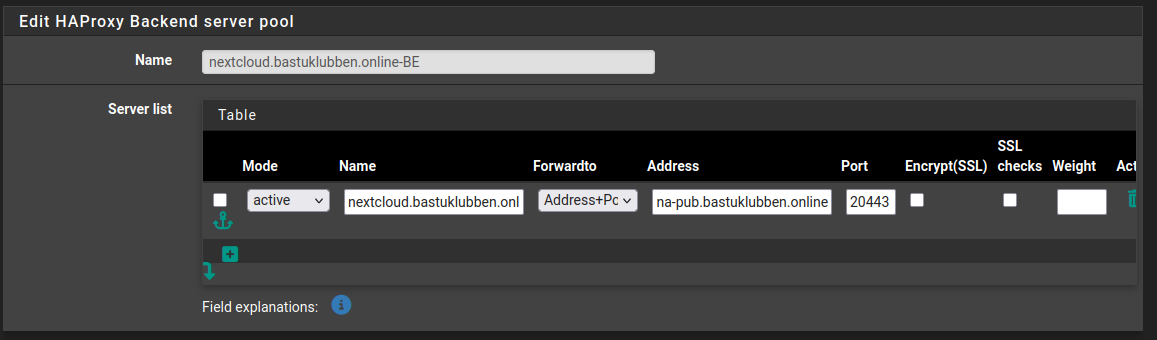
HA Proxy Settings
Nextcloud HA Proxy Settings have been covered before in this article:
https://opensourceisfun.substack.com/p/pfsense-reverse-proxy-part-2-configure
That was based on the Snap version. Some notes for AiO setup:
SSL verification has been turned off on the backend because the domain configuration will fail with a self-signed certificate.
You need to create forwarding rules for UDP 3478 to the container host IP for Nextcloud Talk to work.
Run the Master Container
Start the Compose project
Mark the Compose project in OMV 7 and click the Up icon (arrow pointing up in the toolbar)
Then the container starts:

If it succeeds successfully it should change status to “UP”.
Run the master container install wizard
Step 1: Browse your pinas server on port 8080, for example: https://10.12.1.7:8080
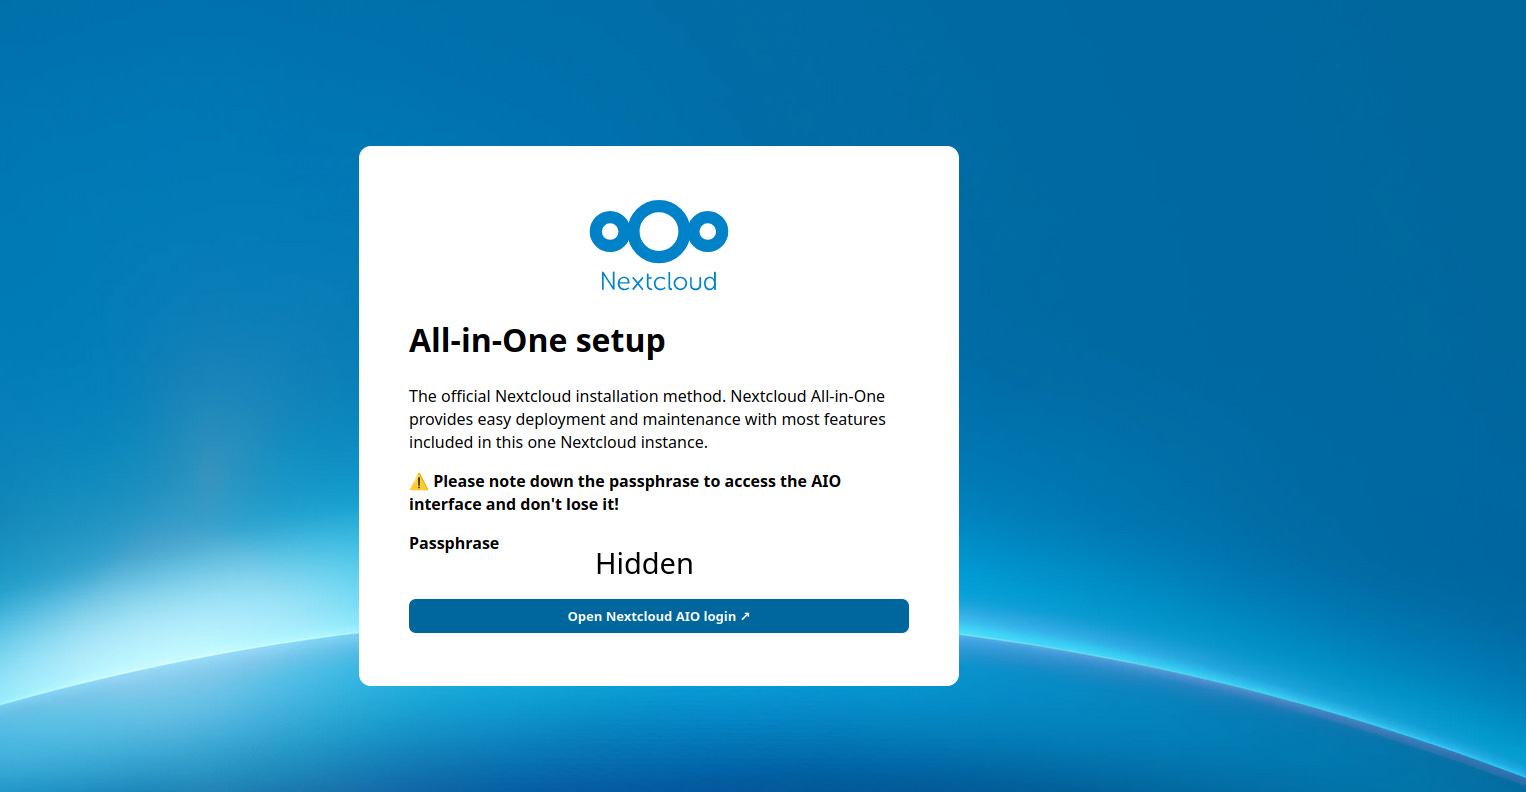
Note down the passphrase. You will need it to login on the next page.
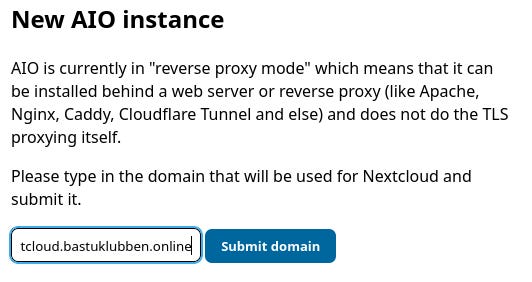
Step 2: After you logged in with the passphrase, You have to verify the domain. This can fail if your reverse-proxy isn’t setup correctly. One possible issue could be that SSL verification has been turned on.
Step 3: Choose your containers:
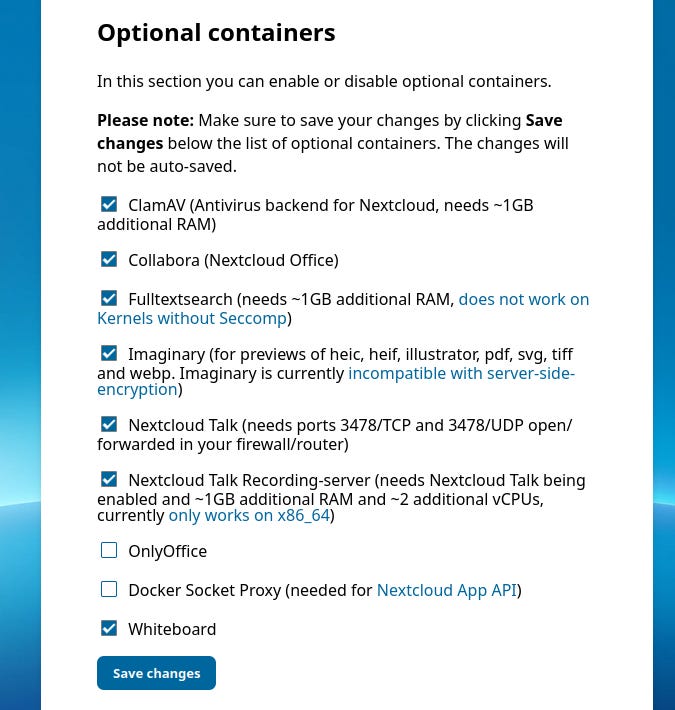
Note: If you are planning to use an external HPB = High-Performance Backend server for Nextcloud Talk and/or Collabora, you can uncheck those containers and configure them later to point to your HPB Server.
Also scroll down to check that the timezone is correctly configured and then click Download and start containers.
Step 4: When all the containers have started, you get the initial admin login password. Note that down and save it, even if you plan to change it right away.
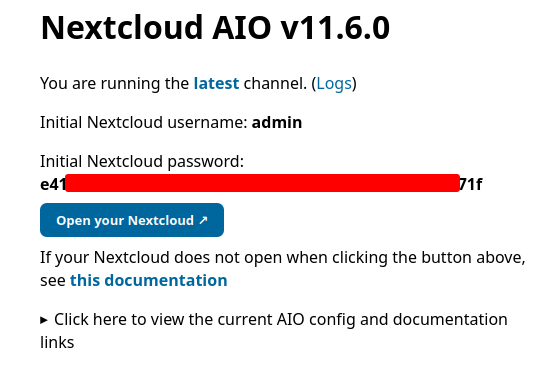
And now you should be able to reach your Nextcloud server!
The master container will always be available as a backend tool to administer your nextcloud AiO instance.
Appendix
Optional Settings
In the master container, you can also specify a backup location for the borg backup container:
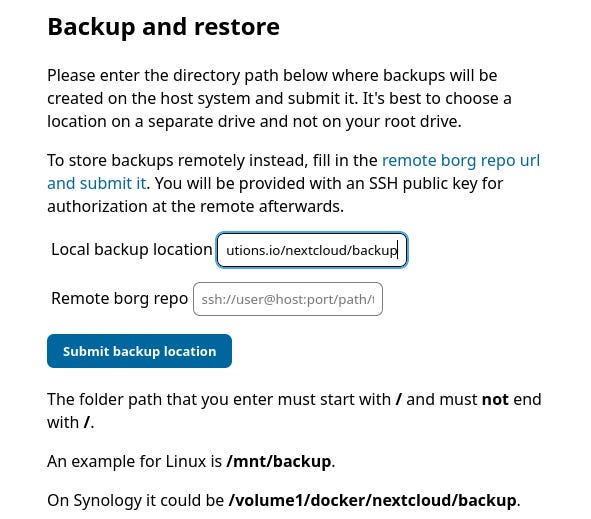
Note down the backup passphase and keep it somewhere safe, like protonpass.
There are a few more settings you can set that are related to Collabora, like which dictionaries it should have installed.
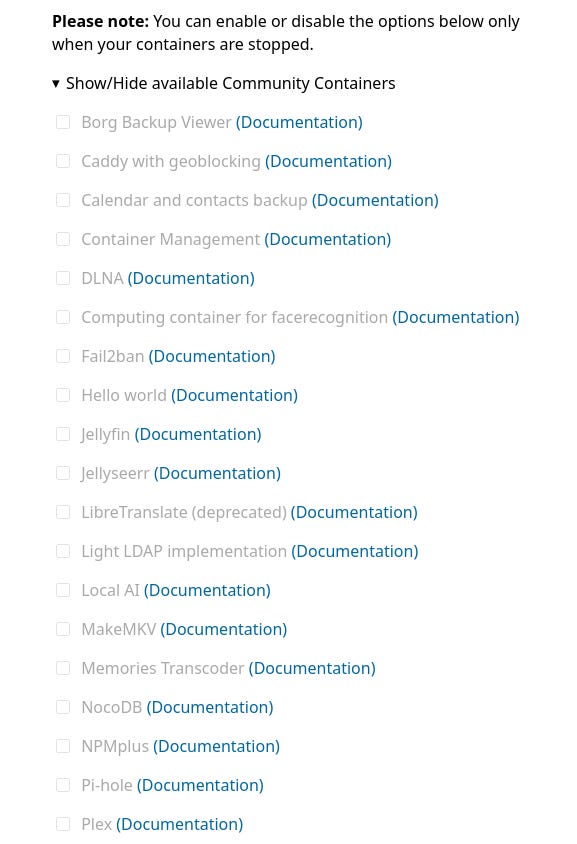
There are also optional community-defined containers you can experiment with aswell: