
TrueNAS Virtual Machines and Networks
How-To: TrueNAS Setup Part 3

April 17, 2023
TrueNAS is more than a network storage system. It also has Hypervisor capabilities. In this guide I’m going through how to setup a network card for Virtual Machines and FreeBSD Jails. Also a basic setup of an Ubuntu Server will be covered.
Network Design
Intended Design:
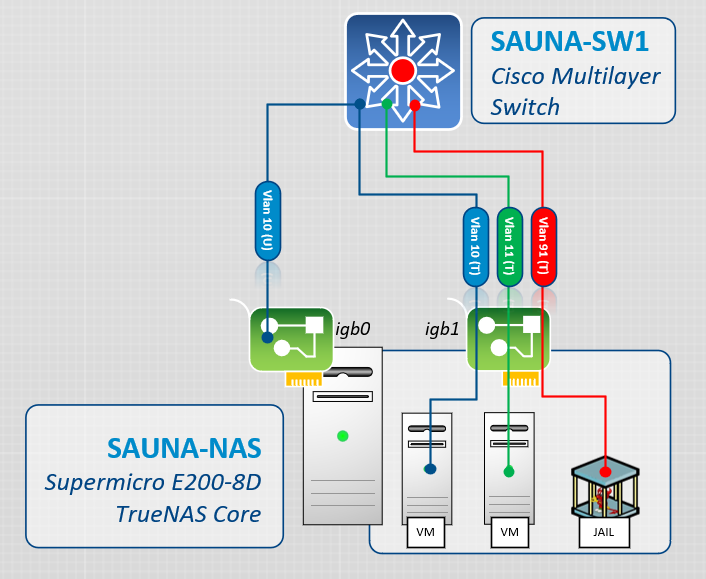
Explanation:
Interface igb0 is an untagged port connected to the MGMT interface of TrueNAS. The IP is terminated on this network adapter. This is already covered in part 2.
Interface igb1 will be dedicated for Virtual Machines and jails. The network adapter will be in a bridged mode* where the VMs and jails can connect directly to their assigned VLANs (i.e. no NATing).
The storage bond interface is not included as it is not relevant here.
*Note: I’m not using a bridge interface for this.
VM Network Adapter Configuration
Go to Network > Network Interfaces and edit igb1
Description: VM Networks
No IP addresses
MTU: 9000
Disable Hardware Offloading: Yes
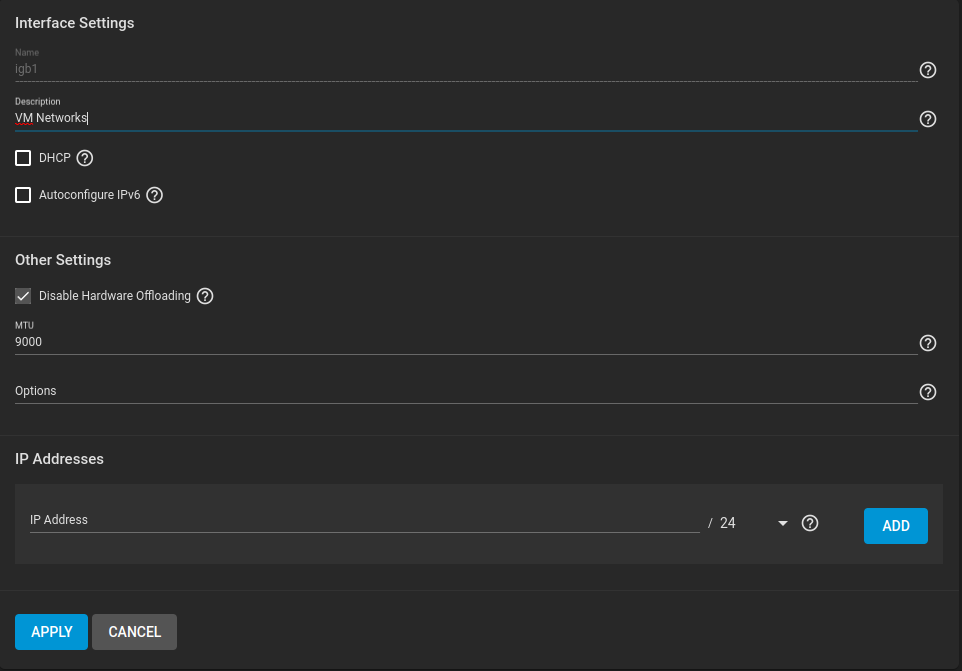
Note: If you are running supported hardware, do not Disable Hardware Offloading and cause unnecessary performance degradation. But if you do have issues with VMs freezing or crashing, then go ahead and disable it.
Now ADD VLAN interfaces.
Example of VLAN 10:

Configure a Virtual Machine
In this example I’m going to set up a Ubuntu Server for Network Management purposes.
Prerequisites
There are a few things that needs to be done before configuring a Virtual Machine.
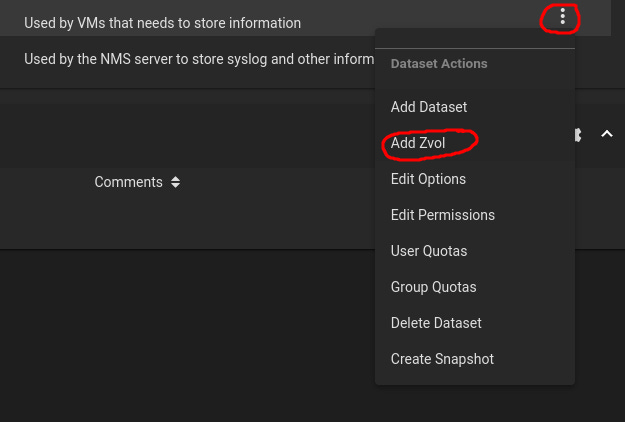
Create datasets and volumes
Step 1: Create a dataset dedicated for VMs. I have an entire SSD dedicated for this purpose:

Step 2: Create a dataset for VMs that needs a separate disk to store huge amounts of information. I have a dataset on the network drive dedicated for this:

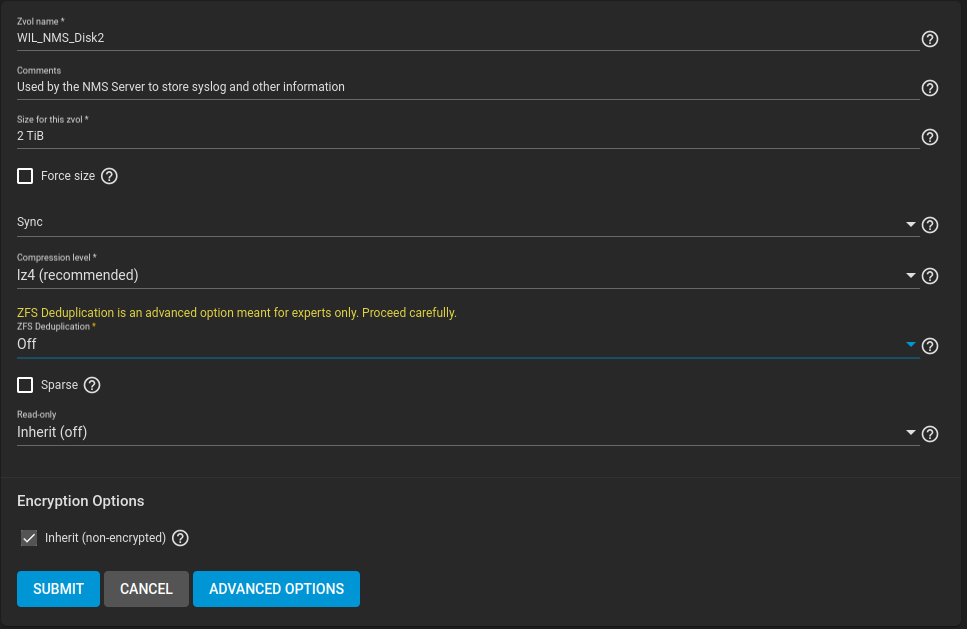
Step 3: This server will need a second drive for syslog data and other information. Add a Zvol under the dataset called VM_Disks or whatever you called it.
Settings:
Set the Disk Size
Compression Level: lz4 (recommended)
I’m no expert so I’m not gonna use any ZFS Deduplication.
Other settings can be the default
Step 4: You will also need a dataset for storing installation files (.ISOs).
Verification:
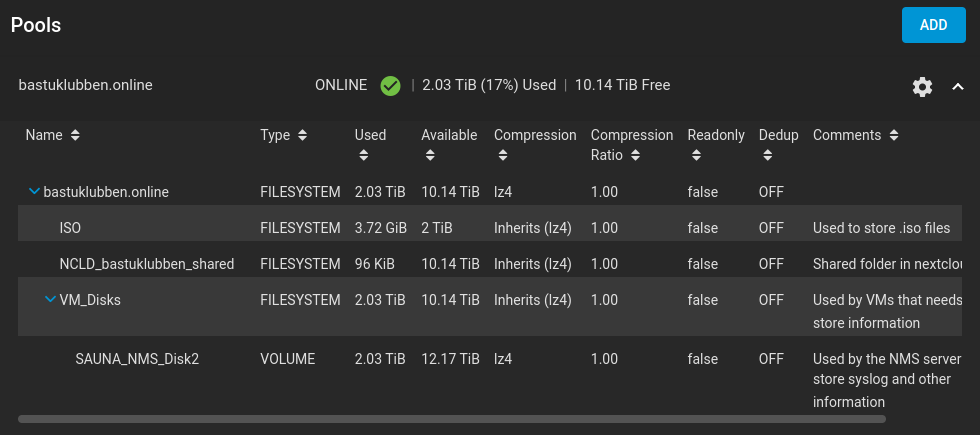
Note: the NCLD dataset is not part of the scope.
Enable FTP
You need to upload an .iso image to TrueNAS. The quickest way to Rome is to enable the FTP service.
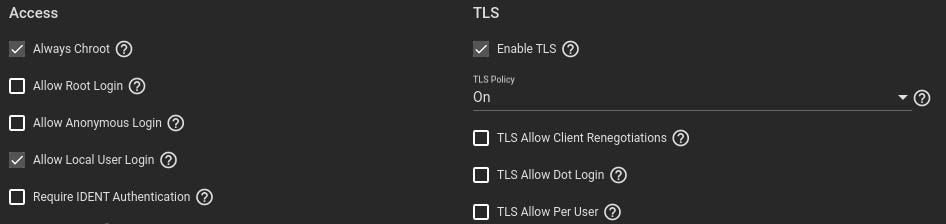
Step 1: Go to Services and edit FTP

Under Advanced Options:
Enable TLS
Tick the box for “Allow Local User Login” (assuming you don’t have LDAP login yet).
Step 2: Create a user to use for FTP purposes.
Go to Accounts > Users and ADD a new user. Set the following parameters:
Full Name
Username/Password
Homefolder directory (use the directory for ISO files).
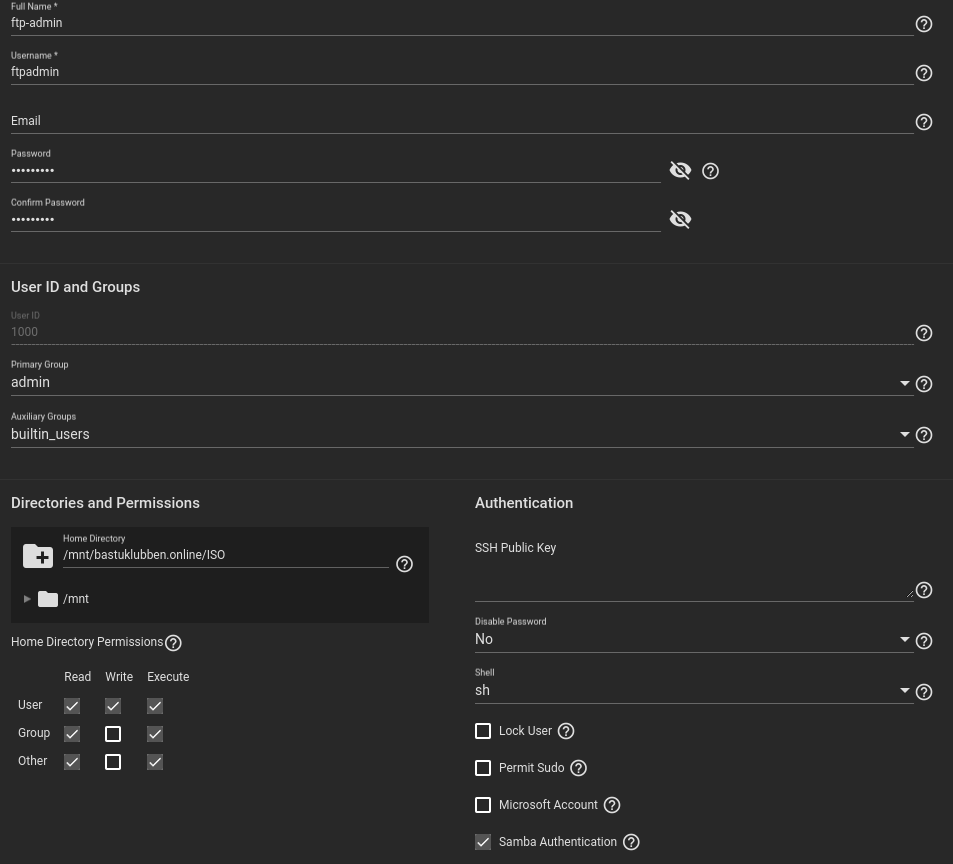
Note: the username “ftp” is already taken by the system
Step 3: Connect to the IP of TrueNAS with an FTP client software and upload the installation media.
Configure the Virtual Machine
In this Guide, an Ubuntu 22.04 Server image will be used
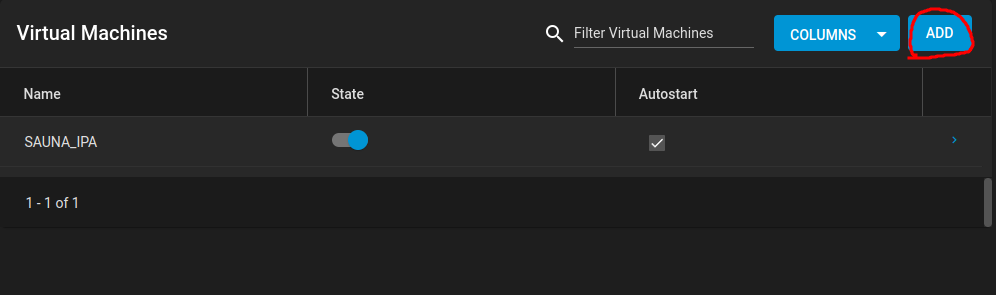
Step 1: Go Virtual Machines and click ADD up in the corner
Step 2: Configure general settings:
Dashes are not permitted in the name field.
Boot Method should be UEFI, otherwise VNC won’t work.
Bind IP Address is which IP VNC will use to connect to the VM.
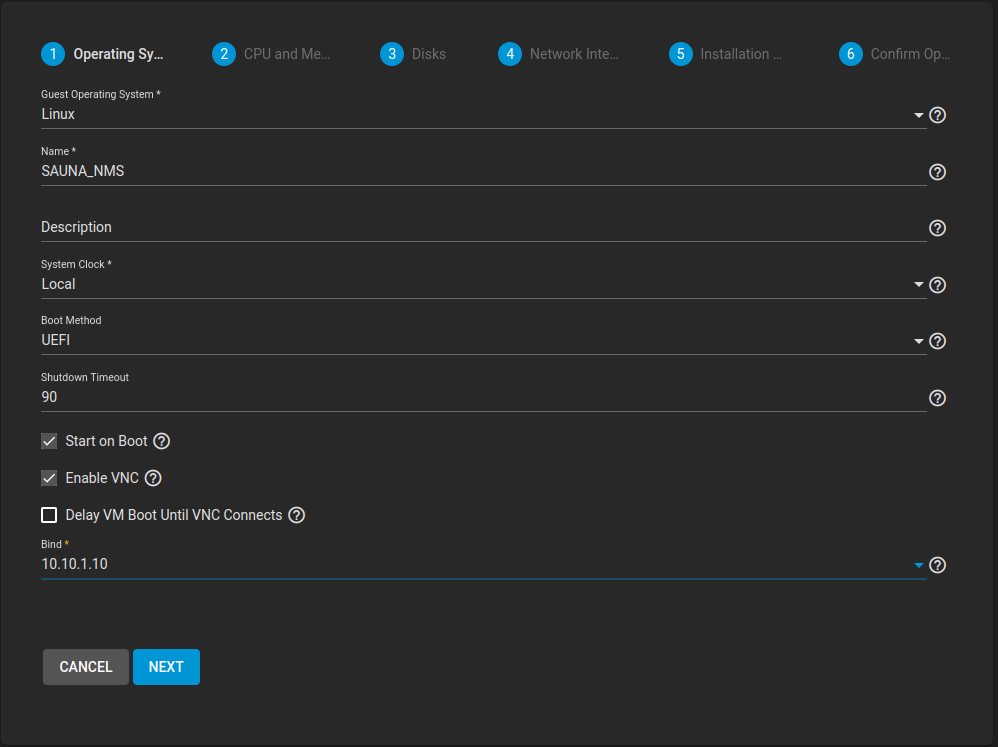
Note: IPv6 connectivity still works if you connect with a VNC client software, like KRDC.
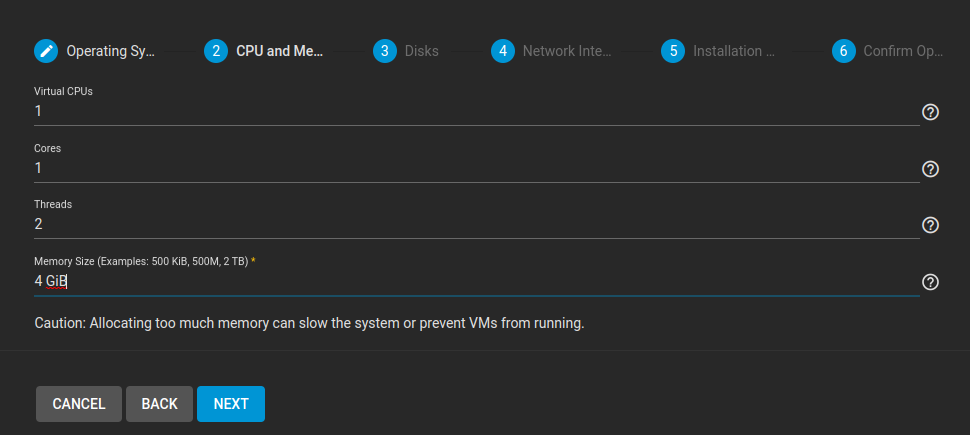
Step 3: Configure CPU and Memory.
A neat thing is when you type “4G” in the Memory Size field and tab, the GUI will autocorrect it to “4 GiB”
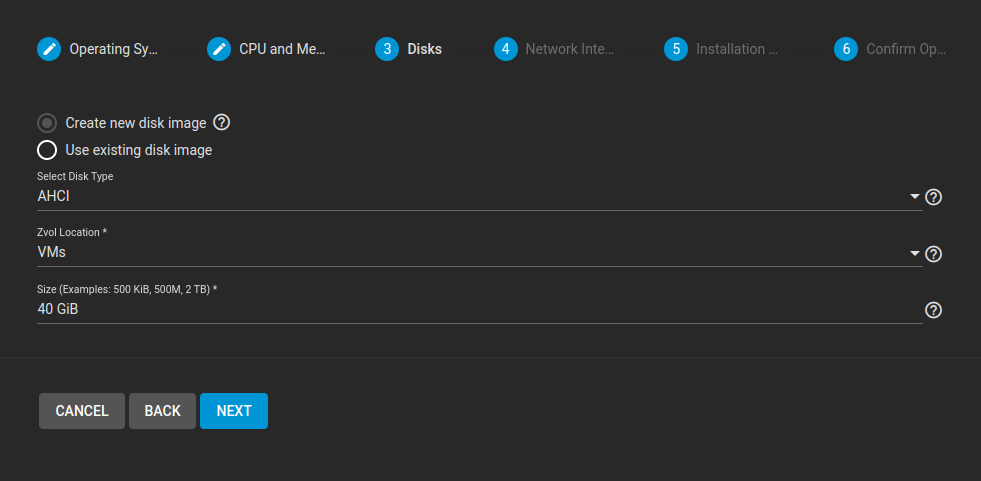
Step 4: Create a Disk Image
You can only create one disk at the setup. You can however add a second drive afterwards.
Zvol Location is the dataset where the VM should be stored.
Step 5: Create a NIC. Adapter Type can be e1000 if hardware offloading is disabled on the VLAN or you are using supported hardware. If not, then use Virtl0.
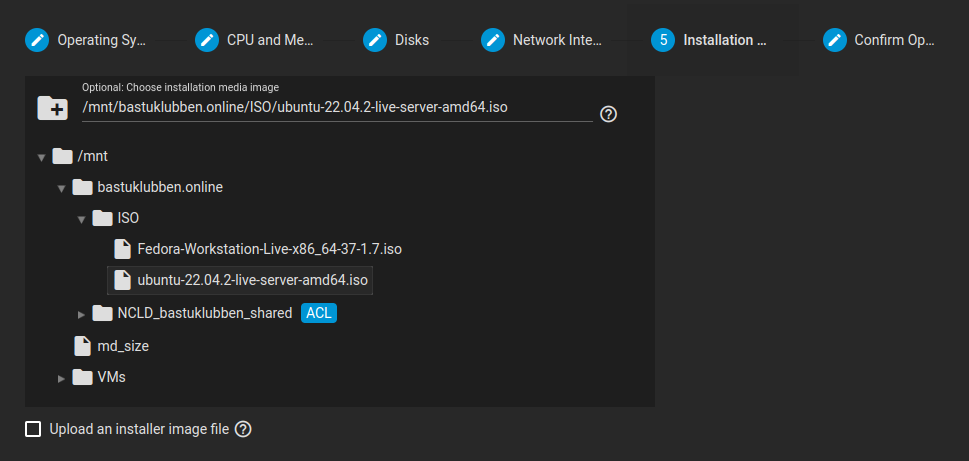
Step 6: Choose installation media (This is the .iso file that you uploaded to your system via FTP).
Note: if you choose “Upload an installer image file”, it won’t work unless you have configured some service that allows it. (At least it didn’t work for me).
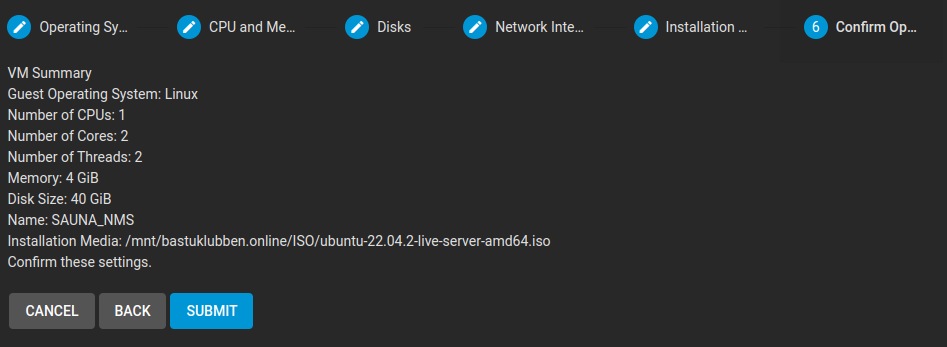
Step 7: Verify that everything looks good
Step 8 (Optional): Change the device order of the NIC
Before booting the VM, I recommend that you put the NIC as the #1 device. If you add or remove devices at a later stage, the network adapter name inside the VM might change, and your IP settings get lost.
Expand the newly created VM and click devices

Choose the NIC and select Change Device Order. Set it to 1001
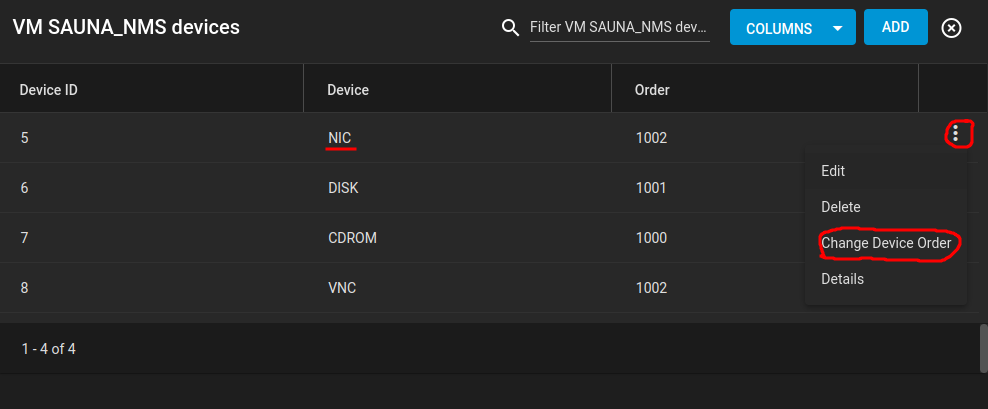
Notes:
The CDROM has device order 1000, but it will need to be removed when the VM is installed
Step 9 (Optional): Add another disk. While inside the device menu, click ADD in the upper corner.
Type: Disk
Zvol: SAUNA_NMS_Disk2 (The volume created at the prerequisites).
Mode: AHCI
Disk Sector Size: Default
Device Order: 1003 (I put it next in line after the first disk)
Verification:

Now it should be safe to start the VM.
Installation of the Ubuntu Server VM
I won’t cover the installation in detail. I’m just highlighting some caveats when using VNC to connect to the VM
Step 1: You can either use noVNC in the browser, or connect to it with a VNC viewer. I use KRDC
Known Caveats:
IPv6 connectivity with VNC works if you are using a remote VNC viewer like KRDC. Only IPv4 seems to work in the webbrowser (noVNC).
You have to use english keyboard on your host system while using a VNC client.

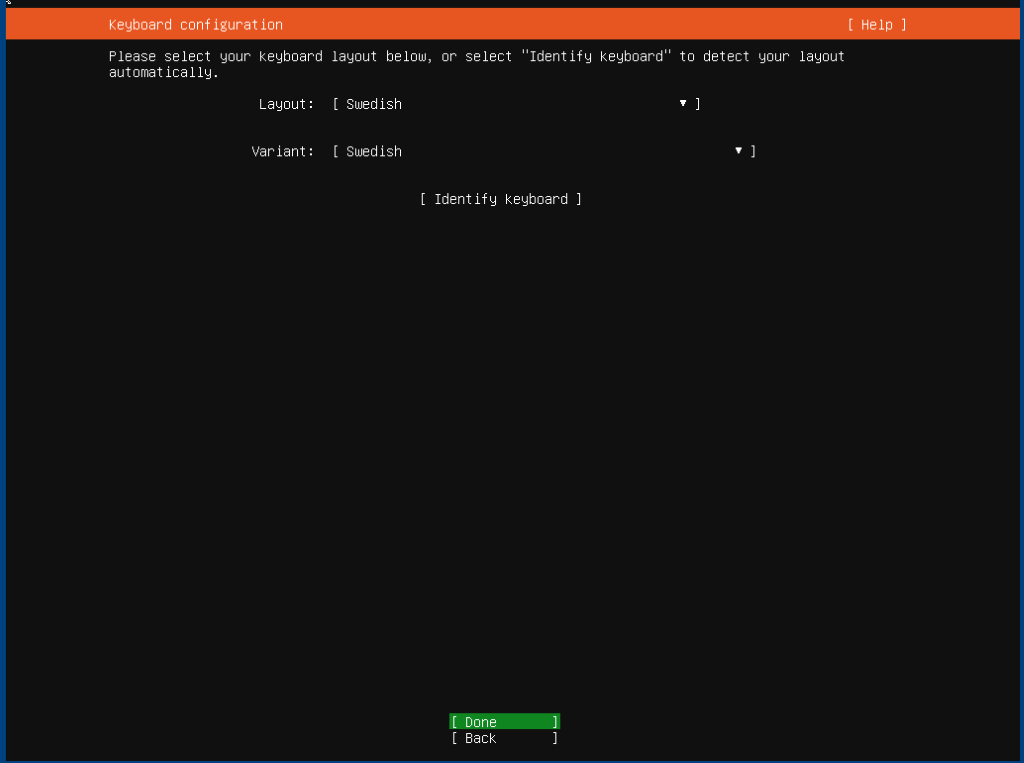
Step 2: When connected with english keyboard (US), you can then set the VM keyboard to whatever you like:
Step 3: When installation is complete, remove the CDROM device and restart the VM.
Note: You may have to choose power off and then restart the VM for the devices to update correctly.
Sources
Appendix
Know Caveats
Problems occured while setting up the VM
VM freezes or crashes
It’s almost always the network card settings. Try disabling hardware offloading or change the VM network card from e1000 to virtl0.
Related Posts
TrueNAS: Open Source Storage and Hypervisor Alternative
TrueNAS Setup Part 1: Installing TrueNAS on Bare Metal
TrueNAS Setup Part 2: Network and Storage
TrueNAS Setup Part 4: Configuring LDAP and Certificates