
Proxmox VE Encryption Part 2: ZFS Pool Encryption
How-To: Enable Proxmox ZFS Pool Encryption

Monday 17th November 2025
In the last post I described different modes of encryption:
Full disk encryption on the host level
Storage Pool encryption
Full disk encryption on the guest OS level
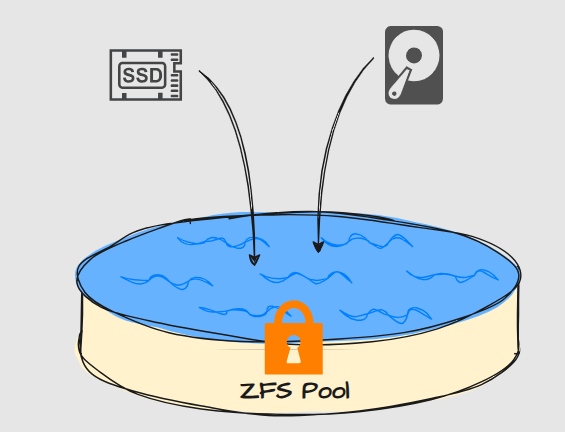
In this part I am going to describe how to turn on ZFS Pool encryption so that my VM and container data is stored securely. There is no reason why you should not use storage pool encryption, unless you already have full disk encryption on the host level.
Migrating from an unencrypted ZFS Pool
Encryption has to be enabled before any data is stored inside the pool. In my case, I had already configured a ZFS pool without encryption, which means that I have to migrate all my VM’s to another pool temporarily. You can skip this part if it’s not relevant to you.
This sounds worse than it actually was. There were only a few caveats one has to be aware of.
Backup network configuration
VM’s get new MAC addresses when they are cloned. Some VM’s have interface-mac configuration statically bound so this will cause a mismatch. I have witnessed this on a VyOS router and on a Fedora Server.
You have to either change the configuration inside the VM, or change the MAC addresses on the VM’s network cards back to the original ones.
Clone VM’s when turned off
This is safer. It is also not possible to clone a VM with an EFI partition if it’s turned on:
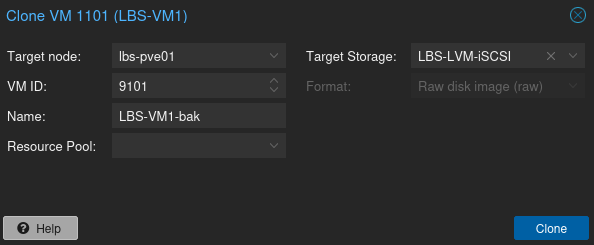
TASK ERROR: clone failed: block job (mirror) error: drive-efidisk0: Source and target image have different sizes (io-status: ok)To clone a VM you just right-click on the VM and choose clone. Remember to change the Target Storage. It doesn’t need to be another ZFS Pool. Any pool will do as long as it is configured for handling VM’s and containers.
Test the cloned VM’s and delete the original
If you are nervous like me, you can testrun the cloned VM’s before deleting the original ones.
Delete the Storage Pool
When all VM’s are migrated, you can go ahead and delete the ZFS pool.

Clone VM’s from temporary storage back to the encrypted ZFS Pool.
Once the ZFS is rebuilt with encryption enabled, you can clone the VM’s back to the new ZFS pool.
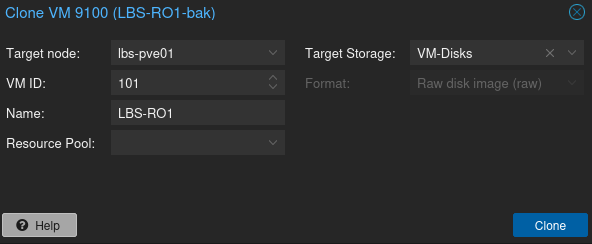
For VM’s containing multiple drives on different storage pools, Choose Target Storage: Same as souce. Then afterwards you can move the drives to the intended pool through CLI.
Command to copy a specific disk on a VM (1101) from one storage pool to another and then delete the original:
qm move-disk 1101 virtio0 VM-Disks --delete
Create a ZFS pool with encryption enabled
You can’t enable encryption when creating a storage pool in the GUI, which is a bit surprising. This has to be done through CLI. The commands used for managing ZFS pools begins with “zpool”.
Storing the private key
If you choose to store the key on the system itself, there won’t be much use for the encryption. You would only protect your data if someone steals the harddrives, but not if they steal the whole server. The zpool will simply just auto-unlock after reading the key location. There are three methods you can unlock the zpool more securely:
Using a key on a USB Drive - Benefits of this is that it is easy to setup and very low cost. The downside however is that you have to keep the USB drive in a safe location and you need to physically connect it to the server when you need to unlock the storage pools.
Using a key on a HSM - This is the most secure way of handling encryption keys and unlocking can be automated. However, it is the most complex and expensive method.
Passphrase - My personal choice. The benefit is that you can store it safely in your password vault and enter it remotely. The downside is that you have to manually unlock the storage pools.
I’m going to present how to store the private key on a USB drive and how to use a passphrase to unlock the zpool.
Alternative 1: Store the key on a USB drive
Step 1: format the drive to use fat32. You can use parted or gparted for this.
Step 2: plug the USB drive into the PVE server and find out what the UUID is:
root@lbs-pve01:~# lsblk -f /dev/sde1
NAME FSTYPE FSVER LABEL UUID                                 FSAVAIL FSUSE% MOUNTPOINTS
sde1 vfat   FAT32       54C4-5843                              14.7G     0% /mnt/usb-keystore
Step 3: Create a directory for the mountpoint:
mkdir /mnt/usb-keystoreStep 4: edit /etc/fstab accordingly:
UUID=54C4-5843 /mnt/usb-keystore vfat defaults,rw,auto,nofail,user,uid=root,gid=root,umask=077I will explain some of the options:
auto= automatically mounts the drive at bootnofail= means that the system can still start if the drive is not present at bootumask=077= sets permissions that only root have access to the directory
If the drive is not present at boot and later plugged in: You can either install the autofs feature to automatically mount the drive when plugged in, or you can simply run mount -a
Step 5: Generate a secure keyfile:
dd if=/dev/random of=/mnt/usb-keystore/.zfs-vm-disks.key bs=32 count=1 chmod 400 /mnt/usb-keystore/.zfs-vm-disks.keyStep 6: Identify Disks with ls -l /dev/disk/by-id/ to get the unique IDs of the two disks for your mirror.
Step 7: To create a mirrored ZFS pool named VM-Disks with encryption using the private key to unlock:
zpool create -o ashift=12 -O encryption=on -O keylocation=file:///mnt/usb-keystore/.zfs-vm-disks.key -O keyformat=raw -O compression=lz4 VM-Disks mirror nvme-Corsair_MP600_CORE_XT_A630B433001HKN nvme-Corsair_MP600_CORE_XT_A630B433006FJIVerification:
zpool list -v zfs get encryption VM-Disks
It should say aes-encryption
root@lbs-pve01:~# zfs get encryption VM-Disks
NAME      PROPERTY    VALUE        SOURCE
VM-Disks  encryption  aes-256-gcm  -
Let’s try remove the USB drive and reboot the system:

Hmm.. Why is it marked as online? Let’s try powercycle the system with poweroff command. Then check again:
How is this possible? I even verified that the key is unavailable with the following command:
root@lbs-pve01:~# zfs get keylocation,keystatus VM-Disks
NAME      PROPERTY     VALUE                                       SOURCE
VM-Disks  keylocation  file:///mnt/usb-keystore/.zfs-vm-disks.key  local
VM-Disks  keystatus    unavailable                                 -
Actually, it is working as intended. There is just no way to verify in the GUI that the zpool is locked. When you try to create a virtual machine using the encrypted zpool, you will notice that is indeed locked:
TASK ERROR: unable to create VM 9999 - zfs error: cannot create ‘VM-Disks/vm-9999-disk-0’: encryption root’s key is not loaded or providedAlternative 2: Using a passhphrase to unlock the zpool
This is a simpler and more convenient approach, in my opinion.
Step 1: Identify Disks with ls -l /dev/disk/by-id/ to get the unique IDs of the two disks for your mirror.
Step 2: To create a mirrored ZFS pool named VM-Disks with encryption using a passhphrase:
zpool create -o ashift=12 -O encryption=on -O keyformat=passphrase -O keylocation=prompt -O compression=lz4 VM-Disks mirror nvme-Corsair_MP600_CORE_XT_A630B433001HKN nvme-Corsair_MP600_CORE_XT_A630B433006FJIAfter you enter a passphrase in the prompt, you should be done. To unlock the zpool after a reboot:
zfs load-key VM-Disks
Verification:
root@lbs-pve01:~# zfs load-key VM-Disks
Enter passphrase for ‘VM-Disks’:

root@lbs-pve01:~# zfs get keylocation,keystatus VM-Disks
NAME      PROPERTY     VALUE        SOURCE
VM-Disks  keylocation  prompt       local
VM-Disks  keystatus    available    -
ZFS pool encryption on Proxmox is a realy practical approach for securing VM and container data on Linux based hypervisors. The passhprase method you described makes it much easier to manage compared to USB key storage especially for remote server managment. I like how you explained the cloning process for migrating VMs from unencrypted to encrypted pools since many people get stuck on that step. The fact that the GUI doesn't show lock status is definitly confusing but your verification steps using the keystatus property are helpful.