
pfSense: Configure VLANS on a SG-1100
How-To: pfSense

20th November 2023
Introduction
The goal is to configure the ports as following:
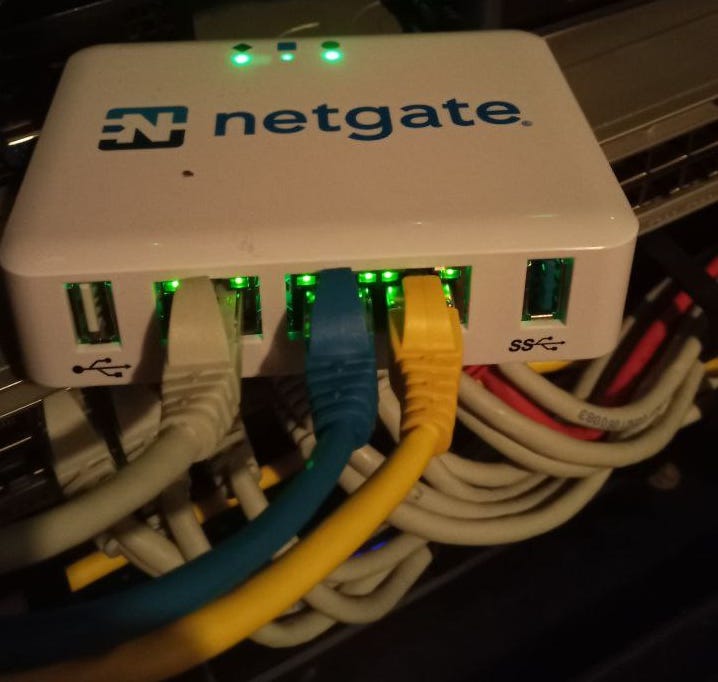
WAN (Grey cable) will be the internet-facing port
LAN (Blue cable) will be the MGMT interface
OPT (Yellow cable) will be configured as a tagged port, transfering multiple VLANs.
Topology
It is always good to have an intended design before you start configuring. These are the VLANs that needs to be added:

Note: For IP addressing and BGP routing, see Configuring BGP Peering between pfSense and Cisco.
Note: Not all VLANs will be included in the examples below.
VLAN Settings Overview
The VLAN Configuration on a SG-1100 is a bit confusing. On VMs or other appliances, you would configure the WAN, LAN and OPT as separate physical interfaces, then configure the OPT port as a trunk port, and all VLANS would have that OPT port as the parent port…
…However, on the SG-1100 appliance, all 3 ports are a part of the same system on a chip, breaked out into 3 logical ports. For a quick overview, on the main page, click LAN Uplink (also Interfaces > Switch > Ports)
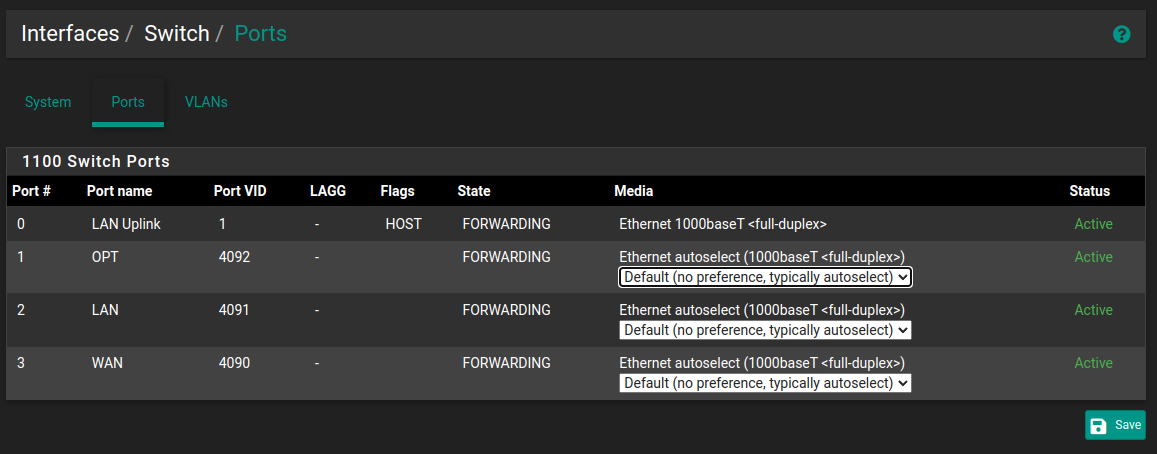
Go to the tab VLANs:
Explanation:
The Member "0" is the chip.
WAN, LAN and OPT has been assigned 3, 2 and 1 respectively.
Configuration
The WAN and the LAN port are untagged ports (only one VLAN allowed) so you don’t need to do much with them, other than set IP addresses. The OPT port however needs a bit of configuring to operate as a tagged port (multiple VLANs allowed).
Step 1: Start with creating the VLANs. To create a new VLAN, go to Interfaces > Assignments > VLANs
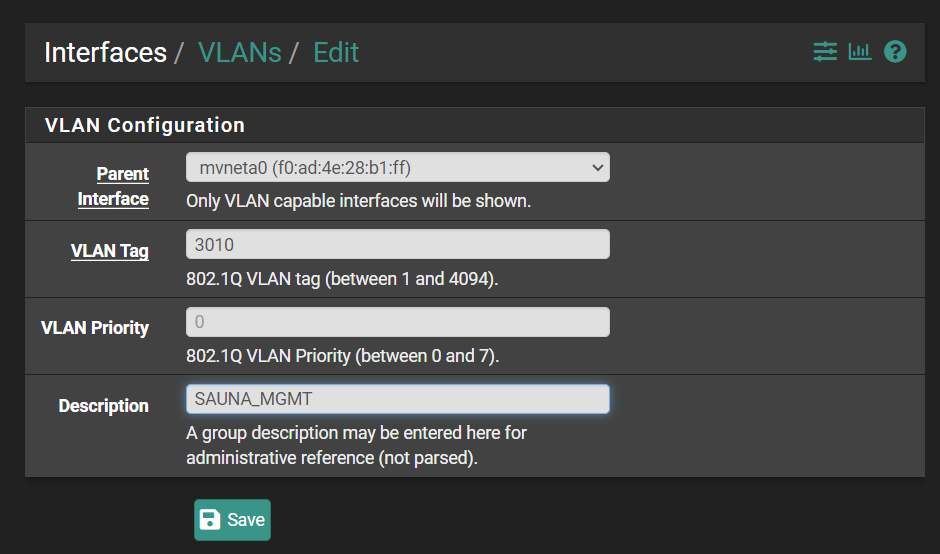
Add a new VLAN, configuration should be self explanatory:
Parent Interface: default (only one to choose from in SG-1100).
VLAN Tag: VLAN number
VLAN Priority: Optional. only used for QoS purposes.
Description: VLAN name
Overview of all configured VLANs:
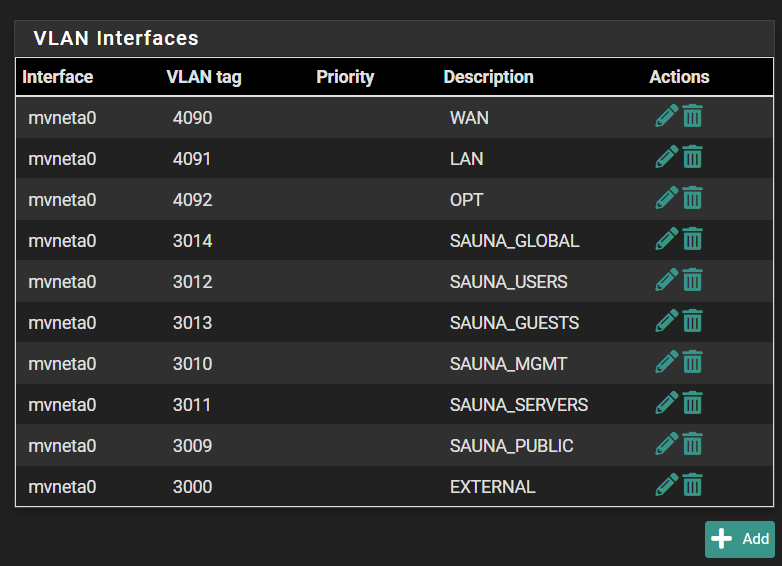
Note: 4090, 4091 and 4092 are system default VLANs.
Step 2: Go to Interfaces > Assignments > Interface Assignments.
Assign the VLAN to parent interface (only one available on SG-1100) by clicking next to the Available network ports: and then Add+
New VLAN Interfaces will get a name of OPT2, OPT3 and so forth. These names can be changed to something more human readable.
Step 3: Click on the newly created interface name or go to Interfaces > OPTx
Here you can enable the interface and set IP addresses if you want.
Description: Name the interface
Check enable interface
Set IPv4 and IPv6 address if applicable
MTU cannot be changed (cannot be higher than the parent interface).
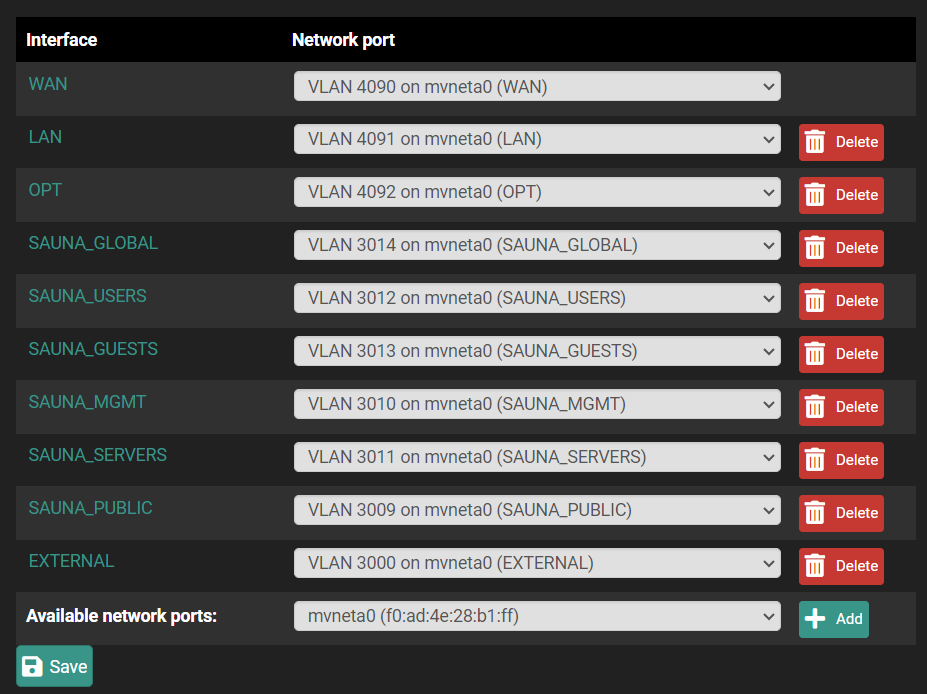
Go back to Interfaces > Assignments > Interface Assignments and you can see that the interface names have changed.
Overview of assigned VLANs:
Note: The interface ID’s haven’t actually changed, but they have gotten aliases assigned to them. You can verify from the CLI:
*** Welcome to Netgate pfSense Plus 23.09-RELEASE (arm64) on SAUNA-FW01 ***
Current Boot Environment: default
Next Boot Environment: default
WAN (wan) -> mvneta0.4090 -> v4/DHCP4: 85.167.132.179/22
v6/DHCP6: 2001:4610:a:6::5fdd/128
LAN (lan) -> mvneta0.4091 -> v4: 10.10.1.6/24
v6: 2001:db8:1234:a010::6/64
OPT (opt1) -> mvneta0.4092 ->
SAUNA_GLOBAL (opt2) -> mvneta0.3014 -> v4: 10.14.255.0/31
v6: 2001:db8:1234:e::1/64
SAUNA_USERS (opt3) -> mvneta0.3012 -> v4: 10.12.255.0/31
v6: 2001:db8:1234:c::1/64
SAUNA_GUESTS (opt4) -> mvneta0.3013 -> v4: 10.13.255.0/31
v6: 2001:db8:1234:d::1/64
SAUNA_MGMT (opt5) -> mvneta0.3010 -> v4: 10.10.255.0/31
v6: 2001:db8:1234:a::1/64
SAUNA_SERVERS (opt6) -> mvneta0.3011 -> v4: 10.11.255.0/31
v6: 2001:db8:1234:b::1/64
SAUNA_PUBLIC (opt7) -> mvneta0.3009 -> v4: 10.9.255.0/31
v6: 2001:db8:1234:9::1/64
EXTERNAL (opt8) -> mvneta0.3000 -> v4: 10.0.1.1/26
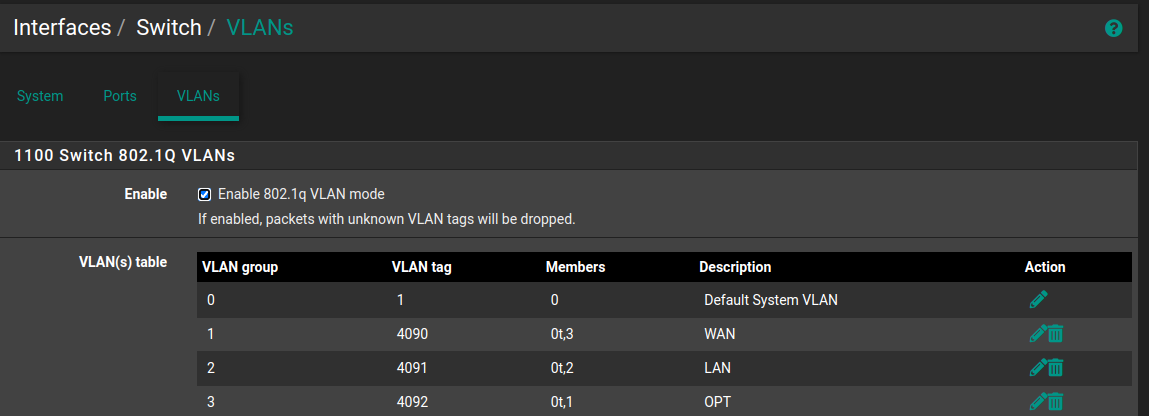
v6: 2001:db8:1234::1/64Step 4: The VLAN configuration is done but they are not allowed on any physical ports yet. Navigate to Interfaces > Switches > VLANs.
Check the Enable 802.1q VLAN mode if not enabled. Then Add Tag+
VLAN tag: should match the previous configured VLAN number
Description: A human readable name
Members:
0 and tagged (the system chip).
1 and tagged (the OPT port on the SG-1100).

Note: if you added more members it would mean that you would allow the VLAN on multiple ports.
Overview of VLAN tag configuration:

Note: remember to save.
Then you’re done. After that you just need to configure firewall rules if your traffic needs to traverse different VLANs, but that is out of scope for this guide.