
Managing users and groups on Ubuntu
Linux Tutorial #5

23rd September 2024

The sudo User
By default, the first user created when installing Linux on a system becomes the administrator with full rights to change anything on the system. But files not owned by the user requires the command sudo to invoke root access. This could for example be an action where you install a new application.
user@computer:~$ apt install opera-stable
E: Could not open lock file /var/lib/dpkg/lock-frontend - open (13: Permission denied)
E: Unable to acquire the dpkg frontend lock (/var/lib/dpkg/lock-frontend), are you root?

user@computer:~$ sudo apt install opera-stable
Reading package lists... Done
Building dependency tree... Done
Reading state information... Done
The following additional packages will be installed:
  chromium-codecs-ffmpeg-extra
The following NEW packages will be installed:
  chromium-codecs-ffmpeg-extra opera-stable
0 upgraded, 2 newly installed, 0 to remove and 17 not upgraded.
Need to get 113 MB of archives.
After this operation, 326 MB of additional disk space will be used.
Do you want to continue? [Y/n] n
Abort.
In graphical user interface context, this is the same when you get prompted to type your administrator password before installing the application:

Alternatively, you can become the hidden root user by typing sudo su
user@computer:~$ sudo su
root@computer:/home/user#
When logged in as root, you can perform any task without requiring to prepend “sudo” for every command. Note that this can be quite dangerous. Because as root, you are equipped with every weapon in the arsenal to shoot yourself in the foot.
The Sudoers file
The textfile /etc/sudoers controls which users are allowed to gain root privileges. You edit this file by typing visudo.
root@computer:/home/user# visudo
#
# This file MUST be edited with the 'visudo' command as root.
#
# Please consider adding local content in /etc/sudoers.d/ instead of
# directly modifying this file.
#
# See the man page for details on how to write a sudoers file.
#
Defaults        env_reset
Defaults        mail_badpass
Defaults        secure_path="/usr/local/sbin:/usr/local/bin:/usr/sbin:/usr/bin:/sbin:/bin:/snap/>
Defaults        use_pty
...
# User privilege specification
root    ALL=(ALL:ALL) ALL

# Members of the admin group may gain root privileges
%admin ALL=(ALL) ALL

# Allow members of group sudo to execute any command
%sudo   ALL=(ALL:ALL) ALL

# See sudoers(5) for more information on "@include" directives:

@includedir /etc/sudoers.d
Note: You must edit this file with the “visudo” command.
By default, member of the groups “admin” and “sudo” are allowed to run commands with sudo. Normally, you don’t need to edit this file.
For more information about the origin of the sudo command and the root user, check out this article:
https://www.howtogeek.com/737563/what-is-root-on-linux/
User management
To create additional users, you can do it through the GUI = Graphical User Interface or the CLI = Command-Line Interface.
GUI User management on Kubuntu
The GUI may differ between distros, but on Kubuntu, which uses the KDE interface, open the start menu and type “users”

There isn’t too many options here. You can specify if the new user is going to be a regular user (not being able to run sudo) or an administrator (can run sudo). You can also set email address once the user is created but that’s about it.

Note: The email address is not a standard detail when creating users. That information won’t be visible anywhere in the system but here.
GUI User management with Gnome System Tools
The built-in User administration tool for KDE is actually pretty lame. I recommend using Gnome System Tools instead. You can download it from the Discover app.

With the Gnome System Tools, you can give more granular permissions for the users, and also add them to groups:

CLI User management
The same task can be done through the CLI with the adduser command:
wl@elenor:~$ sudo adduser jane
[sudo] password for user:
Adding user `jane' ...
Adding new group `jane' (1002) ...
Adding new user `jane' (1002) with group `jane' ...
Creating home directory `/home/jane' ...
Copying files from `/etc/skel' ...
New password:
BAD PASSWORD: The password fails the dictionary check - it is based on a dictionary word
Retype new password:
passwd: password updated successfully
Changing the user information for jane
Enter the new value, or press ENTER for the default
        Full Name []: Jane Doe
        Room Number []: 104
        Work Phone []: +479999999
        Home Phone []: +470000000
        Other []: For Demonstration only
Is the information correct? [Y/n] Y
Note: It complains about me using a weak password but it still let’s me use it.
As you can see it lets me enter some additional information about the user:
Room Number
Work Phone
Home Phone
Other (anything you want it to be)
Without any flags specified, it creates a normal user by default, and i could not enter her email address.
Give administrator privileges
To make user jane an administrator, we could have added the --group sudo flag after the username before we created it:
sudo adduser jane --group sudo
To retrospectively give jane administrator privileges, you can runt the same command but append the group name:
user@computer:~$ sudo adduser jane sudo
Adding user `jane' to group `sudo' ...
Adding user jane to group sudo
Done.
Note: Older Ubuntu versions used the group “admin” to add sudo priveleges. That group doesn’t exist anymore. Newer versions use the group “sudo”.
Modifying the user through CLI
You can’t set an email address through the CLI. The email address is only visible in the KDE GUI. However, a workaround is to use the “other” field for the email address. To change the user information, use the chfn command:
user@computer:~$ sudo chfn jane
[sudo] password for user:
Changing the user information for jane
Enter the new value, or press ENTER for the default
        Full Name [Jane Doe]:
        Room Number [104]:
        Work Phone [+479999999]:
        Home Phone [+470000000]:
        Other [For Demonstration only]: jane@bastuklubben.online
Verification
You can verify the details of a user in any ways but the easiest one is to use the finger command:
user@computer:~$ finger jane
Login: jane                             Name: Jane Doe
Directory: /home/jane                   Shell: /bin/bash
Office: 104, +479999999                 Home Phone: +470000000
Last login Sat Sep 21 17:19 (CEST) on pts/2 from ::1
No mail.
No Plan.
The “Other” field is however only visible with the command getent command:
wl@elenor:~$ getent passwd | grep jane
jane:x:1002:1002:Jane Doe,104,+479999999,+470000000,jane@bastuklubben.online:/home/jane:/bin/bash
Note: Storing details about users is more useful in an enterprise infrastructure anyway, not something that you bother with for your home computer. For storing more information about users, you would use an Identity Management Server like FreeIPA or OpenLDAP.
Groups
Users can be added to groups to gain certain privileges. To view which groups a user is part of, use the groups command:
user@computer:~$ groups john
john : john adm dialout fax cdrom floppy tape sudo dip video plugdev lpadmin lxd sambashare
Note: With the Gnome System Tools, you can verify which users are a part of a group, but there is no way to verify which groups a user is part of.
There are different kinds of groups:
The Primary group is the first group listed after the username. It uses the same name as the user. The purpose of this group will be more clear in the next tutorial.
System groups grants privileges to use certain HID = Human interface Devices or perform specific actions. For example the group “
cdrom”gives the user privileges to use the CD-ROM drive. These are either built-in or automatically created when certain software is installed.Custom groups are created by admins.
The main use-case for having custom groups is for multiple users to be able to read and/or edit files in a shared directory. More on that in the next tutorial.
Group management
Group Management through Gnome System Tools (GUI)
It is only possible to manage groups with the Gnome System Tools, if you do it the GUI way.
To add a new group:
Click Manage Groups > +Add
Enter Group name, Group ID and Group Members

You can also retrospectively add users to the group by marking the group from the list and click Propterties
Group management through CLI
To create a new group, use the addgroup command:
user@computer:~$ sudo addgroup cligroup
[sudo] password for user:
Adding group `cligroup' (GID 1004) ...
Done.
To add users to that group, use the adduser command but append the users you want to add:
user@computer:~$ sudo adduser jane cligroup
Adding user `jane' to group `cligroup' ...
Adding user jane to group cligroup
Done.
Note: you can use the addgroup or adduser interchangeably when adding users to groups:
user@computer:~$ sudo addgroup john cligroup
Adding user `john' to group `cligroup' ...
Adding user john to group cligroup
Done.
Group permissions
Creating groups and adding members to them will not make a single difference unless you set certain permissions for group members. That will be covered in the next tutorial.
Cleanup: Delete users and groups
You can delete groups and users through the GUI or the CLI.
Delete users
… With GUI
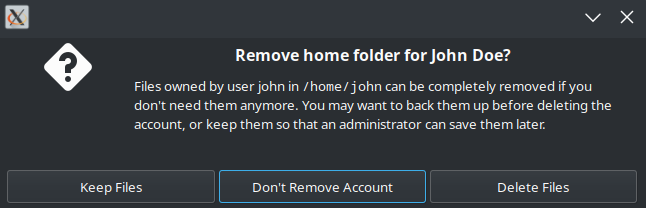
If you do it with Gnome System Manager, you get a popup asking if you want to keep the users home directory or not:
… With CLI
With the CLI, use the deluser command. To remove the user and the home directory, add the --remove-home flag:
user@computer:~$ sudo deluser jane --remove-home
Looking for files to backup/remove ...
Removing files ...
Removing user `jane' ...
Warning: group `jane' has no more members.
Done.
Note: the primary groups for john and jane are also removed.
Delete Groups
… with GUI
Deleting a group in Gnome System Manager is just as easy as creating it. Just mark it and click delete
… with CLI
To delete a group through CLI, use the delgroup command
user@computer:~$ sudo delgroup cligroup
Removing group `cligroup' ...
Done.
And that concludes this tutorial. Next tutorial will be looking at file permissions.