
Linux KVM: Migrating from ESXi to Linux KVM
Linux KVM: How-To

9th September 2023.
I have reinstalled my Intel NUC from VMWare ESXi to a Linux distribution running KVM. There was only one VM I cared about that needed to be imported into KVM and that was my Wireless LAN Controller.
Step-by-Step instructions
Export the VM from ESXi
Step 1: Turn off the VM
Step 2: Right-click on the VM and choose Export

You only need the .vmdk file:

Convert the .vmdk file into .qcow2
the .vmdk file format from ESXi is not compatible with KVM. It needs to be converted.
Step 1: Install qemu (Ubuntu):
user@workstation:~$ sudo apt update
user@workstation:~$ sudo apt install qemu
Step 2: convert the .vmdk file with the qemu-img command:
user@workstation:~$ qemu-img convert -f vmdk -O qcow2 WIL-WLC-1.vmdk SAUNA-WLC-1.qcow2Reinstall intel NUC with Linux
The installation of Linux on bare-metal is not covered in detail here. I can say that I used ubuntu-server22.04LTS but KVM is supported on multiple distros.
I used balena-etcher to create a bootable USB. It is easily installed on Debian or Redhat systems.
Edit Network Settings
Depending on your setup, you might require some additional VLANs. This is why I like to use Ubuntu Server; Netplan is a very powerful and intuitive way to configure advanced network settings.
sudo nano /etc/netplan/00-installer-config.yaml
# network settings for hypervisor functionality:

network:
  version: 2

  ethernets:
    eno1: {}

  vlans:
    vlan.10:
      id: 10
      link: eno1

    vlan.11:
      id: 11
      link: eno1

    vlan.90:
      id: 90
      link: eno1

    vlan.91:
      id: 91
      link: eno1

  bridges:
    br10:
      interfaces:
        - vlan.10
      addresses:
        - 10.10.1.9/24
        - 2001:db8:1234:a010::9/64
        - FE80::10:9/64
      nameservers:
        addresses:
        - 2001:db8:1234:b010::b
        search:
        - bastuklubben.online
      routes:
        - to: ::/0
          via: fe80::10:1
        - to: 0.0.0.0/0
          via: 10.10.1.1

    br11:
      interfaces:
        - vlan.11

    br90:
      interfaces:
        - vlan.90

    br91:
      interfaces:
        - vlan.91
Explanations:
the “{}” defined under eno1 brings the interface up but without any configuration on it.
vlans links to parent interface, and bridges links to parent vlan.
local IP settings for the KVM server has to be configured under the bridge interface.
Switchport settings
Since all VLANs uses the same physical interface, the switchport needs to be configured as a tagged port. This is how the switchport is configured (Cisco Catalyst 3850):
interface GigabitEthernet1/0/2
 description SAUNA-KVM
 switchport trunk allowed vlan 10,11,90,91,120
 switchport mode trunk
 spanning-tree portfast disable
Install KVM on Ubuntu Server 22.04
Step 1: Install KVM. The steps are following:
sudo apt update
apt install libvirt-daemon-system libvirt-clients bridge-utils virtinst virt-manager
You can verify with:
virsh --version
systemctl status virsh
Step 2: Edit your user privileges to administer KVM
You need to add your primary user to the kvm and libvirt groups:
adduser username libvirt
adduser username kvm
Verify:
user@sauna-kvm:~$ id $USER
uid=1902600004(user) gid=1902600004(user) groups=1902600004(user),109(kvm),141(libvirt),1902600000(admins)
Source: https://adamtheautomator.com/virsh/
Install virt-manager on the workstation
While you can setup VM’s through the linux CLI (from the link above there are instructions on how to do it) I prefer the easy way out with the Linux Virtual Machine Manager.
user@workstaion:~/$ sudo apt install virt-managerNote: the user also needs to be added to the local groups kvm and libvirt on the workstation after installation.
Import VM into Linux KVM
Step 1: Copy the .qcow2 file over to the KVM server. The easiest way is to use SCP:
# On the workstation:
user@workstation:~/ISO$ scp SAUNA-WLC-1.qcow2 user@kvm:/home/user/SAUNA-WLC-1.qcow2

# On the kvm server:
wl@sauna-kvm:~$ sudo mv SAUNA-WLC-1.qcow2 /var/lib/libvirt/images
Explanation:
Specifying username is not necessary if it is the same user you are currently logged in with.
Unless you have set a root password, you have to transfer the file first to the users home directory, then you can move the file to /var/lib/libvirt/images, which is the default location for all images in KVM.
Configure Virtual Machine Manager
Step 1: Open Virtual Machine Manager either by searching it on installed application or typing the following command:
$ virt-managerStep 2: enable xml editing, because it might be useful later.
Click Edit > Preferences and then check Enable XML editing


Install the VM in Virtual Machine Manager
Step 1: Click File > Add Connection… and connect to your remote KVM server


Step 2: Once connected you can click on create new virtual machine to start import of the .qcow2 file:

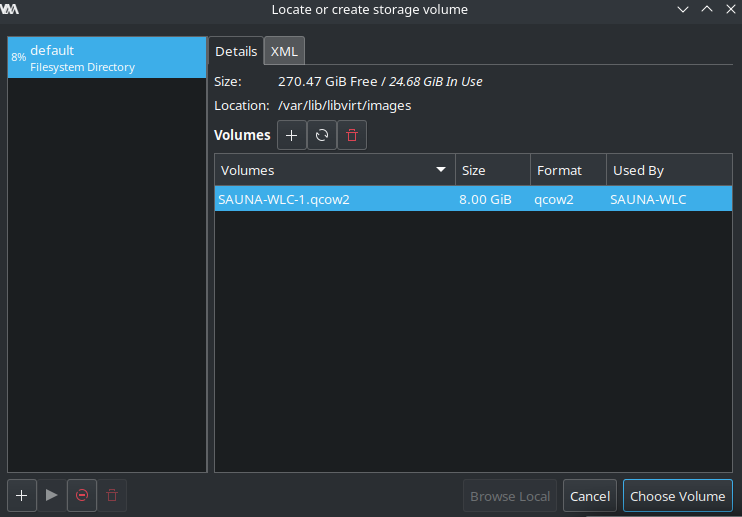
Step 3: Then you just continue following the installation wizard:


Step 4: On the last page:
Mark Customize configuration before install
Network selection choose Bridge device… and specify bridge name

Step 5: Depending what type of VM you are importing, you might need to tweak some settings before installing. For example, it might be a good idea to set the MAC address for the main interface.
Click on the NIC device. Then go to the tab XML and edit the MAC address to the original MAC from before.

After that, the import should complete successfully.