
Linux: Configure MPLSoDMVPN Part 1: Interface configuration
How-To: Linux MPLSoDMVPN Part 1

Monday 26th May 2025
After I managed to create an MPLSoDMVPN tunnel between VyOS and Cisco, I realized that my routing got very messy when trying to separate different tenant traffic. I then got the idea to move the DMVPN tunnel from the VyOS router, directly onto the Linux server!
VyOS is utilizing FRR so it should be possible to port the configuration to a Linux server with FRR installed. It turned out that it was, but wasn’t nearly as straight forward as I thought!
DMVPN Design
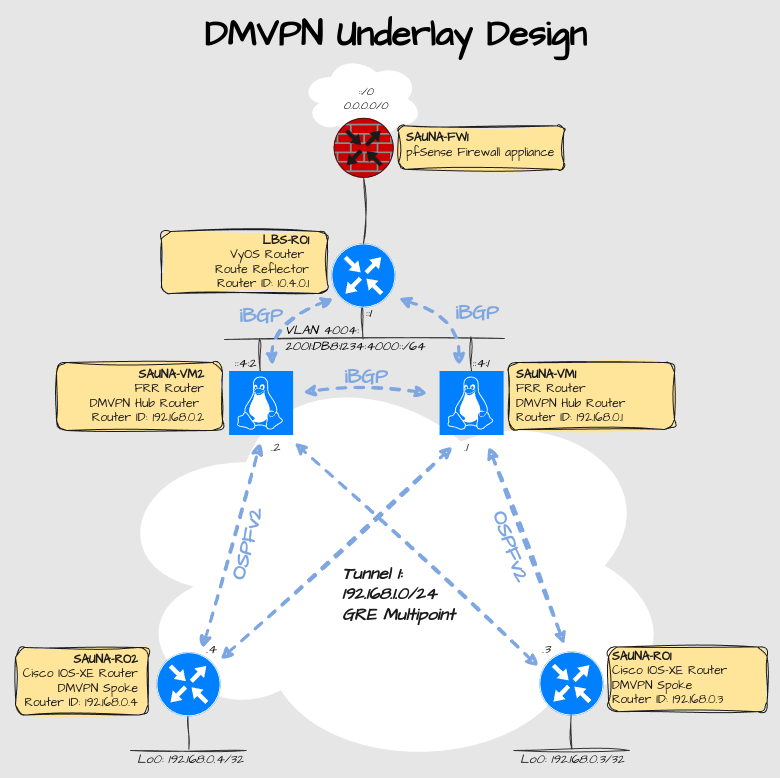
Explanation:
The DMVPN hubs have been moved from the VyOS router to the Linux Servers. This means that the VyOS will only route traffic from tenants to the Internet, and won’t have any knowledge about the rest of the tenants infrastructure.
Multicast is configurable on Linux GRE tunnel interfaces, so I can use OSPF as the routing protocol inside the tunnel.
Pre-Requisites
Here are all the pre-requisite steps summarized in order:
Create a GRE tunnel interface in /etc/network/interfaces
Create a dummy interface in /etc/network/interfaces. This will be used for router ID’s.
Configure iptables to make multicast work over GRE
Install FRR
Download Strongswan source code from github.
Download the Strongswan patch from gitlab.
Apply the patch
Install necessary dependencies
Configure and compile the sourcecode
Configure Strongswan ipsec profile for the DMVPN tunnel interface
After all that, you can start configuring FRR.
Part 1 and 2 will cover the pre-requisites:
Part 1 (this one) will cover interface configuration and installation of FRR
Part 2 will cover installation and configuration of Strongswan (used for ipsec configuration).
Part 3 will cover FRR configuration:
Part 3 will cover underlay and overlay routing configuration
Create GRE and dummy interface
I hope you are not using an Ubuntu server because netplan doesn’t support dynamic multipoint GRE. I came so far that IPSec establishes fine but NHRP will never transition to “up”. If you have an Ubuntu server, you have to deactivate Netplan and install ifupdown.
sudo mkdir /etc/netplan/backup
sudo mv /etc/netplan/*.yaml /etc/netplan/backup
sudo apt install ifupdown
sudo nano /etc/network/interfaces
Here is a sample configuration on translated config from netplan in a previous post, including GRE tunnel interface (gre1) and the dummy interface:
# This file describes the network interfaces available on your system
# and how to activate them. For more information, see interfaces(5).

source /etc/network/interfaces.d/*

# The loopback network interface
auto lo
iface lo inet loopback

# The dummy interface for Router IDs
auto dummy0
iface dummy0 inet static
        pre-up ip link add $IFACE type dummy
        address 192.168.0.1/32

# The GRE tunnel interface
auto gre1
iface gre1 inet manual
        pre-up ip tunnel add $IFACE mode gre local 10.4.254.41 remote 0.0.0.0 key 1 ttl 64
        up ip link set $IFACE up
        up ip link set $IFACE mtu 1400
        up ip addr add 192.168.1.1/32 dev $IFACE
        up ip -6 addr add fc01::e:1/128 dev $IFACE
        down ip addr del 192.168.1.1/32 dev $IFACE
        down ip -6 addr del fc01::e:1/128 dev $IFACE
        down ip link set $IFACE down

# The OOBM interface
auto OOBM
iface OOBM inet manual
        pre-up ip link add $IFACE type vrf table 100
        up ip link set dev $IFACE up
        down ip link set $IFACE down

auto ens18
iface ens18 inet6 static
        pre-up ip link set dev $IFACE master OOBM
        address fc00::4:a/64
        up ip -6 route add default table 100 via fc00::1 dev $IFACE

iface ens18 inet6 static
        address fe80::4:a/64

iface ens18 inet static
        pre-up ip link set dev $IFACE master OOBM
        address 172.16.0.10/23
        up ip route add default table 100 via 172.16.0.1 dev $IFACE

# VRFs

auto NMS
iface NMS inet manual
        pre-up ip link add $IFACE type vrf table 110
        up ip link set dev $IFACE up
        down ip link set dev $IFACE down

# NMS Linknet
auto ens19
iface ens19 inet6 static
        pre-up ip link set dev $IFACE master NMS
        address 2001:db8:1234:1000::4:1/64

iface ens19 inet6 static
        address fe80::41:1/64

iface ens19 inet static
        pre-up ip link set dev $IFACE master NMS
        address 10.1.254.41/24

# Global Linknet
auto ens22
iface ens22 inet6 static
        address 2001:db8:1234:4000::4:1/64
        # dns-* options are implemented by the resolvconf package, if installed
        dns-nameservers 2620:fe::fe 2620:fe::9
        dns-search bastuklubben.online

iface ens22 inet6 static
        address fe80::44:1/64

iface ens22 inet static
        address 10.4.254.41/24

# Bridge
auto ens23
iface ens23 inet manual
        bridge-ports none
        bridge-stp off
        bridge-fd 0
        bridge-vlan-aware yes
        bridge-vids 2-63
        up ip link set dev $IFACE up
        down ip link set dev $IFACE down

#NMS VLAN
auto ens23.10
iface ens23.10 inet static
        pre-up ip link set dev $IFACE master NMS
        address 10.10.0.1/24

iface ens23.10 inet6 static
        pre-up ip link set dev $IFACE master NMS
        address 2001:db8:1234:A001::1/64

iface ens23.10 inet6 static
        address FE80::A:1/64

#Global VLAN
auto ens23.40
iface ens23.40 inet static
        address 10.14.0.1/24

iface ens23.40 inet6 static
        address 2001:db8:1234:E001::1/64

iface ens23.40 inet6 static
        address FE80::E:1/64
Explanations:
“inet static” can be used when you need to assign ip addresses.
“inet manual” can be used on interfaces that doesn’t have any addresses assigned.
The GRE tunnel interface is a bit of a corner case. The only way I have made it work is with this configuration.
When configuring VRFs, you can type “inet manual” or “inet6 manual". It doesn’t make any difference.
To assigned multiple IPv6 addresses, you have to enter multiple “inet6 static”.
I like to statically assign link local addresses. Unfortunately I have not found a way to disable automatically created link-local addresses with updown, something you can do with one line in netplan.
Note: I really miss netplan…
Additional configuration for the dummy interface
Dummy interfaces won’t work properly if you don’t enable the dummy driver. Create a file in the following directory:
~# sudo nano /etc/modules-load.d/dummyThen type the name of the driver, simply:
dummyThen reboot:
sudo rebootOptional: Turn off IPv6 DAD
DAD = Duplicate Address Detection is a service that pre-checks if an intended IPv6 address is already taken by someone else on the same subnet. This check takes maybe a half a second to complete, but it adds up when you need to bring up all interfaces sequentially. The risk for duplicate IPv6 addresses is extremely small anyway and when using static addresses It’s even more unnecessary.
To disable IPv6 DAD, you can do it with sysctl by creating a new file:
sudo nano /etc/sysctl.d/ipv6.confYou can disable either by per-interface basis:
net.ipv6.conf.ens18.accept_dad=0
net.ipv6.conf.ens19.accept_dad=0
net.ipv6.conf.ens20.accept_dad=0
net.ipv6.conf.ens21.accept_dad=0
net.ipv6.conf.ens22.accept_dad=0
net.ipv6.conf.ens23/10.accept_dad=0
net.ipv6.conf.ens23/20.accept_dad=0
net.ipv6.conf.ens23/30.accept_dad=0
net.ipv6.conf.ens23/40.accept_dad=0
Or globally:
net.ipv6.conf.all.accept_dad=0Then you can apply the changes with the following command:
~$ sudo sysctl -p /etc/sysctl.d/ipv6.confSource: https://sysctl-explorer.net/net/ipv6/accept_dad/
Configure iptables
iptables needs to be modified for the GRE interface to work properly.
Multicast support
For multicast forwarding on the GRE interface to work, it requires an iptables NFLOG rule to allow nhrpd to intercept multicast packets. A second iptables rule is also usually used to drop the original multicast packet:
iptables -A OUTPUT -d 224.0.0.0/24 -o gre1 -j NFLOG --nflog-group 2
iptables -A OUTPUT -d 224.0.0.0/24 -o gre1 -j DROP
NHRP Shortcut routing
Add rules to provide the possibility to shortcut tunnels and connect spokes directly:
iptables -A FORWARD -i gre1 -o gre1 -m hashlimit --hashlimit-upto 4/minute --hashlimit-burst 1 --hashlimit-mode srcip,dstip --hashlimit-srcmask 24 --hashlimit-dstmask 24 --hashlimit-name loglimit-0 -j NFLOG --nflog-group 1 --nflog-size 128Adjust TCP MSS
Adjust TCP Maximum Segment Size inside GRE tunnel. This is to prevent fragmentation:
iptables -t mangle -A POSTROUTING -p tcp --tcp-flags SYN,RST SYN -o gre1 -j TCPMSS --set-mss 1360

ip6tables -t mangle -A POSTROUTING -p tcp --tcp-flags SYN,RST SYN -o gre1 -j TCPMSS --set-mss 1340
Note: I have explained in an earlier DMVPN related post why you would need to adjust MTU and MSS on a VPN tunnel interface.
As Internet wide PMTU discovery rarely works, we sometimes need to clamp our TCP MSS value to a specific value. - VyOS Documentation
Verify iptables configuration
To verify active rules:
~# iptables -L -v -n~# iptables -t mangle -L -v -nMake iptables rules persistent
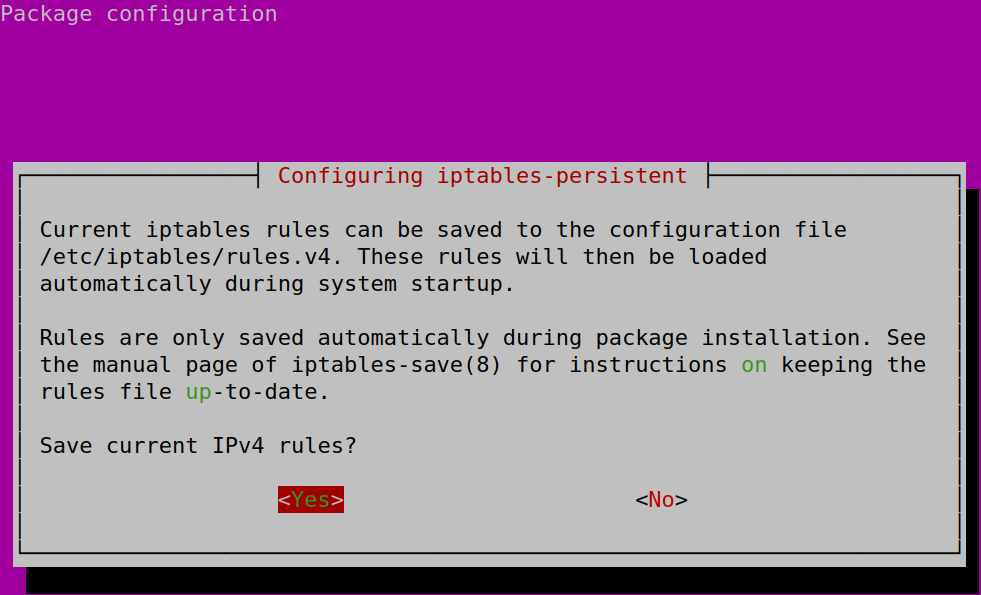
To make the rules persistent through reboot, install following packet:
~# apt install iptables-persistentThen choose yes to save IPv4 currently configured rules. Do the same for IPv6:
Should you add new rules in the future, run this command to update the config:
~# dpkg-reconfigure iptables-persistentSource: https://sleeplessbeastie.eu/2018/09/10/how-to-make-iptables-configuration-persistent/
Install FRR
To install the latest version, you can add the FRR debian repository:
# Add GPG key:
curl -s https://deb.frrouting.org/frr/keys.gpg | sudo tee /usr/share/keyrings/frrouting.gpg > /dev/null

# Add latest version:
FRRVER="frr-stable"
echo deb '[signed-by=/usr/share/keyrings/frrouting.gpg]' https://deb.frrouting.org/frr \
     $(lsb_release -s -c) $FRRVER | sudo tee -a /etc/apt/sources.list.d/frr.list
To install FRR, run:
sudo apt update && sudo apt install frr frr-pythontoolsSource:
https://deb.frrouting.org/
Setup FRR
Enable routing daemons:
sudo nano /etc/frr/daemons
bgpd=yes
ospfd=yes
ospf6d=yes
...
Add following services to /etc/ services:
zebrasrv        2600/tcp                        # zebra service
zebra           2601/tcp                        # zebra vty
ripd            2602/tcp                        # RIPd vty
ripngd          2603/tcp                        # RIPngd vty
ospfd           2604/tcp                        # OSPFd vty
bgpd            2605/tcp                        # BGPd vty
ospf6d          2606/tcp                        # OSPF6d vty
ospfapi         2607/tcp                        # ospfapi
isisd           2608/tcp                        # ISISd vty
babeld          2609/tcp                        # BABELd vty
nhrpd           2610/tcp                        # nhrpd vty
pimd            2611/tcp                        # PIMd vty
ldpd            2612/tcp                        # LDPd vty
eigprd          2613/tcp                        # EIGRPd vty
bfdd            2617/tcp                        # bfdd vty
fabricd         2618/tcp                        # fabricd vty
vrrpd           2619/tcp                        # vrrpd vty
And then restart FRR:
sudo systemctl restart frrSource:
https://docs.frrouting.org/en/latest/setup.html
To be continued…
Next up is how to install and configure Strongswan to be used for the IPSec profile inside the GRE tunnel. That topic is so big it deserves a post in itself.