


February 20, 2023

This is the beginning of a series on how to get started with the Linux operating system for people who wants to migrate over to Linux for their first time, as well as to share my experiences, discovered caveats and solutions. The guide will focus on the Debian-based Ubuntu distributions, but the basic principles should apply to all installations.
Technical Lingo
Some technical terms that are referenced through this article is:
GUI = Graphical User Interface. It’s the image with all the things you can see on the screen, which you navigate by using keyboard and mouse.
CLI = Command-Line Interface. It’s the text-based terminal window where you enter commands with only your keyboard.
Linux Distribution = a certain “flavor” of the Linux operating system. They all share the same Linux kernel, but then uses different packages and applications as they branch out to become their own things. Examples of core distributions are Debian, OpenSUSE, Redhat or Arch. They later branch out to Ubuntu, Manjaro and others.
List of distributions from wikipedia: https://en.wikipedia.org//wiki/List_of_Linux_distributions
OS = Operating System. An operating system manages the hardware and software resources of the computer. It also provides a stable, consistent way for applications to deal with the hardware without having to know all the details of it.
For more information: https://computer.howstuffworks.com/operating-system.htm
BIOS = Basic Input/Output System. The most basic software on a system. It is used to start the operating system and also control IO peripherals like the keyboard, mouse and screen.
UEFI = Unified Extensible Firmware Interface. Doing the same tasks as BIOS but with extended features. UEFI is replacing BIOS more and more.
OEM = Original Equipment Manufacturer. A company whose goods are used as components in the products of another company, which then sells the finished item to users. In laptops for example, this refers to the Windows OS used inside a vendor-specific machine, which will have an OEM license.
Considerations
So you might be interested to try an open-source alternative for multiple reasons:
More privacy
Free-to-use software
Development
There are some things to consider though:
Linux is licensed under GPL = GNU General Public License, which makes it free to do whatever you want with the software, without needing to report to anyone.
GPL software comes with absolutely no warranties. If you are having trouble with the software, you have to fix it yourself, or ask someone for help. There are companies that are specializing on open-source software.
If you change the original OS on your laptop, you might not get support from the vendor, even if it might be hardware issues. I suggest either install Linux on an older laptop without warranty, or make sure you are able to recover to the original OEM version.
Installing a new operating system will potentially erase all your data on the current system. Make sure you have a backup of all your important files.

Which Distribution to choose
The distribution to choose depends on what you like to do. A few popular ones for beginners and basic users are Ubuntu, Kubuntu, or Mint. Ubuntu may be a good alternative for MAC users, while Kubuntu or Mint may be preferred if you are used to Windows.

Note: Ubuntu and Kubuntu are really the same distribution but with different GUIs pre-installed. Mint is a branch of Ubuntu, like Ubuntu is a branch of Debian.
Install options
There are a few options to consider when installing a new operating system on a computer.
Clean install
Completely removes the old operating system. Best option for optimal performance and boot time.
Dual boot
Install Linux in parallel with Windows or Mac. The benefit is that you can switch between for example Ubuntu or Windows. The drawback is that it causes a performance hit, slows boot speed and complicates things.
Install as a VM = Virtual Machine
A VM is a computer inside a computer, with it’s own virtualized hardware. The benefit of this method is that it is easy to install, delete and test different linux distributions. But a VM is still running inside your current operating system, and needs to be allocated hardware resources. For this option you need a hypervisor software like VirtualBox. Hardware virtualization also needs to be enabled inside UEFI BIOS settings.
Note: Personally, for educational purpose I would recommend Virtual Machine over dual boot.
Making a Clean Install of Ubuntu or Kubuntu
The installation for Ubuntu and Kubuntu are very similar. I’m going to use Kubuntu in my examples, because I prefer the Windows-like GUI.
One assumption is that we are going from Windows to Linux.
Note: I’m explaining a basic installation first that works 9/10 times. Later in the post I will explain some challenges or special requirements. Not all computers are the same.
Download Ubuntu or Kubuntu installation files and make a bootable media.
Step 1: Download the distribution .iso file
I recommend choosing the latest LTS = Long Time Support version
Ubuntu download link: https://ubuntu.com/download/desktop
Kubuntu download link: https://kubuntu.org/getkubuntu/
Step 2: Make a bootable USB drive.
The .iso file in itself can’t be used to install linux (unless you are installing it as a VM). You have to make it into a bootable media. A USB drive is good for this, although I suppose you can also burn a DVD.
For windows I recommend using an application called Rufus for making a USB Bootable Media. The default settings are fine. Just choose the file and the disk you want to make bootable.
Partition Scheme: MBR
Target System: BIOS or UEFI
File system: Large FAT32
Cluster size: 32 kilobytes

Note: If you want to burn a DVD instead, you can use ImgBurn for example.
Editing the UEFI BIOS Settings
Note: Keep the DVD or the bootable USB flashdrive connected while entering UEFI BIOS.
For some PC’s, it is necessary to make some changes to the computers BIOS or UEFI settings; most important is to disable secure boot.
Note: Check the appendix part at the end of this post for more information about what secure boot does and why it must be disabled.
To gain access to the BIOS, you would usually press the F2, Del or F9 button. Some laptops have that disabled for faster boot or some security reason.
In Windows, you can make and Advanced Boot into UEFI settings:
Step 1: Press the windows key on your keyboard and search for “boot”. Open Change advanced startup options
Step 2: Click Restart Now under Advanced startup

Step 3: Choose Troubleshoot > Advanced Options > UEFI Firmware Settings > Restart
Now the computer should boot into UEFI BIOS mode. The interface varies between different vendors or models.
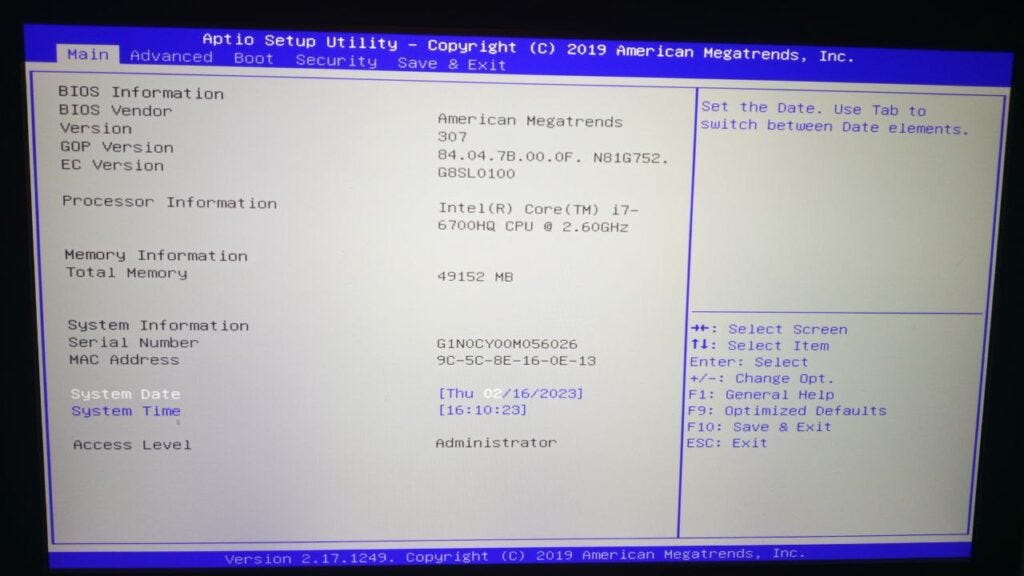
The settings for secure boot can most likely be found under either Security, or the Boot section. It depends on the vendor of the motherboard.
When done, remember to save the configuration change. You would typically do that under the Save & Exit section or press F10.
Note: For those who want to install Linux as a VM, Virtualization has to be enabled from BIOS. You would typically find that setting under the Advanced tab.
Boot with the installation media
Step 1: While the DVD or USB flashdrive is connected, and while still remaining in BIOS settings, boot with the DVD or USB flashdrive by navigating to the Boot section or Save & exit (again, it depends on the vendor). Check under the section most likely called Boot Override.
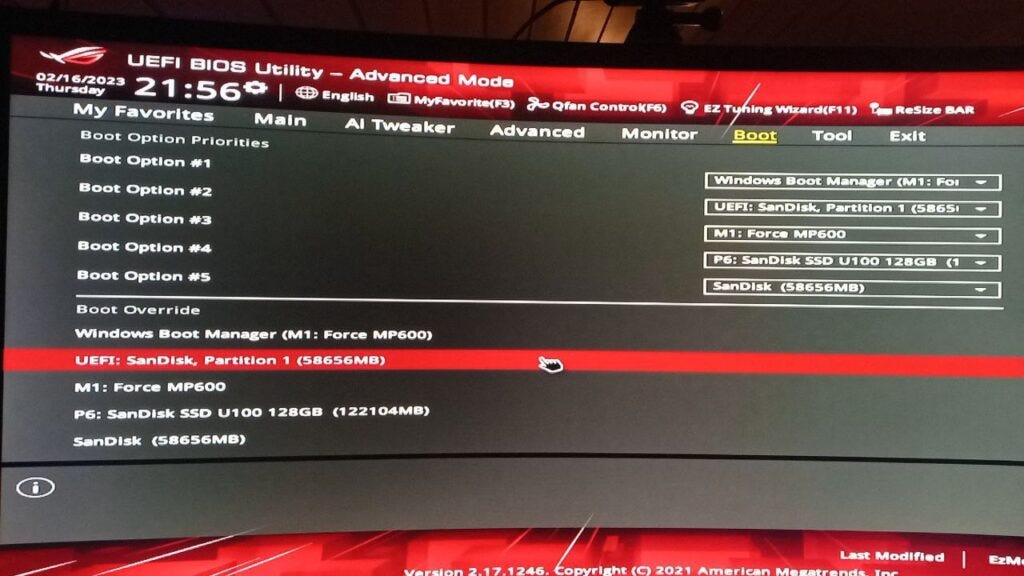
Note: The name of the drive might not be too obvious. If you are confused about which drive is the one with the Linux installation on it, check the volume size. In my case I used a 64GB SanDisk USB drive, so the closest match would be the UEFI: SanDisk, Partition 1 (58656MB).
Step 2: On the next screen that will show up, choose Try or Install Kubuntu
Installing Kubuntu
When the bootable media have loaded, you will be presented with 2 choices. You can either Try Kubuntu, or Install Kubuntu. Click on Install Kubuntu.
Step 1: First you get to choose language and keyboard layout.
Step 2: Under the Software, you get to choose either minimal or normal installation. It depends if you prefer to have control over which software have installed on the system, or if you prefer convenience and ease of use. I personally choose minimal, because I like to manually choose what software to install later. I would also check the Install third-party software for graphics and Wi-Fi, unless you know how to install them manually later.

Step 3: Next page is the Disk Setup. If you only have one disk on your system, the default settings are fine. Click on Install Now.

Why isn’t my disk listed?
You might be using one of those new M.2 drives. Check under appendix at the end of this post for a possible solution to this.
Note: It is quite common that computers have 2 disks; one fast SSD disk, but small in size, and one large HDD disk, but slower speed. To utilize both disks, choose the Manual alternative and then click Next. Check Appendix at the end for a recommended setup with 2 disks.
Step 4: While the system is installing, you get to choose Timezone and set the User settings.
When the installation is finished, you are now able to login with your credentials that you set during the installation. Congratulations!
Appendix
Secure Boot
Secure boot is used to make sure that only signed software will be allowed to start from UEFI BIOS. That practically means that if the machine is shipped with Windows, most likely only Microsoft signed software and drivers will be allowed to boot.
While in theory it can have some security benefits, like preventing malware from attacking the bootloader, it is mostly an obstacle for regular users who wants to install a 3rd party OS. It is however possible to enable it again after you install Linux, by adding the required signatures, but it is quite a complex task for most users.
Information about secure boot:
https://wiki.ubuntu.com/UEFI/SecureBoot/Testing?action=show&redirect=SecurityTeam%2FSecureBoot
https://askubuntu.com/questions/755238/why-disabling-secure-boot-is-enforced-policy-when-installing-3rd-party-modules
Discussion about Secure Boot: https://www.reddit.com/r/linux/comments/21k19p/why_should_i_use_secure_boot/
How to sign the Linux kernel and enable secure boot:
https://ubuntu.com/blog/how-to-sign-things-for-secure-boot
Advanced Installations
I will link to posts regarding Advanced Linux Installation here
Installing Linux on an M.2 SSD drive
Install Linux on 2 disks.
Special Mention
Thank you Tech Target for making very good explanations of computer components.