Installation of TrueNAS on Bare Metal
How-To: TrueNAS Setup Part 1
16th April, 2023
Updated 3rd October 2025
Update: TrueNAS has evolved rapidly since I last installed it. TrueNAS Core is deprecated and TrueNAS Scale is the new community edition. It is no longer based on FreeBSD but on Linux as the core OS. Therefore, I have updated the install instructions.
The Setup
The goal is to install TrueNAS on a server, connect it to an iSCSI target and use it as a Hypervisor platform.
Involved Hardware and Software
Hardware
This is the hardware and intended setup used:
Notes:
This is the hardware I happened to have laying around. A recommended setup would involve a TrueNAS storage array. I didn’t know about TrueNAS or storage design in general when I acquired the Synology NAS. It’s all trial and error.
It’s very handy to have 4 ethernet ports available on the server. I recommend having one port dedicated for MGMT of the system.
Any switch that supports VLANs and LACP will do.
Software
I’m going to install TrueNAS Community Edition
Installation of TrueNAS
Step 0: You need to have a bootable media of the TrueNAS image. You can use Balena Etcher to create a bootable media in Linux or Windows. Here are Install instructions for Debian-based or Redhat-based platforms.
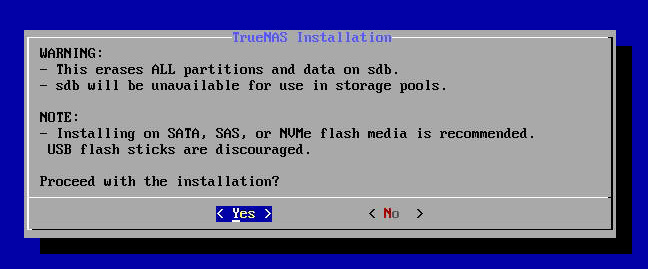
Step 1: Start the installation.
You can either install it directly connected to the machine; or use the IPMI, iLO, iDRAC interface or whatever it’s called on your specific system. It’s up to you.
Step 2: Choose a disk
When choosing multiple disks, TrueNAS will be installed on both disks. If one disk fails, you can just replace it and the system will be intact.
Notes:
I ended up installing it on only one disk because I do not have 2 identical disks and the server doesn’t have space
The whole disk will be reserved for the TrueNAS system so there is really no need to use your 1TB NVMe for this. That is better used for caching.
Note: I’m considering if I should invest in a Supermicro SATADOM, or “SuperDOM” as they call it. It is a small 32GB SSD that can be installed directly on the motherboard. Check this article for an example.
Confirm:
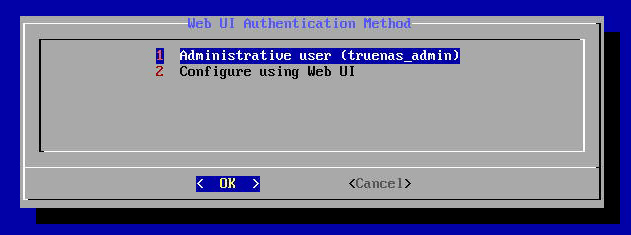
Step 3: Enter a password for the truenas_admin user
Step 4: You should now be at the stage where the installation is completed. Reboot the system and remove the installation media.
Basic Setup after Installation
The only thing you need to do from the TrueNAS console is to setup the MGMT interface so you can reach the webinterface. Once you have done that, you can login with root and the password you set during the installation.
Note: If there is DHCP in the network, TrueNAS will use that and you will be shown which IP to use to reach the web UI. You can change to manual settings inside the web UI.
Set Static IP from WebUI
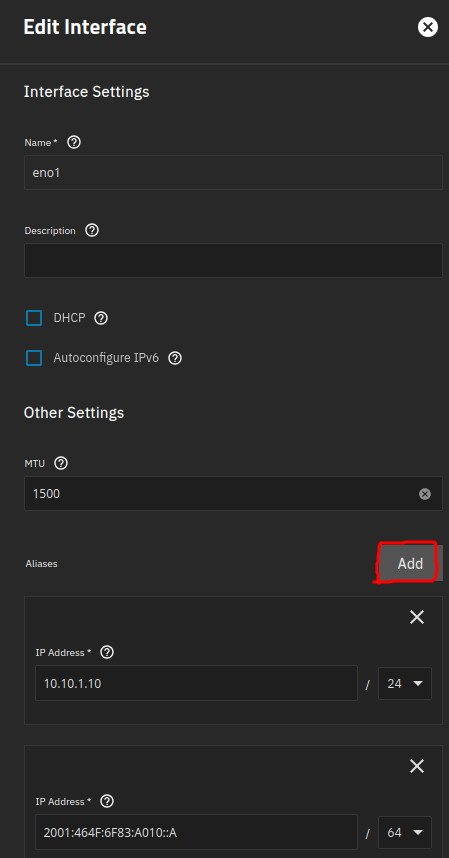
To set IP static IP address on TrueNAS Scale is a bit confusing. YOu have to disable DHCP and add "aliases"
Navigate to Network > eno1 > edit
Disable DHCP for IPv4 and IPv6. Then you can add IP addresses by clicking Add under aliases
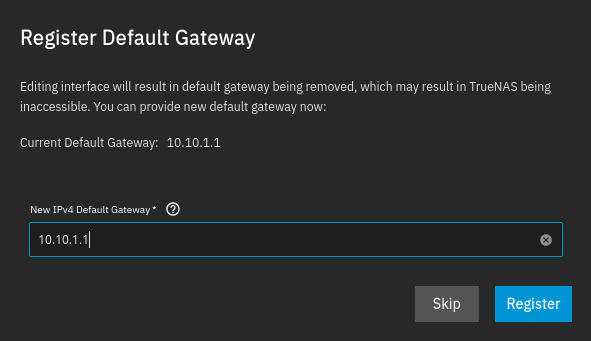
When clicking save, you get to enter the new default gateway but for IPv4 only. The default gateway for IPv6 will be automatically recognized by IPv6 RA's.
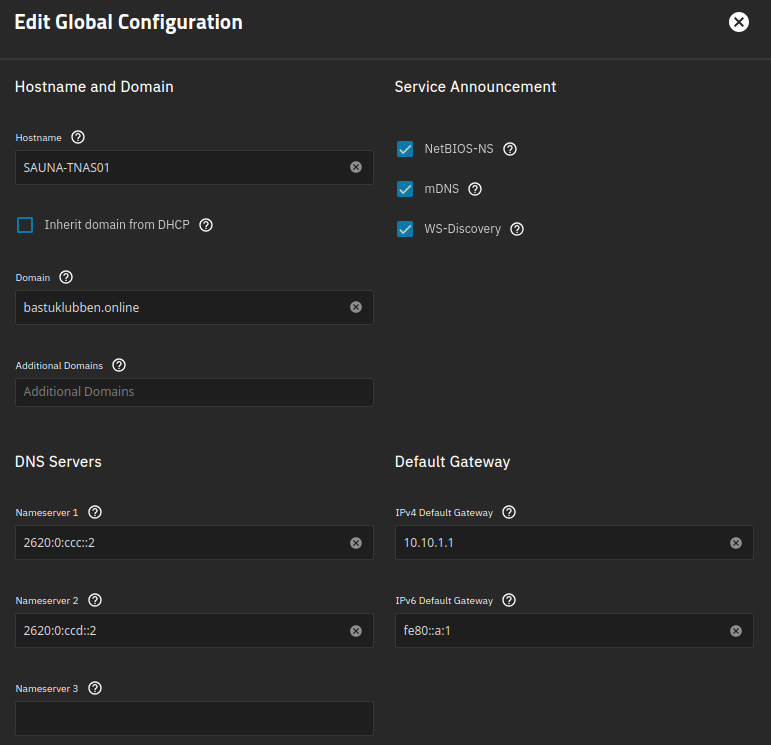
Global Configuration Settings
Global network configuration settings like hostname and DNS servers can be set under Network as well by clicking Settings under Global Configuration
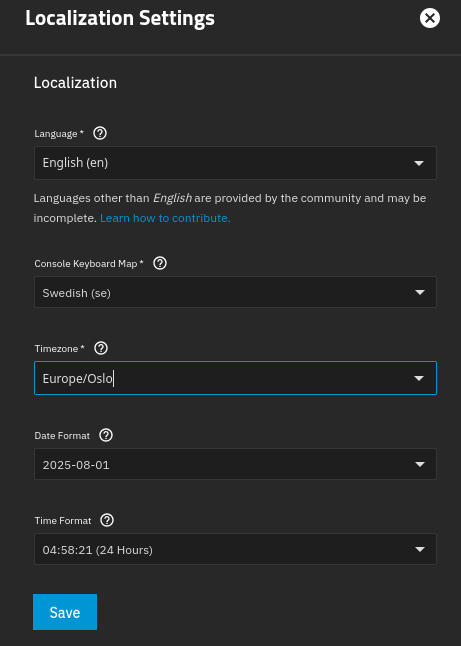
General Settings
Under System > General Settings > Localization > Settings you can set the correct Timezone and Keyboard Layout.
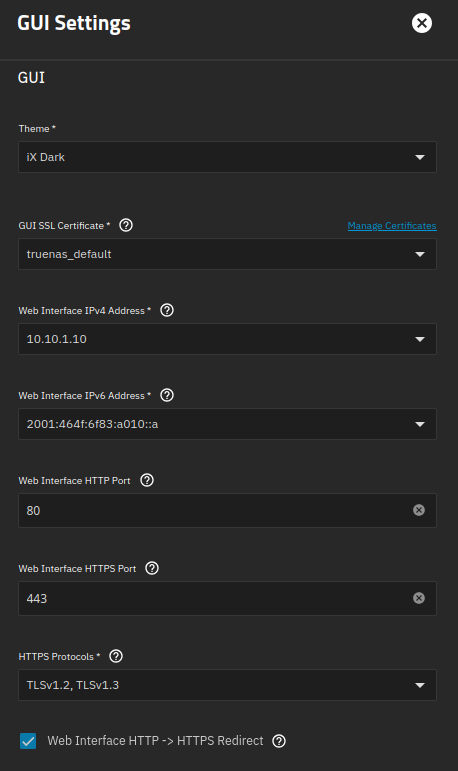
Under General Settings > GUI Settings you can edit settings related to the WebUI like allowed IP’s, SSL certificate used and enable HTTPS redirect:
Note: A warning comes up when you activate HTTPS redirection, notifying you that some apps may become inaccesible if they only use HTTP.
And that concludes the first guide. Next is to setup addtional network interfaces, iSCSI initiator and Storage Pools.
Advanced Settings
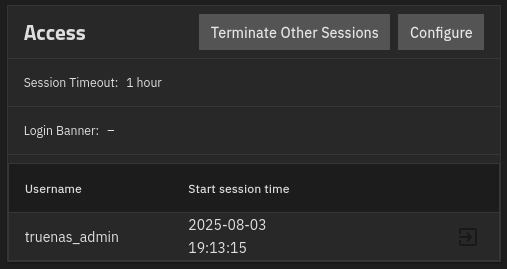
Under System > Advanced Settings there are things like setting up Cron Jobs or add sysctl configuration but the one setting you probably want to edit right away is the default session timeout period of 5 minutes.
Enable SSH
Step 1: Navigate to System > Services and start and enable SSH
Step 2: Navigate to Credentials > Users > truenas_admin > edit and enable SSH login with password or upload an SSH key:
Related Posts
TrueNAS: Open Source Storage and Hypervisor Alternative
TrueNAS Setup Part 2: Network and Storage
TrueNAS Setup Part 3: Virtual Machines and Networks
TrueNAS Setup Part 4: Configuring LDAP and Certificates


