
Install Open Media Vault 7 on a Raspberry Pi5
How-To: RPI, OMV7

Thursday 31st July 2025
Open Media Vault is an open source frontend for Do-It-Yourself NAS builds. It got features like:
ZFS RAID with Snapshots;
Samba share;
NFS, SFTP and Rsync;
Docker Compose;
and more
Pretty much all the things you need to run Nextcloud and other applications. The only thing that is concerning is that it is maintaned by one guy, Volker Theile. He may not be the sole contributor, but if you consider using OMV, please consider to make a donation so he can keep maintaining the application.
I’m going to install OMV7 on a Raspberry Pi5. I would like to use TrueNAS for this but it’s not supported on a RPI. However, OMV is a good lightweight alternative that only requires 4GB of RAM.
Install Open Media Vault 7
The documentation for installing OMV 7 on a RPI is very detailed. Therefore I recommend reading that if something is unclear.
Instructions on how to install OMV on a RPI:
https://wiki.omv-extras.org/doku.php?id=omv7%3Araspberry_pi_install
Install OMV
Enter this command to execute the pre-install script:
sudo wget -O - https://github.com/OpenMediaVault-Plugin-Developers/installScript/raw/master/preinstall | sudo bashThen enter this command to install OMV:
wget -O - https://github.com/OpenMediaVault-Plugin-Developers/installScript/raw/master/install | sudo bashAfter 5 min or so you should be able to browse to your PiNAS IP address. Default username/password is admin/openmediavault
Update OMV
Install any updates available before proceeding with any other configuration. In the left pane click System > Update Management
User Settings
Click the user icon in the top right corner and activate Dark Mode.
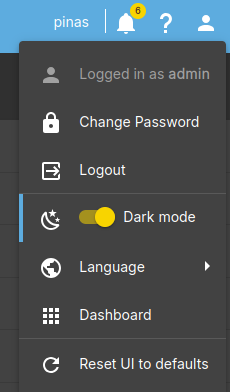
As you can see you can also change the password and edit the Dashboard from here.
Network Settings
When OMV is installed, you can’t make changes to the hostname or network settings from the CLI anymore. They will be overwritten by OMV. You have to configure it from the GUI instead.
Change hostname and domain name
Navigate to Network > General. Here you can set hostname and domain name.
Changes will be visible in the /etc/hostname and /etc/hosts files in CLI.
Change network settings
Under Network > Interfaces you can edit your IP settings. You can also add interfaces, bonds and VLANs.
Other Network Related Settings
There is also HTTP Proxy and Firewall Settings but those are out-of-scope for this article.
Activate HTTPS
As you might have noticed, only unencrypted HTTP is available by default.
Create a self-signed SSL certificate
I have no intention of making the OMV 7 interface reachable over the Internet. Therefore I’m OK with a self-signed certificate until I have my own CA setup.
Navigate to System > Certificates > SSL. Click the + icon and choose create.
Here you can specify your settings for the cert. My settings are:
Key Size: 4096
Validity: 5 Years
Common Name: Set to FQDN
There is no way to add more SANs
Tags are used to identify the cert inside OMV settings
Activate HTTPS login
Navigate to System > Workbench
Activate Secure Connection and choose your cert (identified by the tag set earlier).
Note: After activating SSL I got “server error” but there was no problem. I Just changed to “https://” and it was alright.
Setting up ZFS RAID Z1
The one thing I assumed OMV would be able do out of the box is to configure RAID, but no. You need to install a plugin first.
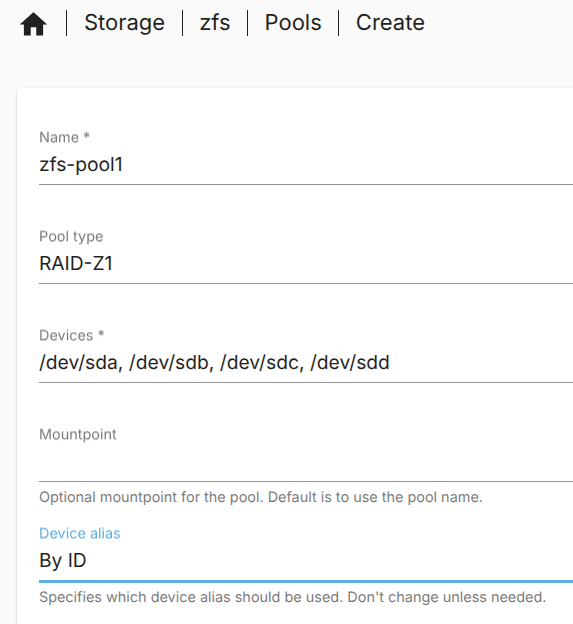
Go to System > Plugins and search for “zfs”. Install the openmediavault-zfs plugin.
Note: At the time of writing there was a bug that prevented the plugin from being installed. I had to install these specific version of these dependencies for the installation to succeed:
sudo apt install libzfs6linux=2.3.1-1~bpo12+1
sudo apt install libzpool6linux=2.3.1-1~bpo12+1
Create a ZFS Pool
After that, navigate to Storage > zfs > Pools and create a zfs pool:
Create filesystem
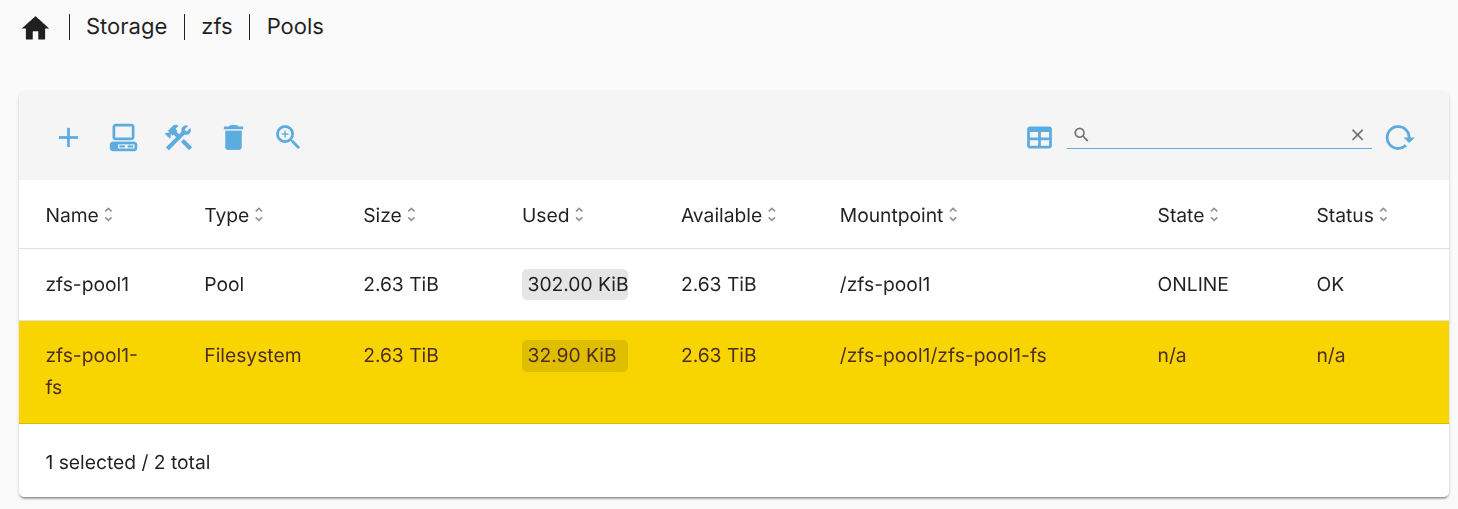
To be able to use the ZFS pool for fileshares, you need to create a filesystem.
Navigate to Storage > zfs > Pools. Mark your pool, click on the + icon and choose add filesystem. Result when finished:
Setup automated ZFS Snapshots
It’s always nice to have Snapshots configured in case somethings goes awry down the line. To setup automated snapshots, just follow the instructions on the following link:
https://wiki.omv-extras.org/doku.php?id=misc_docs:auto_zfs_snapshots
Installation
wget https://github.com/zfsonlinux/zfs-auto-snapshot/archive/upstream/1.2.4.tar.gz
tar -xzf 1.2.4.tar.gz
cd zfs-auto-snapshot-upstream-1.2.4
make install
This script will install some cron-jobs that automatically creates snapshots every 15th minute, daily, weekly and monthly with rotation (read the docs for details).
Configuration
Activate automated snapshots for the zfs pool “zfs-pool1”:
zfs set com.sun:auto-snapshot=true zfs-pool1To disable automated snapshot creation every 15 minute:
zfs set com.sun:auto-snapshot:frequent=false zfs-pool1Verification
To view snapshots you can either do it in the GUI under Storage > zfs > Snapshots or execute following command in the CLI:
zfs list -t snapshotAlternative: RAID 5
If you prefer regular RAID 5, you can install the openmediavault-md plugin.
After installation, navigate to Storage > Multiple Devices. From there you can configure different RAID levels.
Setting up Docker Compose on OMV
Docker will be needed to install Nextcloud AiO later.
Source: https://wiki.omv-extras.org/doku.php?id=omv7:docker_in_omv
Note: There is a lot of good information on the link above so I recommend reading that. I’m only summarizing all the steps.
1 Install Docker Compose
In the Left pane under Plugins there is omv-extras. Go there and enable Docker repo
Then go to Plugins. Search for "compose" and install openmediavault-compose
2 Configure filesystems
Navigate to Storage > Shared Folders
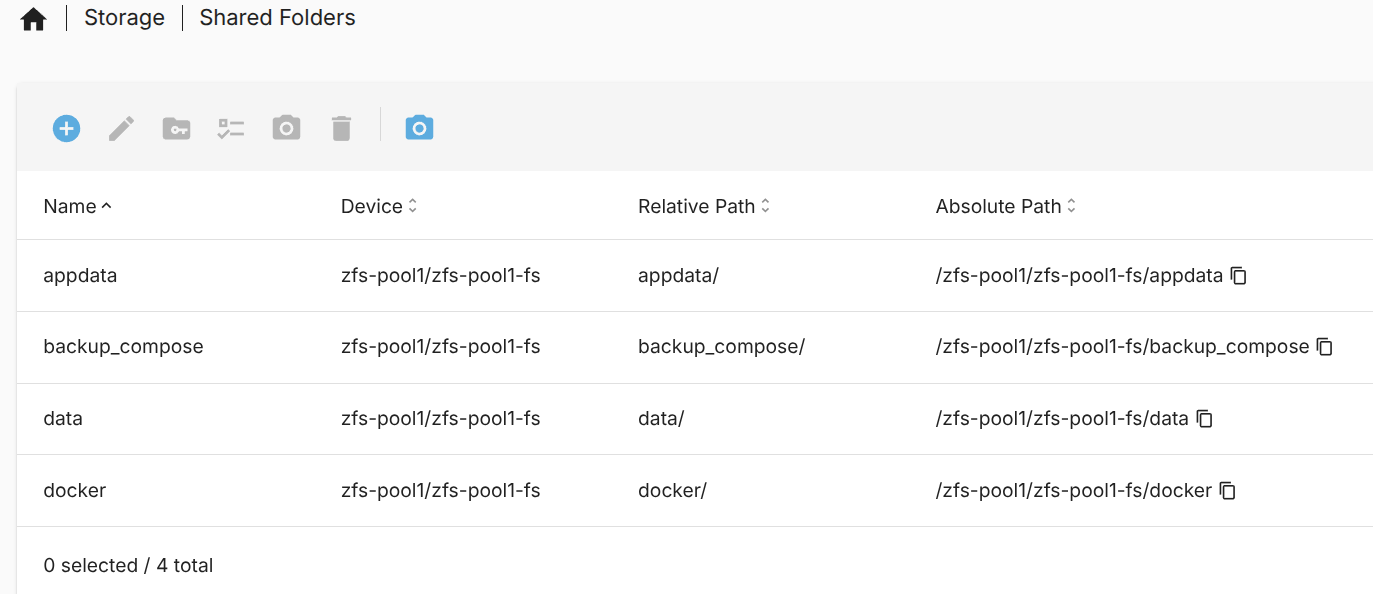
Create following Linux directories in the ZFS filesystem with relative paths:
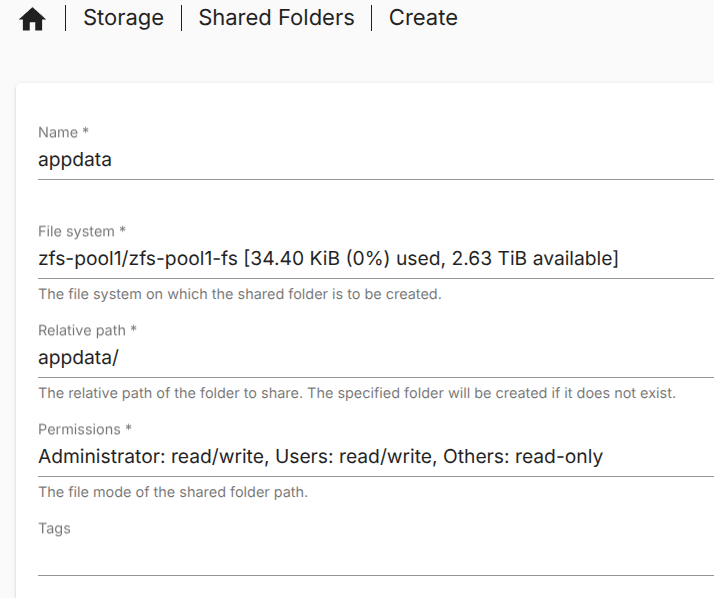
appdata: /appdata. Default Permissions
data: /data. Default Permissions
backup_compose: /backup_compose. Default Permissions
docker: /docker. Default Permissions
Example:
Result:
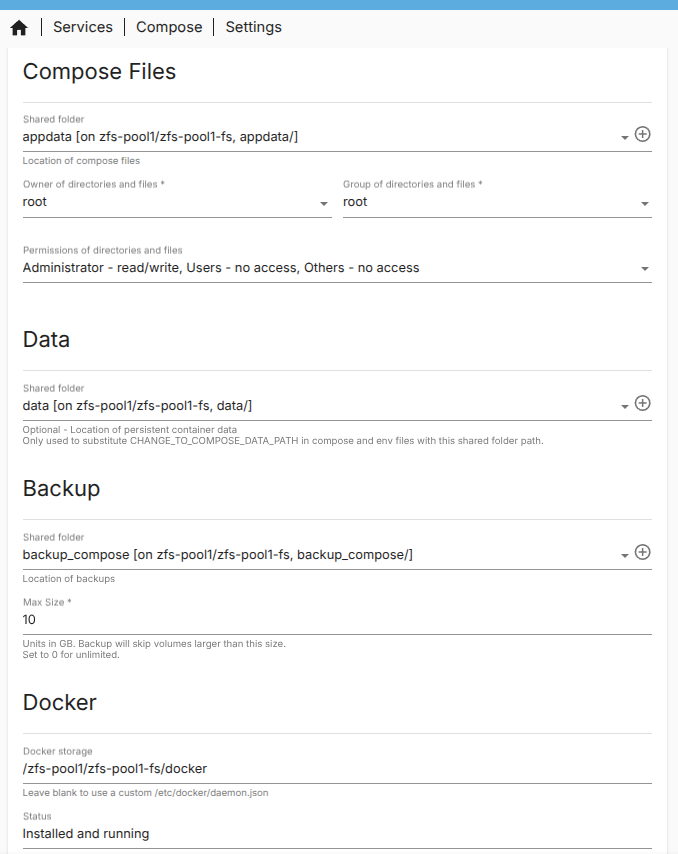
Navigate to Services > Compose > Settings
Compose Files: /appdata. Permissions: Admin=rw, Users=none, Others=none
Data: /data.
Backup: /backup_compose. Max Size: 10 [GB]
Docker: Docker Storage=/zfs-pool1/zfs-pool1-fs/docker
Result:
3 Configure a container management user
For increased security, the OMV documentation recommends creating a separate user to be used for container management. I gave it the name “appuser”.
Navigate to Users > Users. Add a user with a username and password
Add the to following groups:
render*
video*
appdata
* According to the documentation: “Used for hardware transcoding with an Intel GPU”. Not sure if needed but I’ll add it anyway.
Note: More groups may be necessary when Nextcloud or other container applications get installed.
Warning: Don't add the user to the docker group. This is a security hole.
4 Set global environmental variables
These variables can be used inside Docker Compose projects later. Go to Services > Compose > Files and click the Edit global environment file icon.
The documentation recommends following variables. Adjust to your setup:
# THE FOLLOWING VARIABLES CAN BE USED IN ANY COMPOSE FILE
# THEIR VALUE WILL BE REPLACED BY THE VALUE ASSIGNED HERE
# YOU CAN ADD AS MANY VARIABLES AS YOU NEED
#
#
# Customize the PID and GID value of your appuser user.
# You can see it in the OMV GUI in the USERS > USERS tab
#
APPUSER_PUID=1001
APPUSER_PGID=100
#
# Customize your time zone value.
# You can see it in the OMV GUI in the SYSTEM > DATE & TIME tab
#
TIME_ZONE=Europe/Oslo
#
# In this file you can define how many paths you need for different compose files.
# The following are examples corresponding to the example system in the Docker on OMV document on the omv-ext>
# Customize the values according to your system configuration.
#
# THE FOLLOWING VARIABLES CAN BE USED IN ANY COMPOSE FILE
# THEIR VALUE WILL BE REPLACED BY THE VALUE ASSIGNED HERE
# YOU CAN ADD AS MANY VARIABLES AS YOU NEED
#
#
# Customize the PID and GID value of your appuser user.
# You can see it in the OMV GUI in the USERS > USERS tab
#
PATH_TO_APPDATA=/zfs-pool1/zfs-pool1-fs/appdata
PATH_TO_DATA=/zfs-pool1/zfs-pool1-fs/data
PATH_TO_BACKUPS=/zfs-pool1/zfs-pool1-fs/backupsNote: You can define other variables according to your needs, such as database passwords or any value your compose file needs.
Now OMV 7 is set up fairly adequate. Next post will cover the Nextcloud AiO installation.
Special Mention
Thank you Volker Theile for your awesome application and especially for the very detailed documentation.