
Install EJBCA with Podman/Docker Compose
How-To: EJBCA Installation


Monday 18th August 2025
EJBCA by Keyfactor is an highly sophisticated open source Certificate Authority solution with alot of features (some which requires enterprise support). It supports virtually every cryptographic algorithms and keysizes you need, from RSA, ECC, ED25519 and even post-quantum ready algorithms.

I was going to write about how to install EJBCA as a virtual machine in the summer of 2023, but I never got it to work (whole July wasted). The installation was so complex that I don’t know what to compare it with.
Fast forward to present time when I tried with a compose setup; it took me less than an hour, just because I wanted to change some defaults. That is just jaw-dropping when thinking of how much time I could have saved if I just started containerize my infrastructure earlier.
Install EJBCA
Compose.yml
The EJBCA official instructions can be found here:
https://docs.keyfactor.com/ejbca/latest/tutorial-start-out-with-ejbca-docker-container
Note: It’s really nothing wrong with the instructions in that link. They are very clear and even includes videos on how to do it step-by-step. You might aswell follow them. I’m mostly documenting this for myself.
My version of the compose.yml file:
services:

  ejbca-database:
    container_name: ejbca-database
    image: "library/mariadb:latest"
    restart: unless-stopped
    networks:
      - application-bridge
    environment:
      - MYSQL_ROOT_PASSWORD=${EJBCA_DB_ROOT_PASSWORD}
      - MYSQL_DATABASE=${EJBCA_DB_NAME}
      - MYSQL_USER=${EJBCA_DB_USER}
      - MYSQL_PASSWORD=${EJBCA_DB_PASSWORD}
    volumes:
      - ./datadbdir:/var/lib/mysql:rw,Z,U

  ejbca-node1:
    hostname: ejbca-node1
    container_name: ejbca
    image: keyfactor/ejbca-ce:latest
    depends_on:
      - ejbca-database
    restart: unless-stopped
    networks:
      - internal-services
      - application-bridge
    environment:
      - DATABASE_JDBC_URL=jdbc:mariadb://ejbca-database:3306/${EJBCA_DB_NAME}?characterEncoding=UTF-8
      - DATABASE_USER=${EJBCA_DB_USER}
      - DATABASE_PASSWORD=${EJBCA_DB_PASSWORD}
      - LOG_LEVEL_APP=INFO
      - LOG_LEVEL_SERVER=INFO
      - TLS_SETUP_ENABLED=simple
    ports:
      - "[2001:DB8:1234:B001::2]:8080:8080"
      - "[2001:DB8:1234:B001::2]:8443:8443"

networks:

  internal-services:
    external: true

  application-bridge:
    driver: bridge
    enable_ipv6: true
    ipam:
      config:
        - subnet: 2001:DB8:1234:B008:3::/80
          gateway: 2001:DB8:1234:B008:3::1
        - subnet: 100.111.3.0/24
          gateway: 100.111.3.1
Explanation:
The environment variable
TLS_SETUP_ENABLEDis only required for initial setup and can be removed when initial configuration has been done.This playbook can be run in Podman Rootless mode and also works with docker. I’m using Podman but you can just replace any “podman” command reference with “docker” if you are using that.
the options “Z,U” are special for systems with SELinux and can be omitted on other distributions like Debian.
Networks are optional to tweak. I personally like to have control over how networks are being configured.
Custom Environment variables
This is the content of the .env file:
EJBCA_DB_USER=sauna
EJBCA_DB_PASSWORD=foo
EJBCA_DB_NAME=sauna-ejbca
EJBCA_DB_ROOT_PASSWORD=foo
IPA_PASSWORD=foo
Start the Container
When you start the container with podman compose up -d, you can follow along with podman compose logs -f.
The first time you start the container can take a while
Initial Configuration
Installation used to be the hard part, until containers arrived. The configuration is pretty straight forward, as long as you follow the instructions in the tutorial.
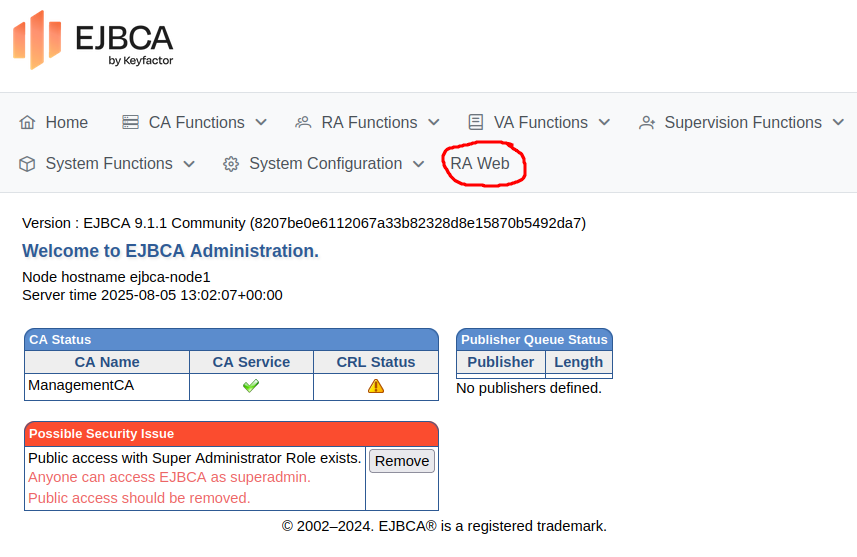
When the container is completely setup, anyone can access it initially. You need to create the SuperAdmin certificate and install it on your machine.
Create the Superadmin user certificate
Browse the configured IP:
https://[2001:DB8:1234:B001::2]
Click RA Web to access the EJBCA RA UI.
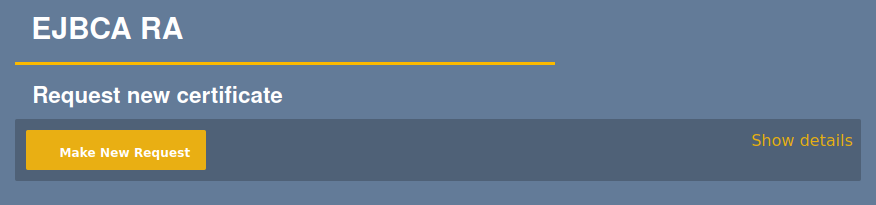
Under Request new certificate, select Make New Request.
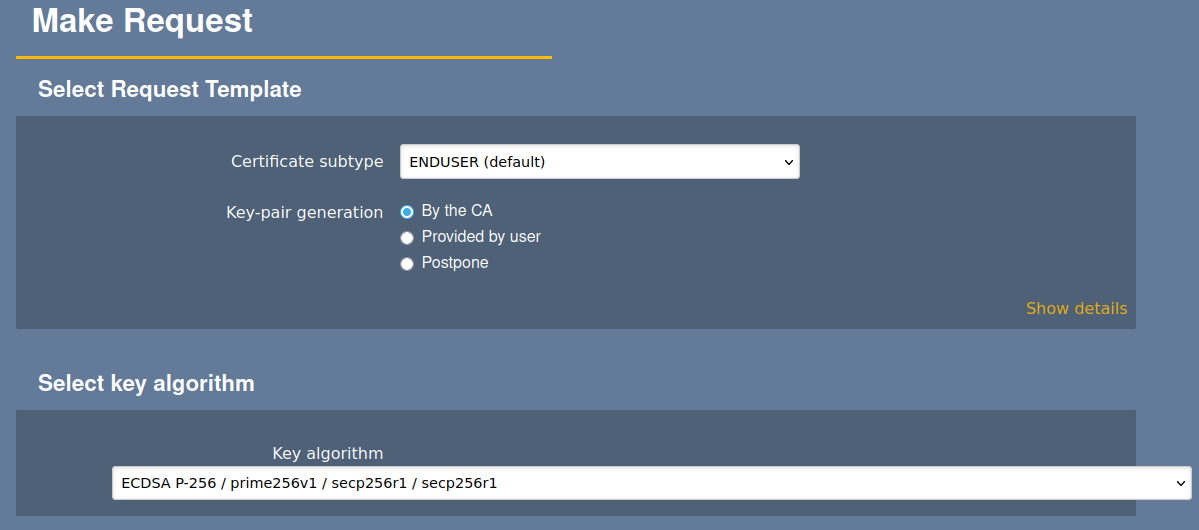
Update the following information:
For Select Request Template Certificate subtype, select ENDUSER (default).
For Key-pair generation, select By the CA.
For Key algorithm, It's tempting to use ED25519, but that is not supported by any common browser. I choose ECDSA p-256 because I'm familiar with it. It is at least more efficient than RSA.
For the Required Subject DN Attributes Common Name, specify SuperAdmin.
Nothing under Optional attributes need to be entered
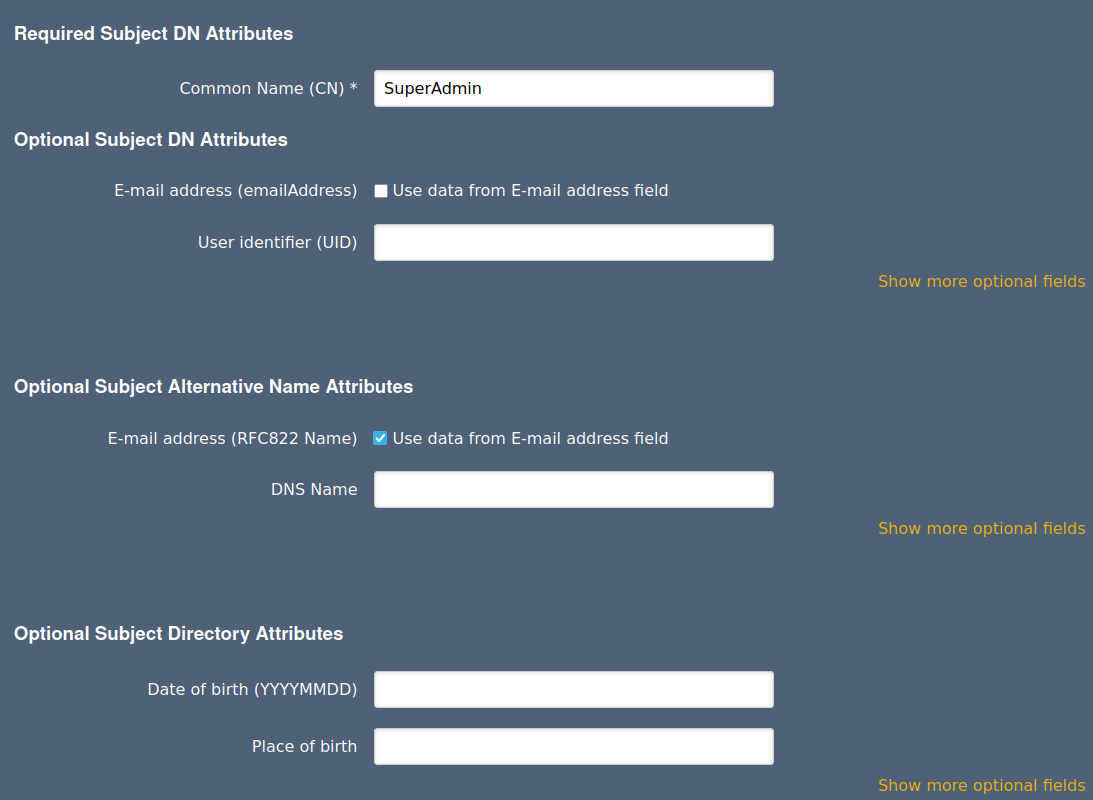
Under Other Data, clear Key Recoverable.

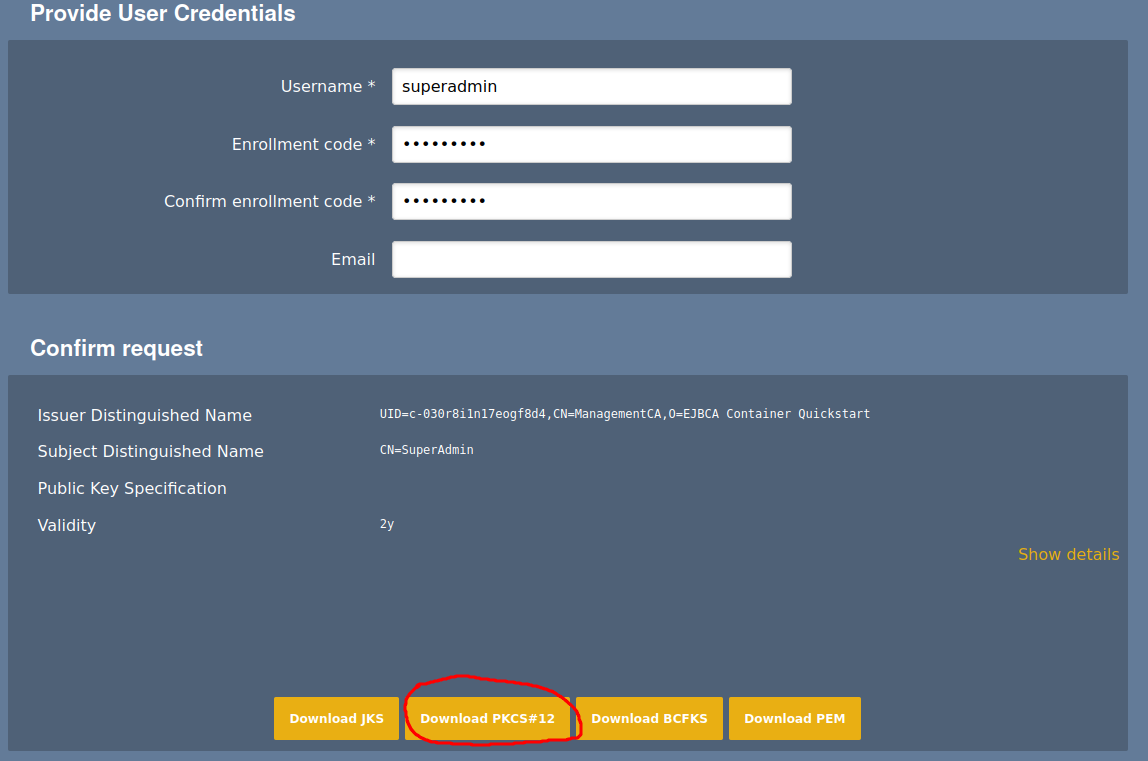
For Provide User Credentials, specify Username "superadmin" and a password (enrollment code) to save this in the EJBCA database under the user name superadmin.
Last, click Download PKCS#12 to download the certificate.
Import certificate into browser
To import the certificate in Mozilla Firefox:
On the Firefox menu, select Settings.
Click Privacy & Security. Scroll down to the Security section and click View Certificates…
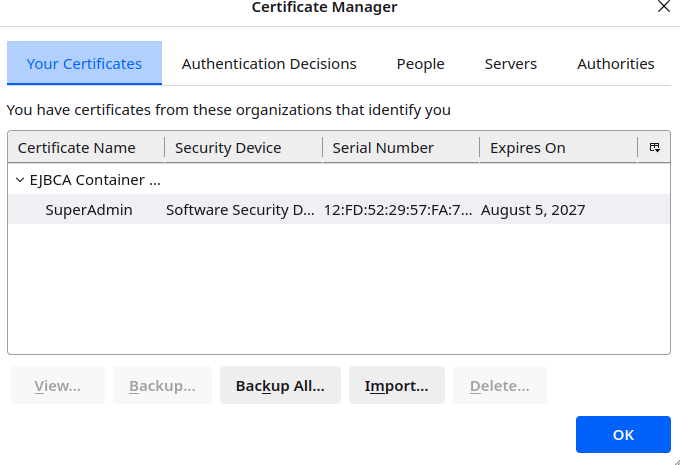
On the Your Certificates tab, select Import. Browse to the downloaded SuperAdmin.p12 and select the file.
For the password enter the enrollment code set in the previous step and click Sign in.
On the Mozilla Firefox tab Your Certificates, verify that the certificate was imported, and then click OK.
Access EJBCA as Administrator
To create an administrator account and lock down access to EJBCA to only the SuperAdmin adminitrator, perform the following steps.
Create Administrator Account
To add the administrator user to the Super Administrator Role:
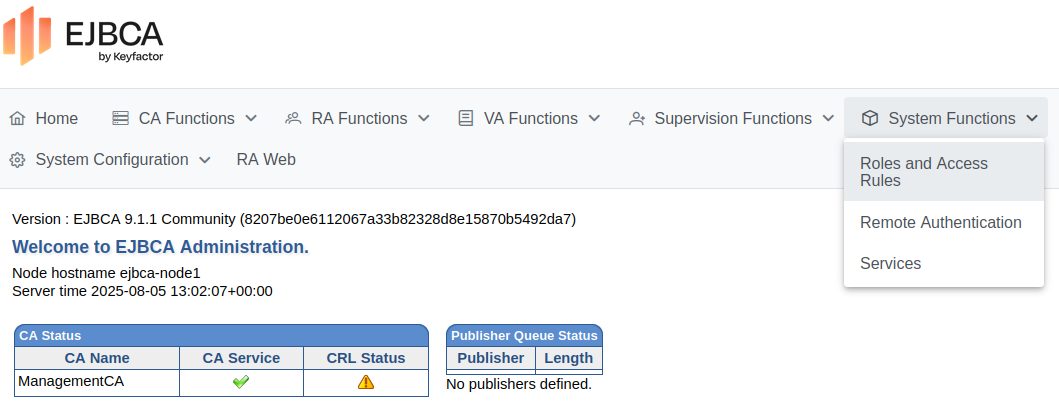
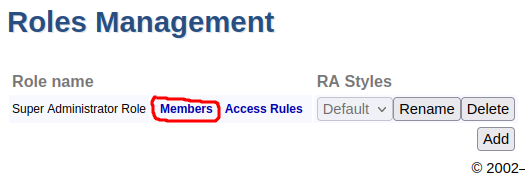
In the EJBCA menu, click System Functions > Roles and Access Rules.
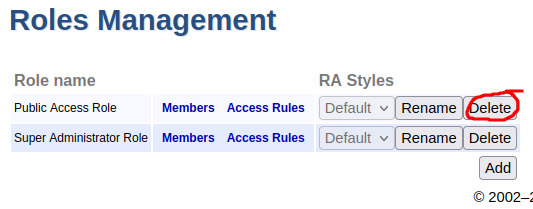
In the list of available roles, next to Public Access Role, click Delete and verify the deletion of the role. The Roles Management page now lists the Super Administrator Role.
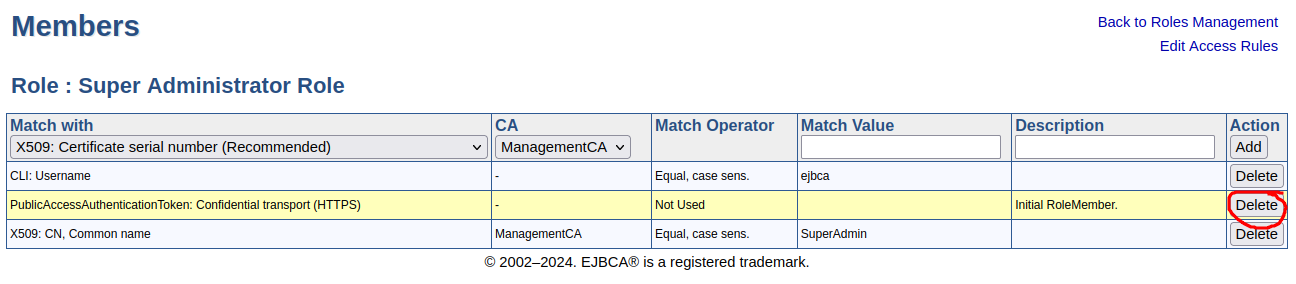
Next to the Super Administrator Role, click Members.
Specify the following for the admin role:
Match with: Select X509:CN, Common name.
CA: Select Management CA for the CA to match on.
Match Value: The CN value from the created certificate: "SuperAdmin". Note that this is a case-sensitive matching.
Click Add to add the user to the Super Administrator Role.

Access EJBCA as Administrator
Restart the EJBCA Container
podman compose restartBrowse back to the webinterface. When prompted for the SuperAdmin certificate, ensure the correct certificate is selected, and click OK.
Restrict Access to EJBCA
To lock down access to EJBCA to only the Super Admininistrator, do the following:
In the EJBCA menu, click System Functions > Roles and Access Rules.
Next to the Super Administrator Role, click Members. In the list of available members, for the PublicAccessAuthenticationToken, click Delete and verify the deletion of the role member.
Creating Root CA, Subordinate CA and Endpoint Certificates
EJBCA already has great documentation on how to setup these things with short video tutorials. Therefore it’s not necessary for me to share my notes, at least not here. Just start from here and in a few hours you will have a descent Open Source PKI infrastructure.
I might document my personal notes somewhere else in the near future anyway. I’m considering to move all my How-To’s to a BookStack server and keep this Substack for more suitable newsletter articles.
Special Mention
PKI is an extremely complex topic and if you want to set it up fast, you need to have excellent documentation. There is no way to be an expert on this without years of experience. Therefore I want to thank the people from Keyfactor for their very well documented tutorials.