
Building your own NAS or Nextcloud Server out of a Raspberry Pi 5
How-To: Raspberry Pi5

Monday 21st July 2025
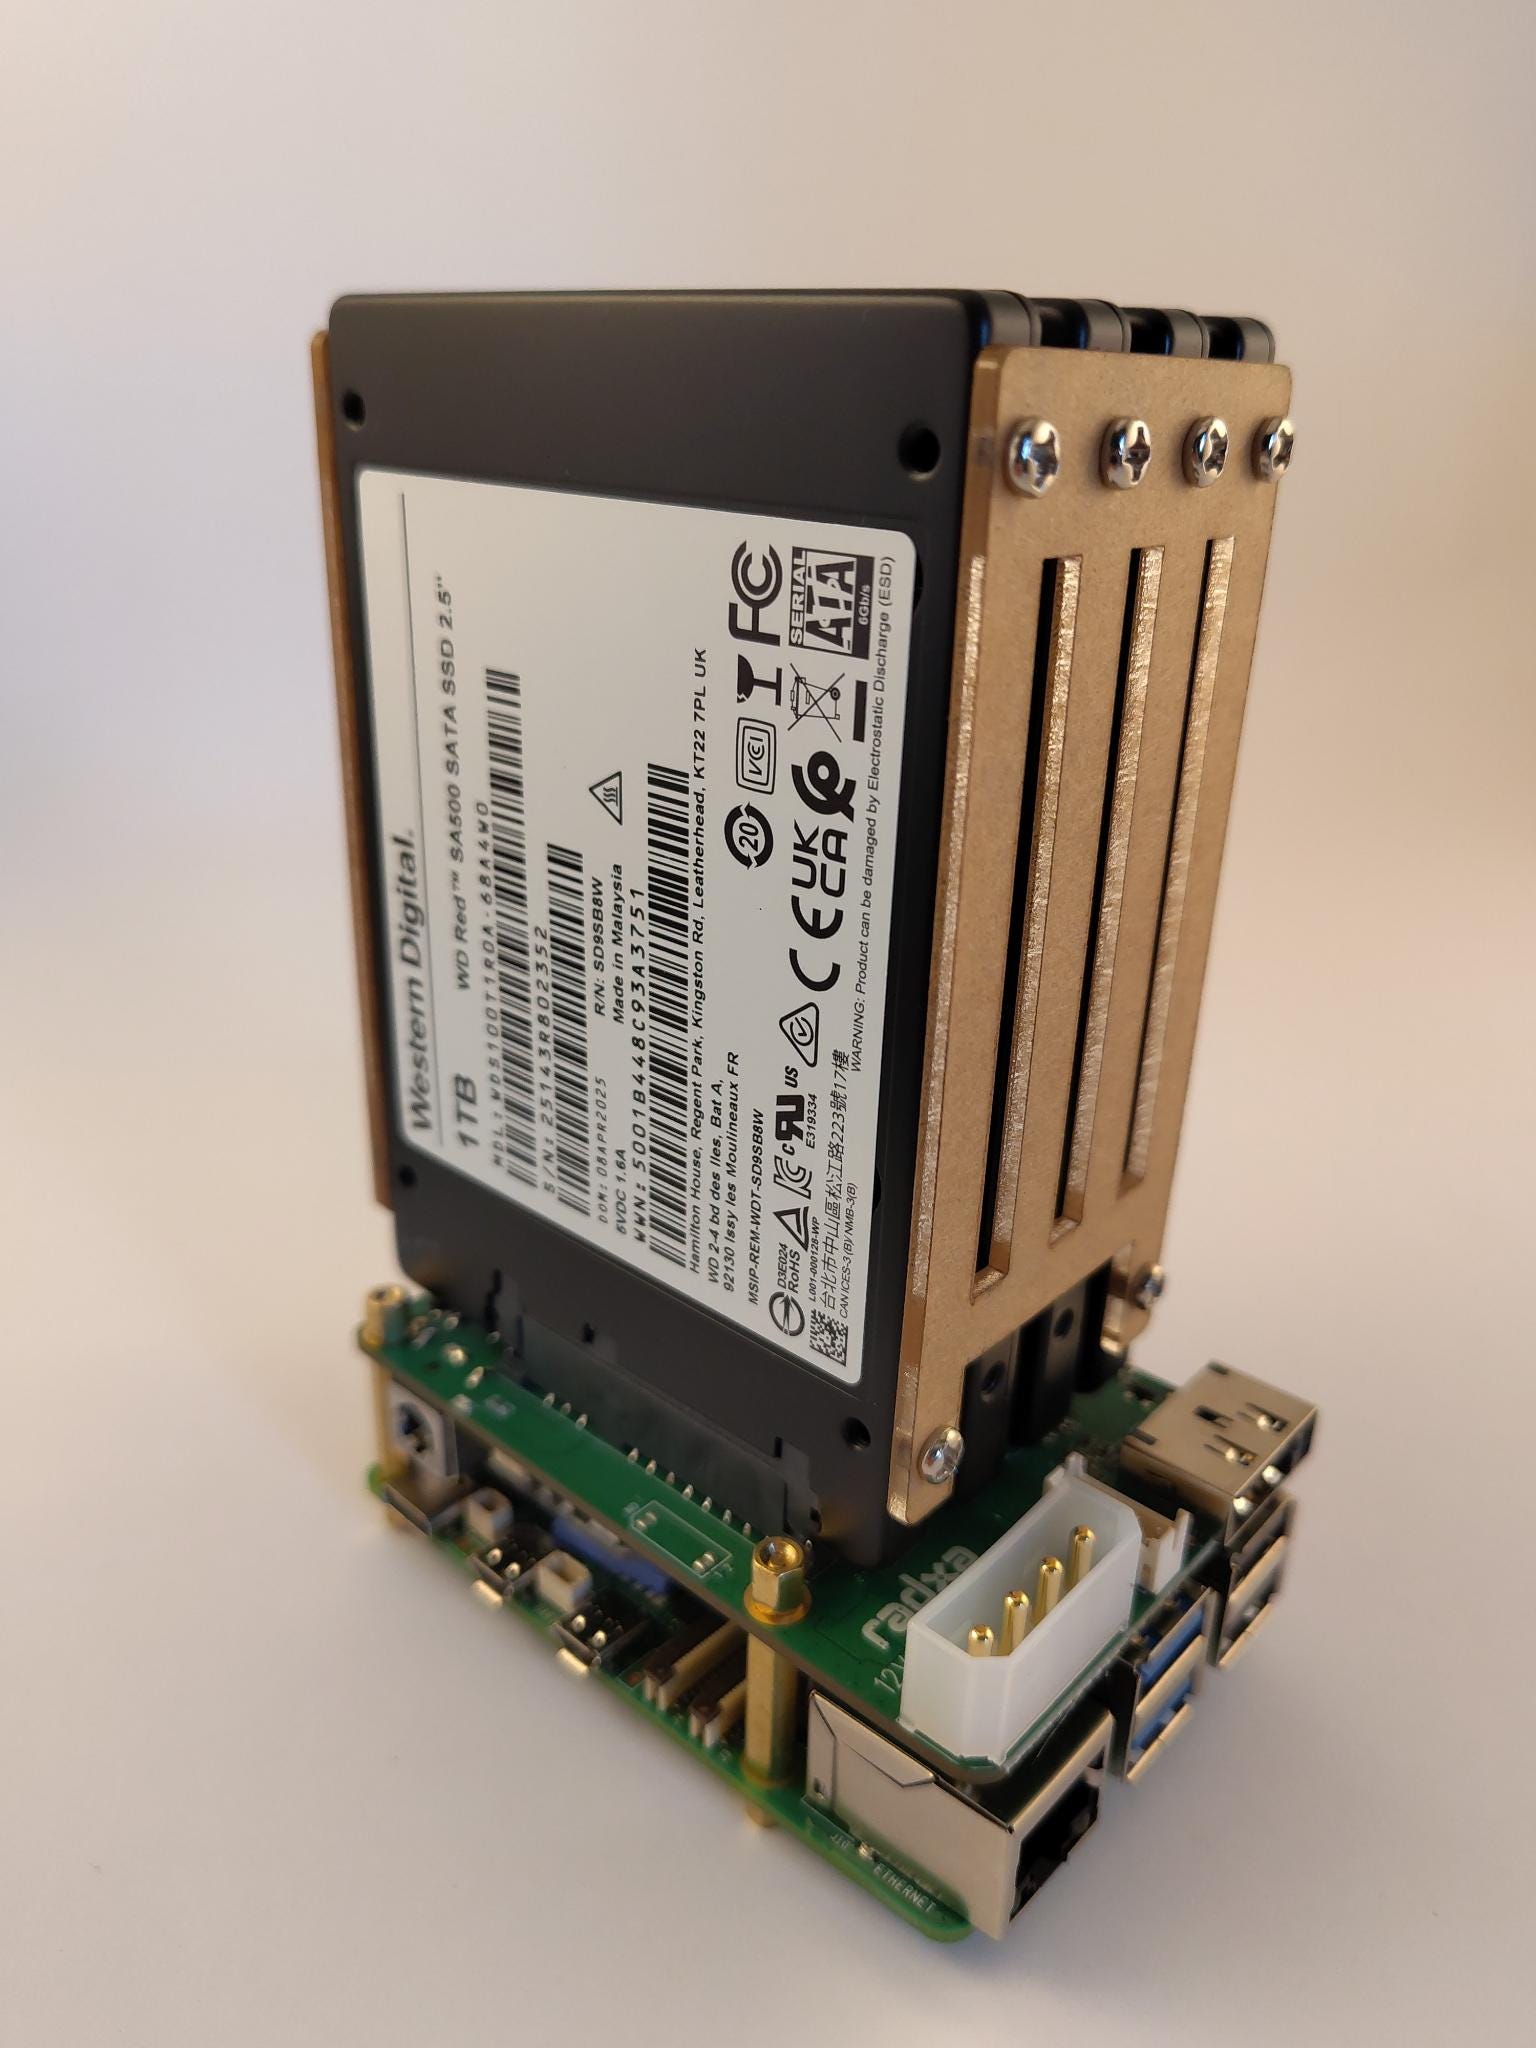
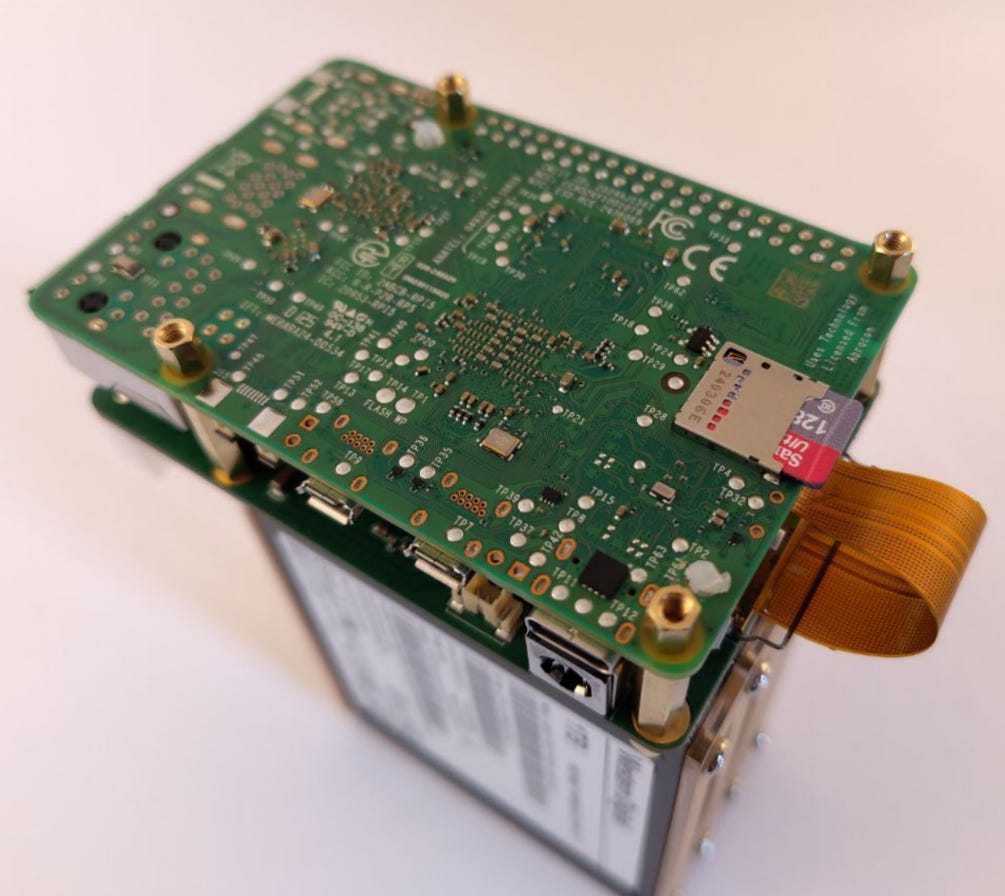
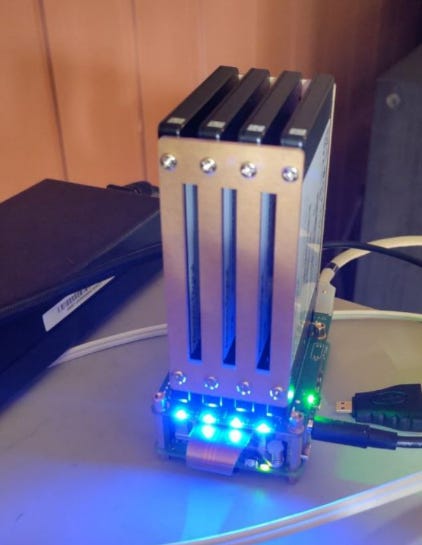
I was wondering how cheap you could build a 4 bay NAS to put Nextcloud on it for home users and small businesses, to have an option to store their data at home, instead of trusting a centralized cloud provider with it. I then stumbled upon Jeff Geerling on Youtube which I immediately became a fan of. I decided to build my own NAS based on his build. Here is how it looks:
I also found this post from Michael Klements, showcasing a great enclosure that you can build yourself, if you have a 3D printer:
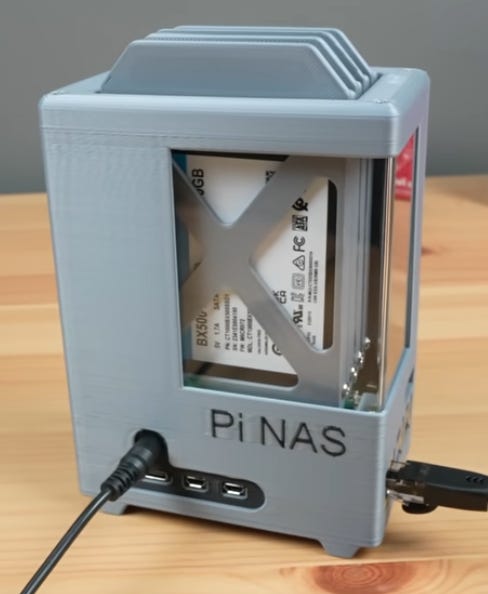
Note: I found out that he also built a PiNAS using 3,5” drives and shared his 3D print for that as well:
Assembling the NAS
Required Parts
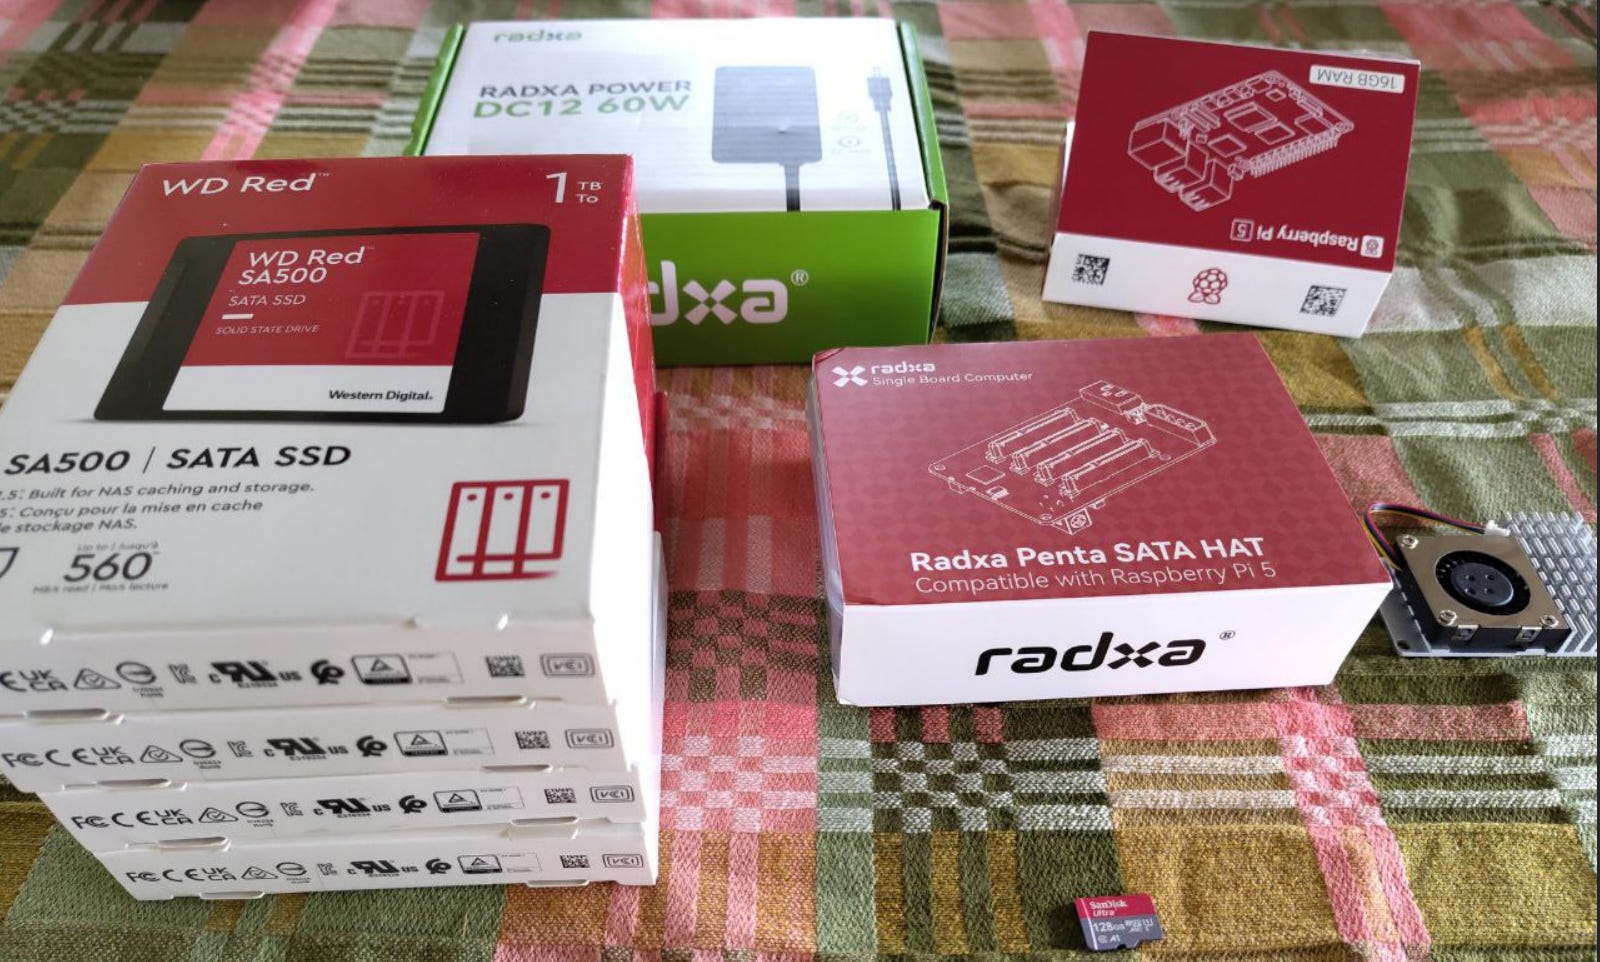
Here is the shopping list:
Compute Module: Raspberry Pi5 8GB RAM (minimum)
Memory Card: 32GB (minimum)
NAS Module: Radxa Penta SATA HAT
Power Adapter: Radxa Power DC12 36W
Cooling: Raspberry Pi 5 Active Cooler
NAS Storage: x4 2,5 SATA SSD Drives
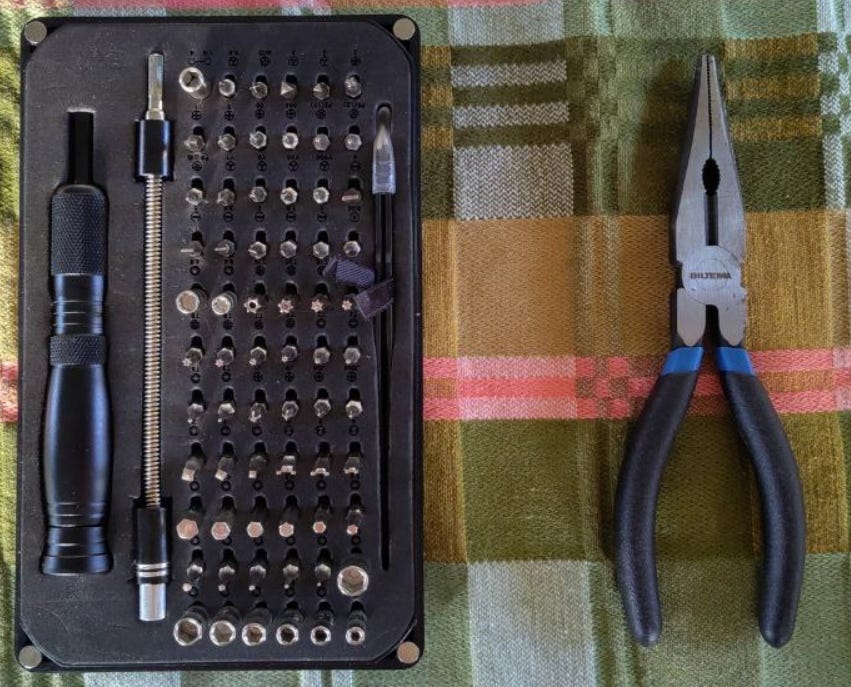
Tools needed:
Multibit Screwdriver with bitset
Needlenose plyer
Assembling the NAS
I was going to make this a very detailed How-To with a lot of pictures, but RADXA actually have a very comprehensive setup guide already:
https://docs.radxa.com/en/accessories/penta-sata-hat/penta-for-rpi5
Therefore I’m only going to include the important parts.
Installing the Active Cooler
One caveat is that the power input connector on the RADXA penta SATA hat is touching the heat sink of the active cooler when installed. That can be fixed by cutting half of the the three pins on the heatsink that interferes. I managed to bend them off using a needlenose plyer. I would do this first before installing the cooler onto the Pi5.
The active cooler comes with three thermal pads. Usually these are already plastered underneath the cooler but in my case they weren’t. I have seen multiple videos and the placement of the thermal pads are different on all of them. Your guess is as good as mine but I put the pads on top of the CPU, RP1 and the RAM.
Installing the RADXA SATA Hat
I may have accidentally broke the PCIe cable when I installed the disks: I put the NAS on the side and forgot about the cable so it got bent. Well thought of RADXA to include a spare one. You may consider installing this cable at the end as it breaks easily.
Install the disks
You don't need the fastest drives as you will be bottle-necked by the single PCIe lane. Pick something reliable instead. My top choices are Crucial and Western Digital for 2,5 inch drives.
Warning: The RADXA penta SATA Hat includes two frames that makes the mounting of the disks more stable. Don't put the mini NAS on the side while attaching the frames. You risk braking the PCIe cable.
Installing the OS
Flashing the SD Card
To install the OS you need a 32GB or larger SD Card.
For the OS I used the Raspberry OS Lite as since I don’t need any fancy GUI stuff. It’s based on Debian. It can be downloaded from here:
https://www.raspberrypi.com/software/operating-systems/#raspberry-pi-os-64-bit
Note: It is also REQUIRED for OMV = Open Media Vault, the software that will configure the RAID array.
I then used Balena Etcher to flash the SD Card.
Note: I could also have used the RPI Imager tool, but I was only able to flash the desktop version when installed with Aptitude. However, the snap version was more up to date:
$ sudo snap install rpi-imager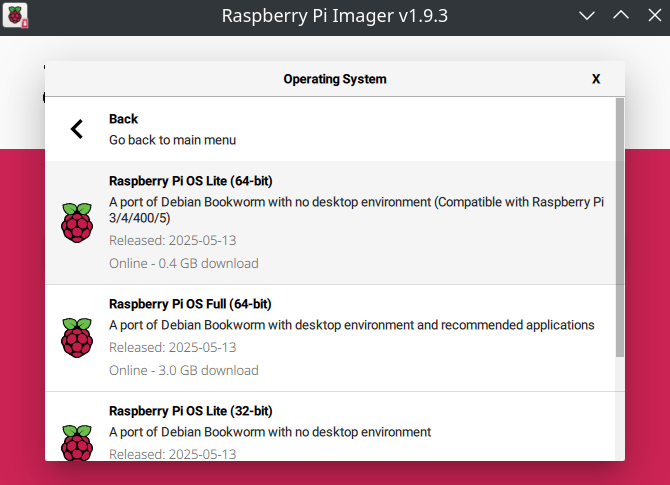
I strongly recommend this approach as it gives you options to set hostname, username and enable SSH before installation so you don’t need to bother with the next step.
The SD card is then inserted on the back of the Raspberry Pi 5:
Install RPI OS Lite
Note: If you installed RPI OS Lite using the RPI imager tool, you actually don’t need to do any of this initial setup.
Connect display, keyboard and mouse to the Pi5. Connect the 12V Adapter to the SATA Hats Power input.
Note: You need a micro-HDMI cable to connect the display.
After the installation, I enabled SSH with the following command:
sudo raspi-configThen I choose Interface Options > SSH
Update
Before configuring anything else, I make sure to update all existing packages:
sudo apt update
sudo apt upgrade
Verifying the disks
At the moment, the SSD drives are not listed with lsblk:
pinas@raspberrypi:~ $ lsblk
NAME        MAJ:MIN RM   SIZE RO TYPE MOUNTPOINTS
mmcblk0     179:0    0 115.2G  0 disk
├─mmcblk0p1 179:1    0   512M  0 part /boot/firmware
└─mmcblk0p2 179:2    0 114.7G  0 part /
It’s because the external PCIe slot is not enabled by default.
Enabling PCIe
There is a way to enable PCIe gen 3 speed through raspi-config but that doesn’t seem to enable PCIe itself. Instead you add this configuration to the bottom of this file:
$ sudo nano /boot/firmware/config.txt
------------------------------------------------------------------------
...
[all]
dtparam=pciex1
dtparam=pciex1_gen=3
After that I noticed the LED lights on my drives lit up:
Verification after PCIe is enabled:
pinas@pinas:~ $ lsblk
NAME        MAJ:MIN RM   SIZE RO TYPE MOUNTPOINTS
sda           8:0    0 931.5G  0 disk
sdb           8:16   0 931.5G  0 disk
sdc           8:32   0 931.5G  0 disk
sdd           8:48   0 931.5G  0 disk
mmcblk0     179:0    0 115.2G  0 disk
├─mmcblk0p1 179:1    0   512M  0 part /boot/firmware
└─mmcblk0p2 179:2    0 114.7G  0 part /
With lspci you can verify the speed. Link status of 8GT/s indicates that PCIe Gen3 is enabled:
pinas@pinas:~ $ sudo lspci -vvvv
...
0001:01:00.0 SATA controller: JMicron Technology Corp. JMB58x AHCI SATA controller (prog-if 01 [AHCI 1.0])
...
                LnkCap: Port #0, Speed 8GT/s, Width x2, ASPM not supp...
                        ClockPM- Surprise- LLActRep- BwNot- ASPMOptComp+
                LnkCtl: ASPM Disabled; RCB 64 bytes, Disabled- CommClk-
                        ExtSynch- ClockPM- AutWidDis- BWInt- AutBWInt-
                LnkSta: Speed 8GT/s, Width x1 (downgraded)
                        TrErr- Train- SlotClk- DLActive- BWMgmt-
That covers the first part of this setup. Next part will cover installation of Open Media Vault, which is a lightweight backend management GUI designed for DIY NAS devices like this one.
Special Mentions
Thank you Jeff Geerling for making awesome Raspberry Pi builds and putting them on Youtube. You have given me a lot of inspiration for future projects.
Thank you Michael Klements for sharing your 3D prints with us.